Getting Started With Keynote: How To Create Your First Keynote Presentation

If you’re new to the Apple ecosystem, then you’re probably a stranger to Keynote, Apple’s very own presentation software. Don’t worry if you don’t know anything about it at this point, that’s what this article is for. So, stay tuned as I introduce you to this popular alternative to PowerPoint. You’ll learn how to navigate the Keynote workspace and later on, how to create your first Keynote presentation.
Why Use Keynote?
I’ve got a few good reasons why Keynote is an awesome presentation software for Mac users.
- It’s free and readily available
Keynote comes pre-installed on new Macs. You don’t need to download it, but if you need to, you can always download it for free on the App Store. For the PowerPoint (and Windows) faithful who’ve made the switch to Apple computers, you’re probably asking this very question right now:
“Why use Keynote when PowerPoint is available on Macs?”
Truthfully, the answer is you don’t have to. However, PowerPoint (and Microsoft Office) isn’t free. If you want to install PowerPoint on your Mac, then you’d need to buy a Microsoft Office license or a subscription to Office 365.
If you absolutely don’t need to use PowerPoint, then why not give Keynote a try? It’s pretty simple to use, it’s intuitive and it works great on Macs. Plus, it’s free, so you don’t need to spend extra cash just to use the app!
- It’s designed for Macs
Keynote was designed by Apple for Apple. This means you’re not going to find Keynote on Windows or Linux or any other operating system. Apple is known for the quality of their products and Keynote is no different. It’s sleek, sexy, easy on the eyes, and it’s fairly easy to use.
For those saying they’d stick to PowerPoint on their Mac, that’s absolutely fine. But if you’re expecting your Mac PowerPoint experience to be on par with your Windows experience, then you’re going to be disappointed. The Mac version lacks many of the newer features you’ll find on Windows. And frankly, it’s just not as good as the Windows version.
If you need to use PowerPoint on Mac, I recommend you use Boot Camp or install third-party software like Parallels Desktop. This is so you can run Windows apps natively on your Mac.
- It’s user-friendly
Apple products are designed to work out of the box. It’s one of the reasons why many people swear by Apple products. You don’t need to be a designer to use Keynote. The interface is clean, intuitive and relatively simple. Sure, there’s a bit of a learning curve, but it’s nowhere near the time you need to spend to master PowerPoint.
If you’re coming from PowerPoint, you may even think Keynote is too simple. But that’s why Keynote users love it – they don’t need to overthink their slide designs. You may not have granular control over every single aspect of your presentation (and this may be a no-no for diehard PowerPoint users), but plenty of Keynote users don’t mind. When all is said and done, they know they’ll have a great-looking presentation.
- Works on all Apple devices
If you’ve invested heavily into the Apple ecosystem, then Keynote should be your presentation software of choice. Why? Because you’re not limited to using just one device to edit your slides. You can work on your slides on your MacBook, iMac, iPad, and even your iPhone! You can even access your Keynote file on non-Apple devices – simply fire up a web browser and go to iCloud Keynote!
- It’s PowerPoint-friendly
Ah yes, PowerPoint users need this reassurance. You’ve probably been burned in the past when PowerPoint and Keynote didn’t play too well with each other. And you had all sorts of problems trying to sort out compatibility issues.
Well, it’s 2019 now. According to Apple themselves, they’ve redesigned Keynote to work better with Microsoft Office products. They regularly update the software too to ensure better compatibility.
Here’s an article detailing the compatibility of Keynote with PowerPoint. You’ll notice there are more ticks in the Supported and Partially Supported columns than the Not Supported one. So, hurray for PowerPoint and Keynote fans!
Getting Started With Keynote
Now that you know just how awesome Keynote is, I’m going to give you a rundown of the software’s interface. To get started with Keynote, launch the app from the Launchpad or look for it in the Dock. You’ll then see the theme chooser (see screenshot below). Choose whether you want to use a standard (4:3) or wide (16:9) theme.
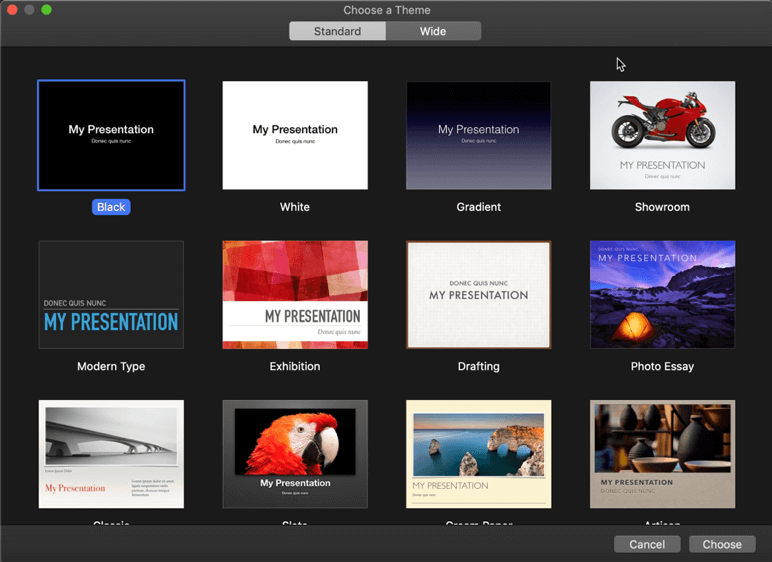
Note: If you don’t see the theme chooser above, press the Option key on your keyboard and click File > New to open a new Keynote file. The theme chooser will then appear on your screen.
Navigating the Keynote workspace isn’t as hard as it looks. The interface is relatively cleaner and simpler than PowerPoint. This is what the Toolbar looks like:
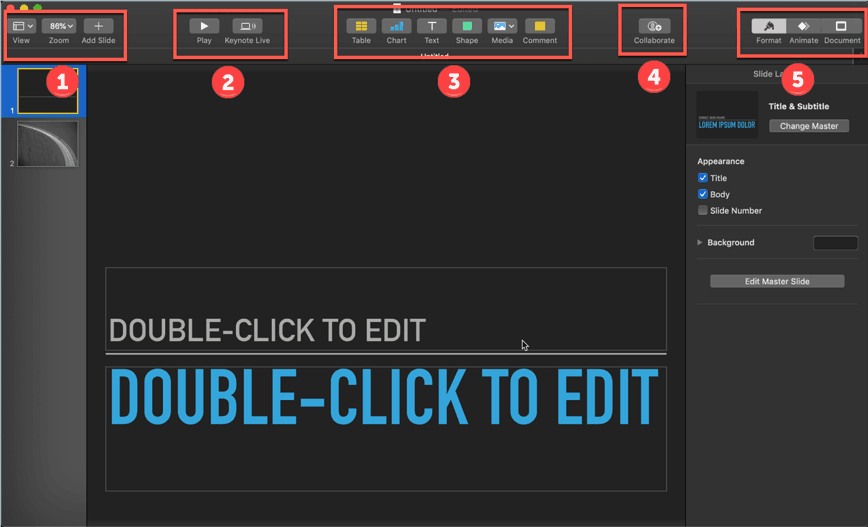
As you can see above, I’ve divided the Toolbar into 5 different parts. Here’s a run-down of what each part does:
1 – This is the navigation panel. As you can see, there are 3 buttons in this section (View, Zoom, and Add Slide):
- Under View, you can decide whether you want to use the Navigator view (default), Slide Only view, Light Table view, or Outline view. This is also where you go to edit the Master Slides, show object list, and more.
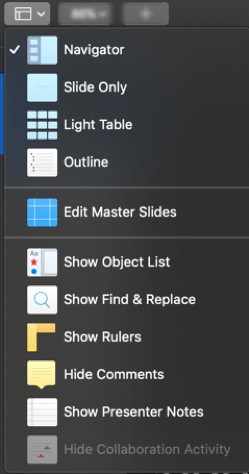
- You can also Zoom in or out of whatever view you’ve selected. If you don’t want to mess around with the percentages, you can always click on Fit Slide.

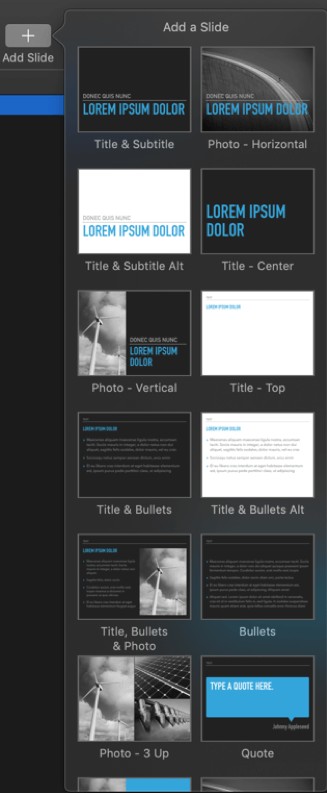
- Lastly, you can click on the Add Slide button to, well, obviously, add a slide. However, this is where it gets interesting. When you add a slide, Keynote doesn’t automatically add a blank slide (like PowerPoint). Instead, you get to choose the slide layout you want to use.
2 – This section consists of the Play and Keynote Live buttons.
- Clicking on the Play button will play your slideshow.
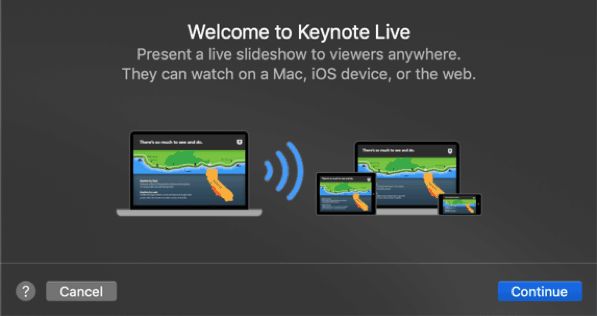
- Hit Keynote Live if you want to present a live slideshow to anyone in the world. Your audience can watch your presentation on any Apple or iOS device, or any browser connected to the Internet.
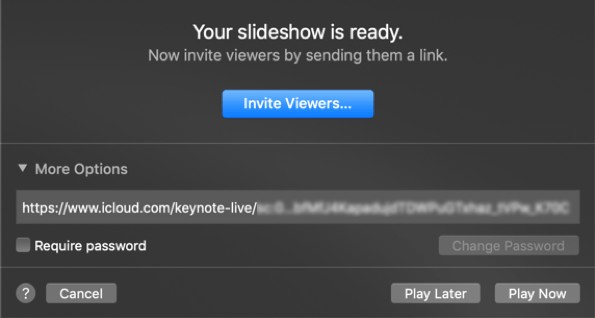
Note you’ll need to be connected to iCloud for this feature to work. Once you’re logged in, you can copy and paste the link to your slideshow and send it to your audience. You can also lock your presentation with a password if you’re concerned about security.
3 – In this section, you can choose from 6 different elements you can add to your slides. You can add a table, chart, text, shape, media (images, videos, audio) and comment. The first 5 elements are largely self-explanatory.
For the 6th element (comments), these are helpful if you’re collaborating with somebody else. You can have a chat in real-time about your ideas and any changes you want to make to the design. In case you’re wondering, the comments won’t appear in your actual presentation.
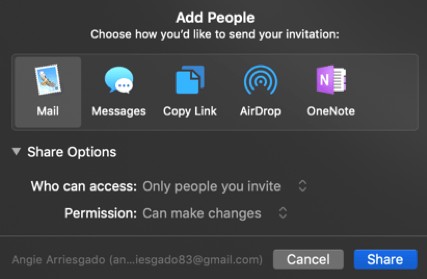
4 – If you’re collaborating with other people, then you simply need to click the Collaborate button. You can specify who can access your Keynote and their permission level. Here’s what it looks like:
5 – The fifth section is where you go to edit the properties of all the elements and slides in your presentation. You can see 3 options or buttons here: Format, Animate and Document.
- Format. To format your slide itself, click on a blank space on your slide. You’ll be able to change your slide layout here as well as edit the Master Slide. You can also change the appearance of your slide (change background appearance, etc.).
- Format an element. The format menu options will change according to the element you click on. Say, for instance, you click on a text, then the formatting options for text will appear on your screen. If you click on a photo, then the image formatting options will appear, and so on.
- Animate (Slide Transition). If you want to add animations when you transition from one slide to another, this is the correct button to click. Slide transitions are categorized into four: (1) Appear & Move, (2) Flip, Spin & Scale, (3) Object Effects, and (4) Text Effects. You can adjust the duration, color, delay, and more, of your selected effect.
- Animate (Element Effect). You can choose to add a Build In effect, an Action effect, and a Build Out effect for your elements.
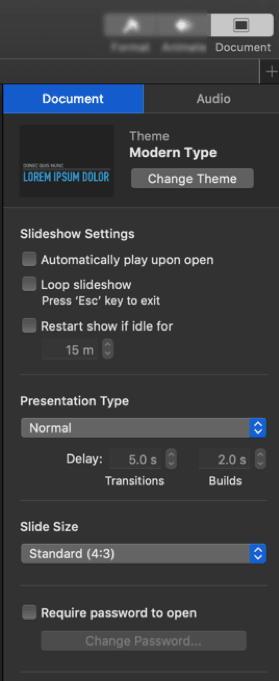
- Document. Click on this button to change your document settings. In here, you can adjust your Slideshow Settings, Presentation Type, Slide Size and more. Additionally, you can also record your slideshow in the Audio tab and add a Soundtrack. This is great if you plan on playing your slideshow in conference kiosks (self-playing) or converting your Keynote to video.
Additional Keynote options
You’re probably wondering if that’s all that Keynote can do. Well, of course not! In addition to the Toolbar, you can also access more settings and features in the Menu bar. You’ll see this at the very top of your screen:

If you think the default Toolbar lacks some important feature, and you don’t want to go looking for it in the Menu bar every time you want to use it, then you may want to customize the toolbar.
Here’s how you do it:
Go to View > Customize Toolbar. You can drag and drop your most frequently used buttons to the toolbar. For example, if you find yourself frequently using the Group and Ungroup options, then you may want to drag it into your toolbar so you can group/ungroup elements with just a single click. If you’re very particular about the size of your fonts, then add the Bigger and Smaller buttons to your toolbar.
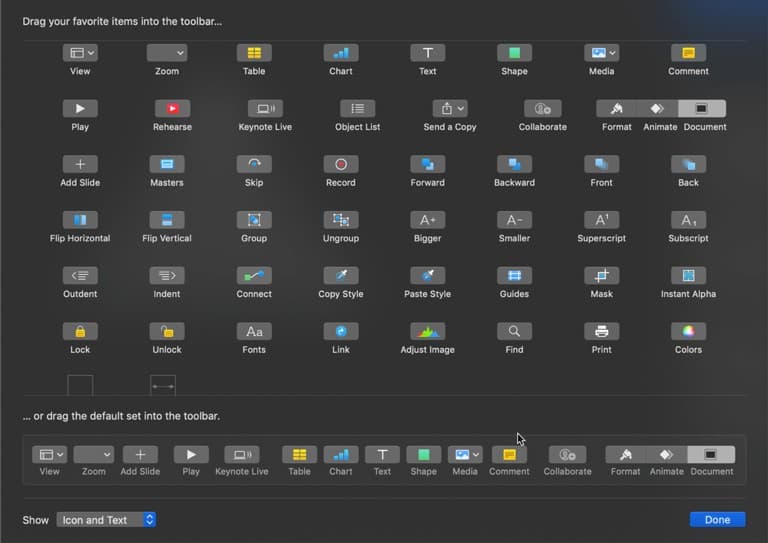
The good thing about customizing your toolbar is that you can always go back to the default settings. If you find yourself wanting to go back to the original toolbar menu, then go back into the Customize Toolbar menu again.
As you can see on the screenshot above, there’s an option to drag the default set into the toolbar. Don’t forget to hit the blue Done button when you’re finished.
Using iCloud Keynote
If you want the ability to edit your Keynote presentation on other devices, then log in to iCloud on your Mac. Go into System Preferences and click on iCloud. You’ll see this on your screen:
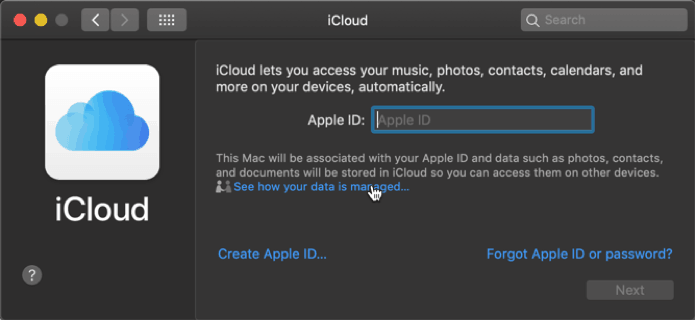
Type in your Apple ID and password if you already have one. If not, click on Create Apple ID.
Now that your Mac is logged in to iCloud, all your photos, contacts and documents (including Keynote files) will be stored in iCloud. This means if you have an iPhone or iPad, and you’re logged in using the same Apple ID, then all the files uploaded to iCloud will automatically appear in your Apple devices. So, you can create your Keynote on your MacBook or iMac, and then continue editing on your iPad or iPhone. Awesome, right?
But what about if you need to need to make last-minute changes to your presentation and you don’t have an Apple device nearby? Will all your hard work go to waste? Thankfully, not.
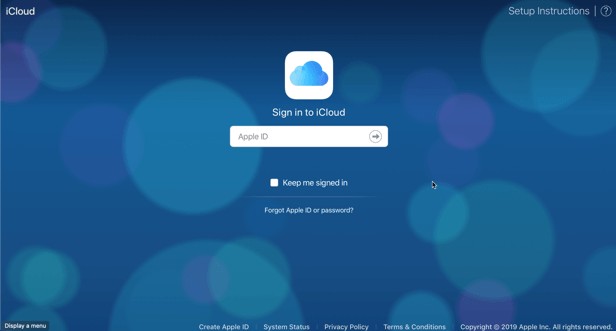
Just open a web browser on any computer and go to https://icloud.com. You’ll see this prompt on your screen:
Once you’re logged in to iCloud, you’ll see this menu on your screen:
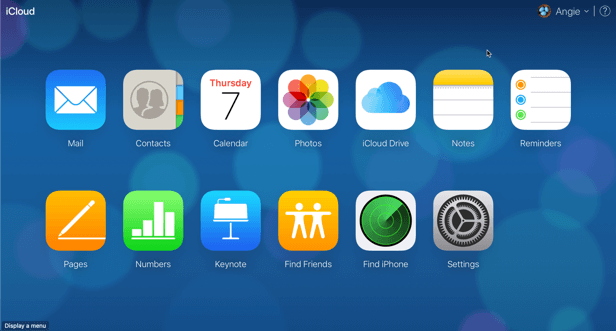
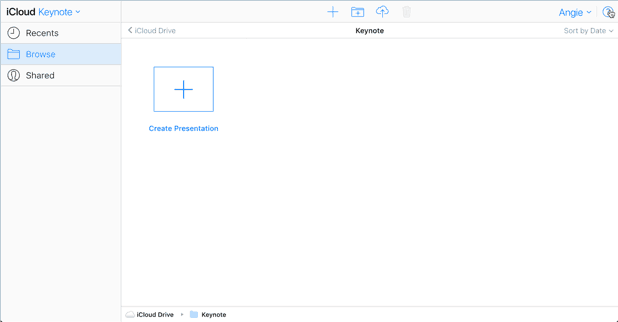
Click on Keynote and you’ll be able to see all the Keynote files you’ve made on other iCloud-linked devices. If you want to create a new file, click on Create Presentation.
Just like in the desktop version of Keynote, you’ll see the Theme Chooser menu on your screen:
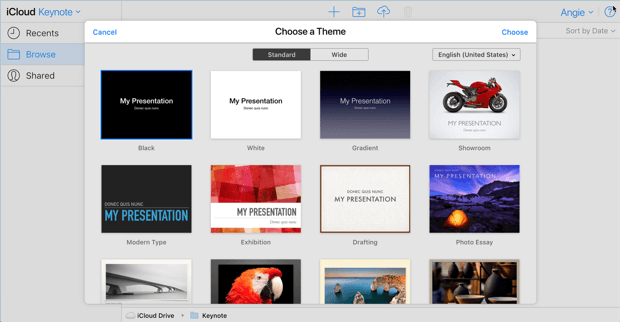
Click on the theme you want to use. A new tab will automatically open on your browser. This what the iCloud Keynote workspace looks like:
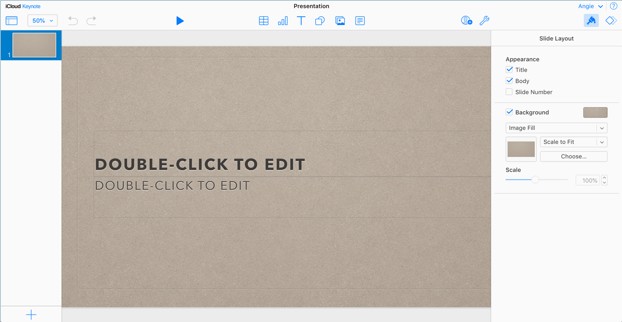
As you can see, it looks almost exactly the same as the desktop version. You’ve got the View and Zoom icons, the Play slideshow button, the 6 element types you can add to your slides (table, chart, text, shape, media, comment), the collaborate icon, and the format and animate button.
At a quick glance, however, you can see that the Keynote Live and Document icons are missing on the toolbar. Unfortunately, like most web-based presentation software, iCloud Keynote also has its drawbacks. A number of features from the desktop app are missing.
For instance, once you’ve selected your theme on iCloud Keynote, you’re going to have to stick with it. You simply don’t have the option to change it to another theme.
For this example, I used the Artisan theme in the screenshot above. I wanted to change it to the Gradient theme, but iCloud Keynote doesn’t have the Document button (available on the desktop version) that allows you to change themes and slide sizes.
There’s also no option to edit the Master Slides. While there’s a Media button, you’re limited to adding images only. This means inserting videos and audio files are not going to be possible on iCloud Keynote. Formatting options are also limited, so keep this in mind when creating and editing slides on the web.
The good news, however, is that iCloud integration is fantastic. You can create your slides in iCloud Keynote. Once you get your hands on an Apple computer, you can just edit your file on the desktop app. iCloud Keynote is great for editing presentations while you’re on the go. For maximum control, however, Keynote desktop is the way to go.
Tips to Make Your First Keynote Presentation a Standout
Even the most novice of Keynote users can make something stunning in just a few minutes. How? Well, if you haven’t noticed, Keynote’s built-in themes already look great. So, really, if you’re in a hurry, you can just choose one of the themes from the Theme Chooser. Then, select the layouts you want to use and replace the placeholders with your own content!
But, of course, if you truly want to make your keynote presentation a standout, then it’s best to actually put some time and effort into making one that your audience is going to love. So, here are some tips you can use to impress your audience and make sure your message is heard loud and clear.
- Keep text to a minimum
No matter what presentation software you use, it’s best to keep text to a minimum. You don’t want to copy and paste several sentences or a few paragraphs in your slides. You don’t want your audience to just read your slides. If you do this, then there’s really no incentive for them to listen anymore, is there?
As the popular saying goes, “less is more.” Strive to have a simple presentation instead of going for all the bells and whistles you can think of. Your audience isn’t there to read, they’re there to listen to your presentation.
Think of your slides as mere visual aids. They’re there to make your presentation more interesting. They’re supposed to help your audience understand your main points.
- Use the right font
Different fonts convey different emotions. There are fonts that look professional. Then there are those that look fun. There are even retro fonts and scary-looking fonts (perfect for Halloween-themed presentations).
Adding new fonts to your Keynote presentation is relatively quick and easy. You’ve got two ways:
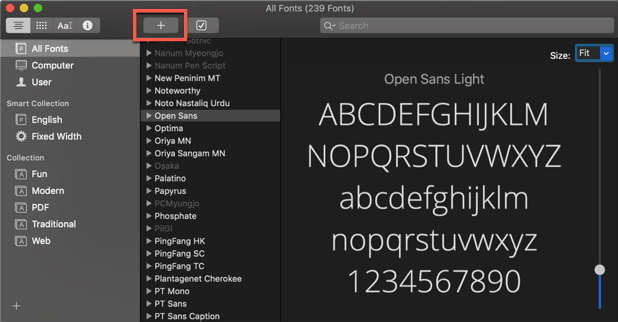
- You can download a font package and add it to Font Book. You can look for this app in your Applications folder or you can search for it using Spotlight (press both Command + Spacebar). Click the (+) icon in Font Book and locate where you saved the downloaded font. Your new font will now appear in the Font dropdown in Keynote.
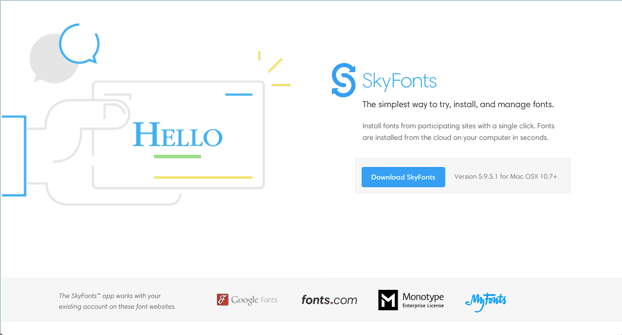
- The second option is to download an app called SkyFonts. You can download and install fonts from Google Fonts, Fonts.com, Monotype and MyFonts. Personally, I prefer this option because you don’t need to download the fonts to your computer. These are stored in the cloud and you can easily remove the fonts you’re no longer using.
Just a word of caution though. If you intend to download fancy fonts and use different devices to edit your Keynote slides, then you may be in for a shock. The fonts in iCloud Keynote are predefined, so whatever font you install on your Mac isn’t going to appear in iCloud Keynote.
- Use high-quality graphics
As the old cliché goes, a picture is worth a thousand words. You can put a picture on a slide, and it will tell the audience its own story. All without you needing to say a single word about it. That’s how powerful images are.
So, one of the first things you need to do once you figure out what you’re going to say in your presentation is to look for an image that will perfectly capture your main points. It doesn’t have to be an original photo or one that you took yourself.
You can use photos as background for your slides or you can use it as the main subject. The good news is there are millions of free images on the web. You just need to know where to look. Places like Unsplash, StockSnap and ISO Republic all offer high-quality images for free.
- Utilize white space
A busy-looking slide will only distract your audience. They won’t know exactly where to look. But if you have plenty of white space on your slides, then you can direct their attention to whatever you’re showing on screen.
Contrary to popular belief, white space doesn’t actually need to be white. It can be any color that will fit in well with your theme. For instance, take a look at the screenshot below. There’s a lot of blank space on the slide – this is what’s known as white space.
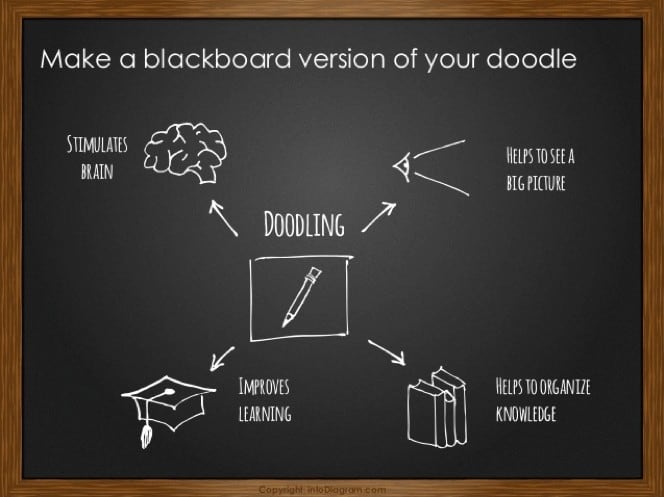
As you can see, it’s easy to follow what the slide above is trying to say. Doodling helps stimulates the brain, helps to see the big picture, improves learning, and helps to organize knowledge. The graphics used are simple enough to understand.
- Use third-party themes and templates
There’s obviously nothing wrong with using the built-in themes and templates on Keynote. But, if you want to stand out from the crowd of similar-looking presentations, then it’s best to use something else that not a lot of people are using. This is where third-party themes and templates come in.
You can download themes and templates that are made specifically for Keynote. Or you can use those that are made for PowerPoint! Surprised? Yes, PowerPoint templates do work on Keynote!
How To Use PowerPoint Templates For Your Keynote Presentations
To use PPT templates for Keynote, all you have to do is fire up Keynote, click on Open, then look for the PowerPoint file. If there are compatibility issues, Keynote will give you a list of things that may look different.
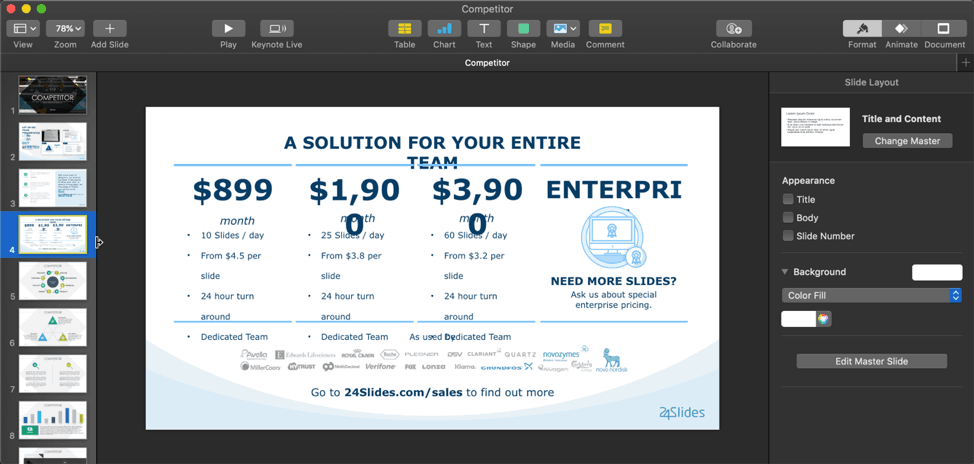
For this example, I downloaded one of our free templates, the Competitor PowerPoint Template pack. Note that you need to create a free account so you can download any of our templates.

Most PPT templates when opened in Keynote will probably have a few issues. I saw a couple of slides which needed a bit of editing. Here’s an example:
For the most part, however, the majority of slides looked great on Keynote! Here’s a screenshot of slides 5-10:
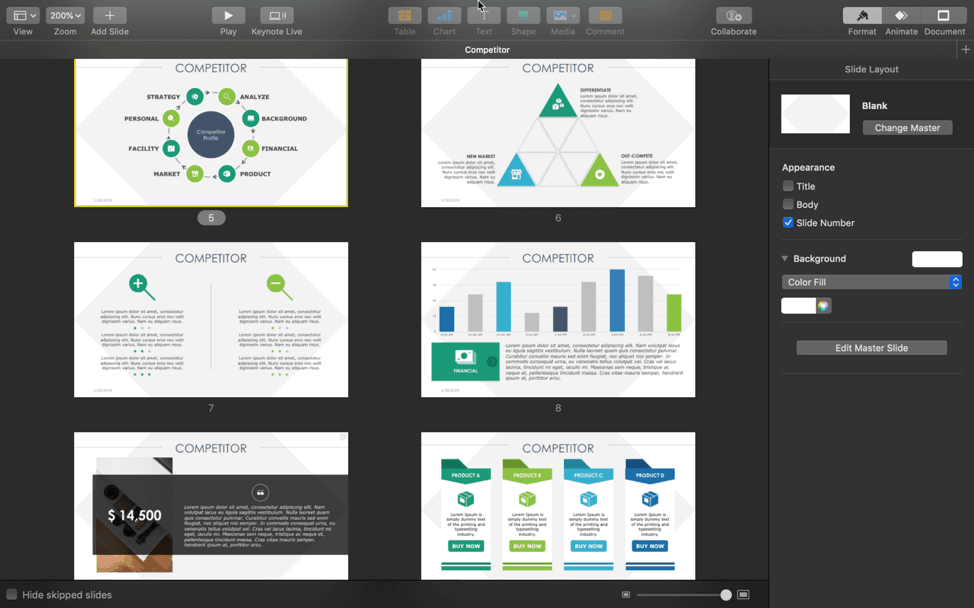
As you can see, the slides look really good. All you need to do is just edit and replace the placeholder content with your own, and you’re good to go! You can then save the file as a Keynote presentation or export it to another format.
Final Words
Apple users, rejoice! You’ve got a free and very capable presentation software on your hands. You don’t need to spend extra cash just to use PowerPoint. As you’ve learned in this article, Keynote is relatively easy to use. You’ll be able to create your first Keynote presentation in no time at all!
You might also find this interesting: The 16 Best Presentation Software For Macs