10 Easy Ways To Send And Share Your PowerPoint Presentations

There’s a lot of reasons why you may want to send and share your PowerPoint presentations. For instance, some of your colleagues or your audience members may ask you for a copy. Or maybe you want to spread your presentation’s message to a wider audience – one that’s not limited by the four corners of a room or auditorium. In this article, I’m going to share with you ten different ways you can send and share your PowerPoint presentations with your audience, your teammates, or even the whole world, for that matter!
How To Share Your PowerPoint Presentations
In the old days, sharing your presentation file with someone else meant literally bringing your computer to that person. If you’ve personally experienced this yourself, you know it’s not the easiest or most convenient thing in the world. Thankfully, with massive improvements in file sharing technology, sending and sharing your presentation file is as easy as 1-2-3. Here are 10 easy ways you can try sharing your PPT file today:
1. Share directly on PowerPoint
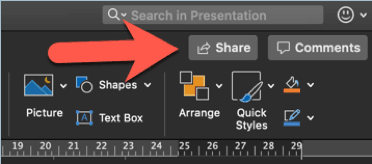
The most recent versions of PowerPoint include a Share button in the upper right corner of the ribbon. While the Mac and PC versions of PowerPoint differ, you’d still need to upload the PPT to the “cloud,” that is, OneDrive or SharePoint.
Here’s how the Mac version looks like:
Option 1 (Save to “cloud” and share):
Click on Share. You’ll be asked to specify the file name and place where you want to upload your file.
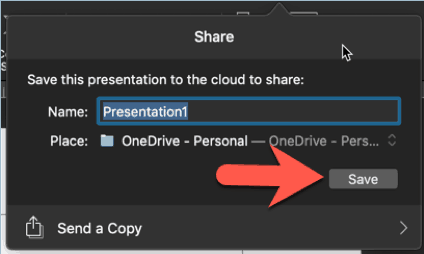
If you haven’t signed in to OneDrive or SharePoint, you’ll get this popup:

Select the cloud service you want to use and log in. Then name your file and hit the Save button.
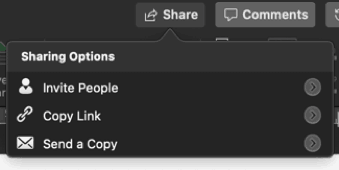
Once your file is saved to the cloud, you will then need to click on the Share button again. This time you’ll see these sharing options below. Simply click the method you want to use:
Option 2 (Send a copy via email):
Click on Share then Send a Copy. You’ll then be presented with two choices: either save the file in PPT format or PDF.
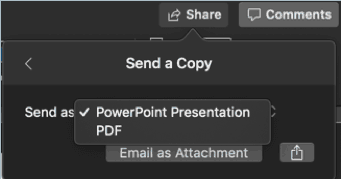
Once you’ve chosen the file format, simply click on the Email as Attachment button and the Mail app will open and attach your file automatically.
And here’s how the Windows version looks like:
Option 1 (Save to “cloud” and share):
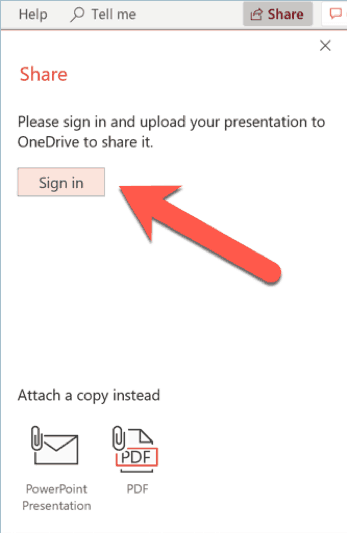
Click on Share. If you’re not logged in to Office, you’ll get a prompt asking you to login so you can upload your presentation to OneDrive.
Once you’re logged in, you can then upload your file to OneDrive or SharePoint. You’ll then see the Send Link pop-up below:
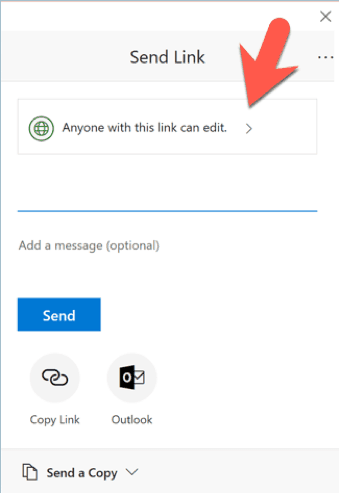
Note that you have different sharing options for your newly uploaded PPT file. See the red arrow in the above screenshot? Click that and you’ll see the following Link Settings:
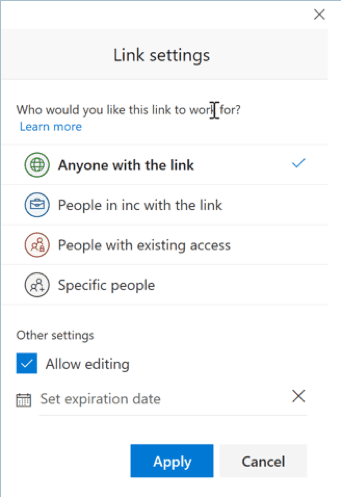
Once you’ve specified all your desired settings, hit the Apply button. Then don’t forget to hit Send later on.
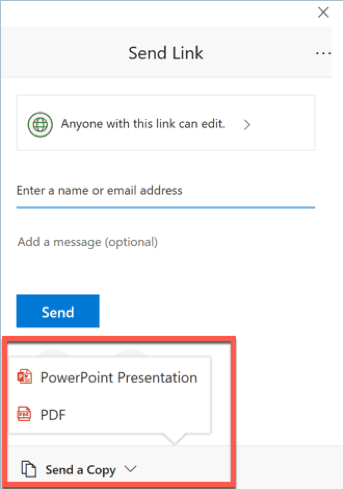
Option 2 (Send as an email attachment):
Your second option is to send your PPT file as an attachment. You can choose to either keep the PPT format or save it as PDF instead.
If you’re using Outlook as your default email client, then Outlook is going to automatically open and attach your file for you.
2. Good old-fashioned USB stick
Cloud-based file sharing is pretty popular nowadays, and for good reason too! But sometimes, you may find yourself cut off from the rest of the world, that is, you may find yourself with NO access to the Internet. What do you do then? Well, there’s no need to panic. Simply plug in a good, ol’ USB stick and you’ll have your file saved and ready to be shared. But, of course, nothing’s ever that simple, is it?
For instance, if you don’t pay attention to how you save your file, you may find yourself sweating when you realize your slides look different from when you last saved it. You probably spent hours looking for the perfect font(s). Then you find out on the day of your actual presentation that your font wasn’t saved and now you’re stuck with the default Calibri font!
Here’s how you make sure your font is preserved no matter which computer you use:
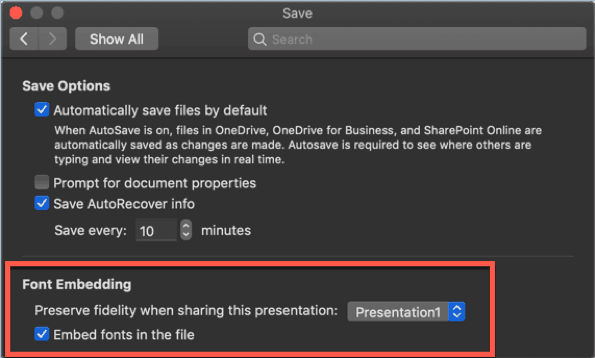
On Macs:
Go to the PowerPoint Preferences > Output and Sharing > Save > Font Embedding. Tick the box that says, “Embed fonts in the file.”
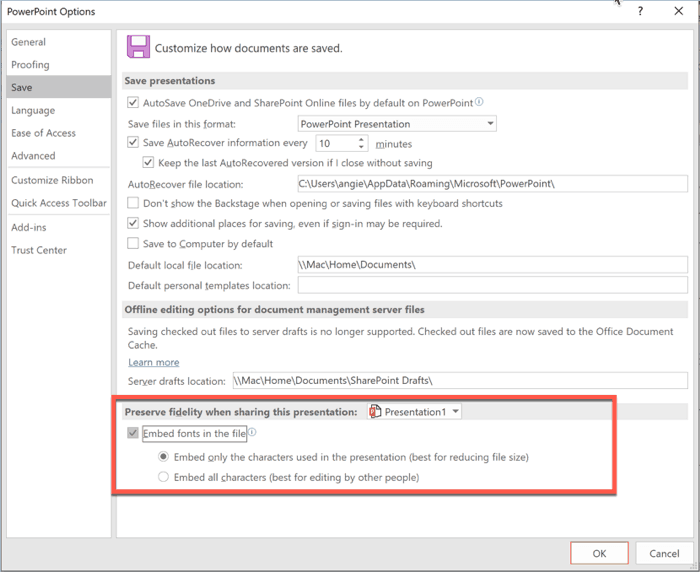
On Windows:
Go to File > Options > Save. In the section “Preserve fidelity when sharing this presentation,” tick the box which says, “Embed fonts in the file.” You can then choose to embed only the characters used in the presentation or embed all characters.
Of course, the downside to saving your PPT file on a USB stick is that there’s a lot of security risks involved. Your USB could become corrupted and your file unusable. Or maybe you’ll have an older version of PowerPoint and you’ll run into compatibility issues. There’s a lot of external factors involved that can potentially destroy your entire presentation, so keep that in mind when you save your file on a USB stick.
3. Save your presentation file as a PDF file
There may be times when you’ll need to share your presentation as a PDF file. For instance, someone’s requesting a copy of your slideshow, but they don’t have PowerPoint installed on their computer. If this is the case, then you may want to consider saving your presentation in PDF format. Here’s how:
On Macs:
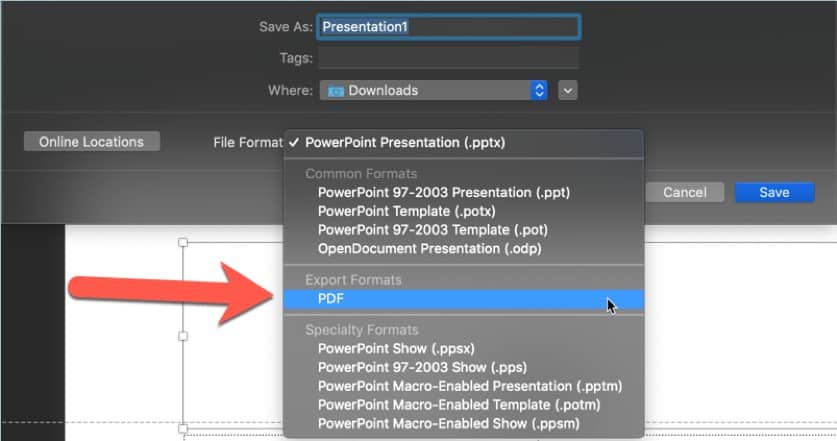
Option 1 (Save As option).
Click File > Save As. In the dropdown for File Format, select PDF from the various options. Then hit Save.
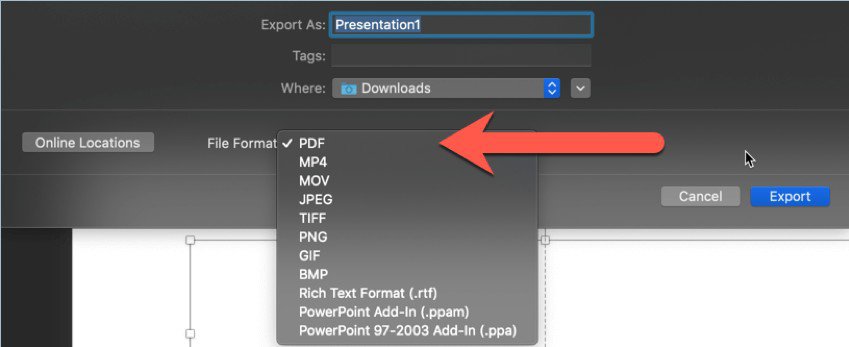
Option 2 (Export option):
Go to File > Export. In the dropdown options for File Format, select PDF. Then hit Export.
On Windows:
Saving or exporting your presentation file to PDF on a Windows computer is similar to a Mac. You’ve got the same two options as well using the Save As and the Export methods.
Option 1 (Save As method):
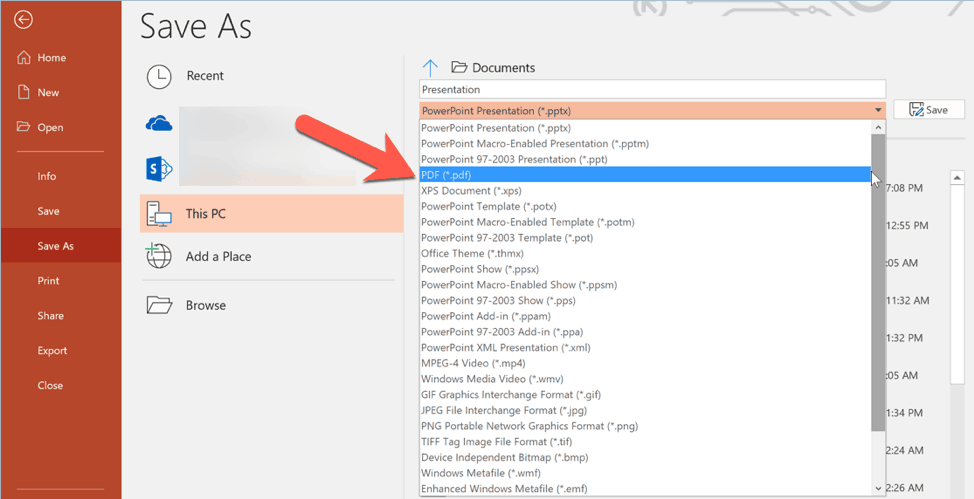
Go to File > Save As and choose the location where you want to save your file. As you can see on the screenshot below, you’ve got a lot more different file options on Windows. Select PDF from the dropdown list. Then don’t forget to hit the Save button.
Option 2 (Export method):
For this method, click on File > Export > Create a PDF/XPS Document like you see below:

You’ll then get this pop-up on your screen:
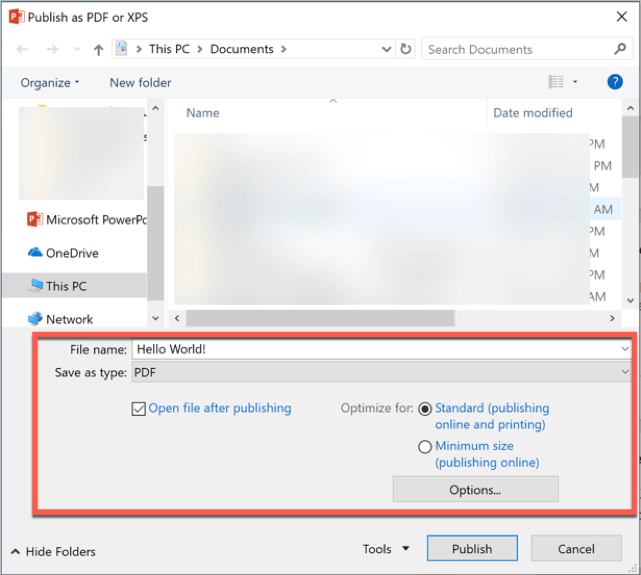
As you can see on the screenshot above, you’ll need to specify the location where you want to save your PDF file. Write your file name. Then specify whether you want to optimize the file for standard PDF (best if you want to print the file) or if you want the lightweight, online-ready PDF version. You can also choose whether you want to open the file after you hit the Publish button.
If you want even more options for your new PDF file, all you have to do is click on the Options button and you’ll see this on your screen:
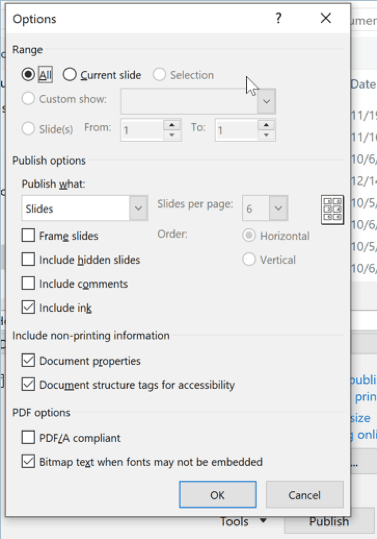
Choose the options that best fits your requirements, hit OK, and then the Publish button. Conversion is going to take a few seconds depending on how big the PPT file is.
4. Use a file sharing service
File sharing services like Google Drive, OneDrive, and DropBox are all the rage nowadays. Why? Because saving to the “cloud” is cost-effective and you can access your files from anywhere in the world as long as you’ve got Internet connection!
Most of these services offer a free trial, so you don’t need to spend any money to get started. If you’ve got a Google account, you automatically get 15GB for free. OneDrive offers up to 5GB in free storage while DropBox only gives you up to 2GB free.
File sharing services help you save a ton of time. You don’t need to save your file to a USB stick, bring that stick over to a new computer, and then open the file there. Thanks to cloud technology, you simply need to upload the file once, and you can access it whenever, wherever!
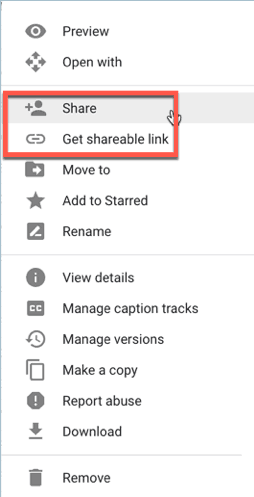
Uploading your file is an extremely simple affair. Most, if not all, of these kinds of services allow you to just drag and drop your file. Once uploaded, you can simply click on ‘share’ or get a shareable link which you can then send via email or chat. Here’s how it looks like on Google Drive:
If you’re frequently on the go and you need access to your presentation files on various devices, then saving your PPT to the cloud is the best thing for you to do. You can access your files via a computer browser or mobile app.
5. Upload your PPT to a slide hosting service
Presentation hosting is pretty much file sharing service on steroids. This means you get to take advantage of all the benefits of file sharing services plus a whole lot more! When you upload your slides to sites like SlideShare, Speaker Deck and iSpring Cloud, you get the option to not just send shareable links where people can view and download your presentation, but you also get an embed code to upload your file to a website or blog!
Some services even allow you to track how many people have viewed and downloaded your file. You can also get direct feedback from your audience. Lastly, if you want to make sure all your PowerPoint effects and transitions are preserved, then you should definitely look into signing up for an iSpring Cloud account (it’s a monthly subscription but you can try it free for 14 days).
6. Convert your PPT to video format
If you truly want to get the most number of eyeballs on your PPT slideshow, then consider repurposing your file to video format. What’s really great about this option is that your PPT is going to appear exactly as intended! This means that all your fonts, effects, transitions, timings, and even your audio narrations will appear on your video. You can then upload your new video to YouTube, the second largest search engine in the world!
So, here’s how you convert your PPT slideshow to video format:
On Mac:
Click on File > Export. Specify your file name and the location where you want to save your file. Then in the dropdown for File Format, select MOV.
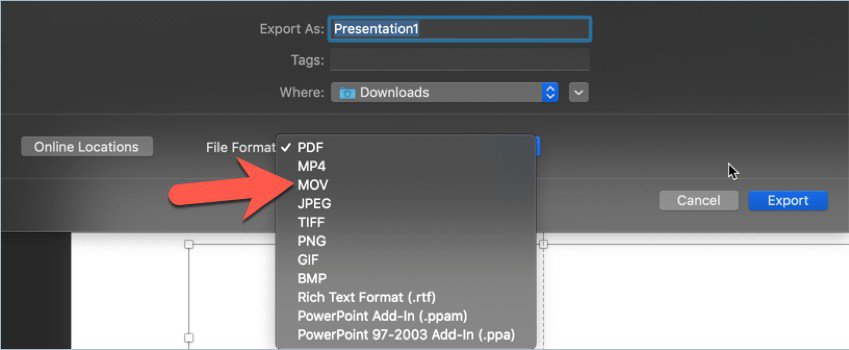
You’ll then be presented with some options for your video:
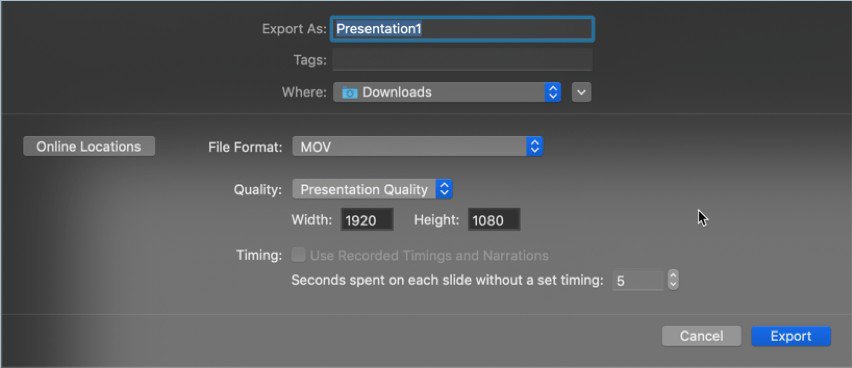
Choose whether you want Presentation Quality, Internet Quality, or Low Quality. The Width and Height will then adjust automatically. Then set the Timing for your video. When you’re happy with your settings, click Export.
On Windows:
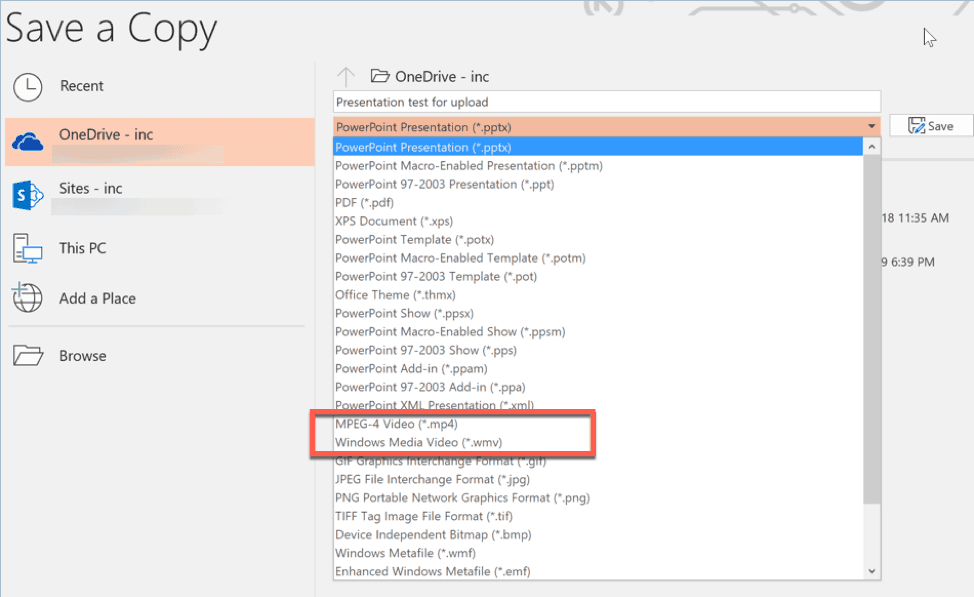
Option 1 (Save a Copy option):
Click File > Save As. In the file type dropdown, you can choose to save your PPT as MPEG-4 Video or Windows Media Video file. Then hit Save.
Option 2 (Export option):
Use this option if you want to preserve everything (animations, transitions, fonts, media, etc) in your presentation. Go to File > Export > Create a Video and select the settings you want to use for your video.
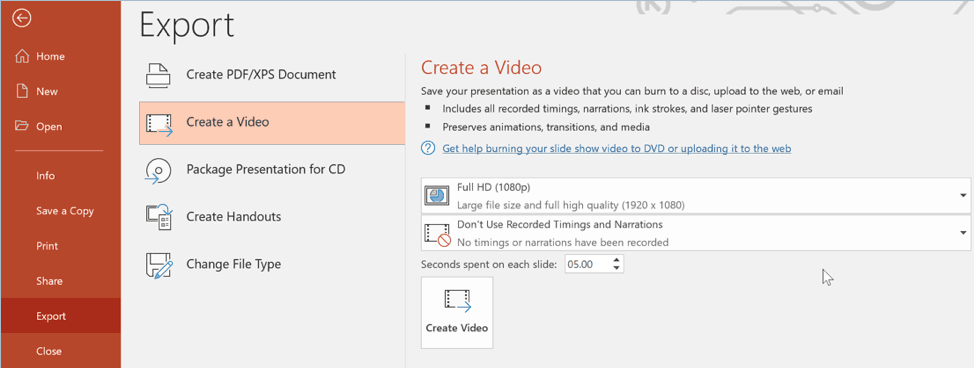
For video quality, you can choose from Ultra HD (4K video), Full HD (1080p), HD (720p) and Standard (480p). The higher the video quality, the bigger the file size as well so keep this in mind if you’re planning to upload your video to YouTube.
At this point, you can record your timings and narrations if you haven’t done so already. If you just want the slides on your video, that is, you don’t want to add your timings and voiceovers, then just leave the default option like you see on the screenshot above. Then specify how many seconds should be spent on each slide (the default is 5 seconds). When you’re happy with your settings, hit the Create Video button.
As I’ve mentioned above, YouTube is a search engine. This means that if you want to get the most number of organic views on YouTube, then you should make sure you optimize your video. Check out this in-depth guide from Backlinko. Don’t forget to share your video on various social media platforms!
7. Embed your presentation on a web page
If you have your own blog or website, and you want to share your PPT file with your site visitors, then you should embed your presentation on your site. There’s a variety of methods you can use. You can upload your file to a slide hosting service (see #5) like SlideShare and then generate the embed code and paste it on your website!

(Click the Share button and the codes above will appear on your screen.)
If you upload your video to YouTube, you’ll find your embed code by clicking on the Share button below the video.
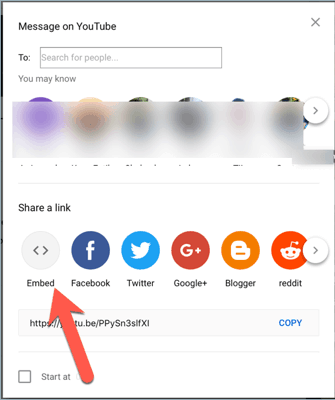
Click on Embed to get the full code like you see below:

One big advantage of using the methods I’ve outlined here is that you don’t need to worry about using up all your web hosting’s bandwidth. This is because the file is hosted elsewhere, so you’re not going to run low on bandwidth.
8. Share your PowerPoint presentation on social media
If you want to get the most number of people to watch your PPT, then sharing it on social media is the way to go. There are a lot of social media channels out there – Facebook, Instagram, Snapchat, Twitter, Pinterest, to name a few.
Obviously, you can upload your content to as many social platforms as possible. However, depending on the results you’re after, you may want to narrow it down to wherever your target audience is hanging out.
Here are a few easy methods you can use to get started:
- Upload your PPT file to a file sharing service (method #4)
- Use a slide hosting service (method #5)
- Upload your converted PPT-to-video file to YouTube (method #6)
Once your file is uploaded to the cloud, then sharing it to the rest of the world wide web becomes a much simpler job. For instance, if you upload your file to Google Drive, then you can simply copy and paste the shareable link to your presentation and then post the link anywhere you want!
If you upload to SlideShare, then you can share your slides to Facebook, Twitter and LinkedIn in just a few clicks.

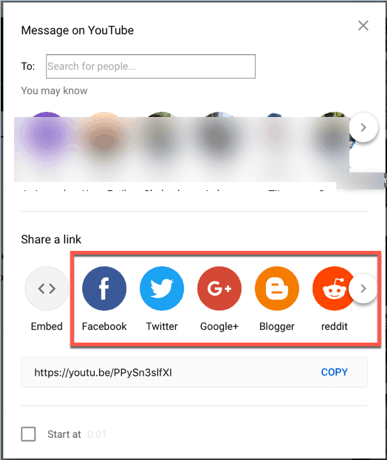
If you uploaded your video to YouTube, you’ve got even more social networks to send your video to – there’s Facebook, Twitter, Google+, Blogger, Reddit, Tumblr, Pinterest, and more!
Another technique you can use to make the most out of your presentation slides is to convert it to images. This is especially useful if you’ve got well-designed slides! Eye-catching images get shared a lot on social media so you should definitely consider this option. Here’s how you can convert your slides to images:
On Mac:
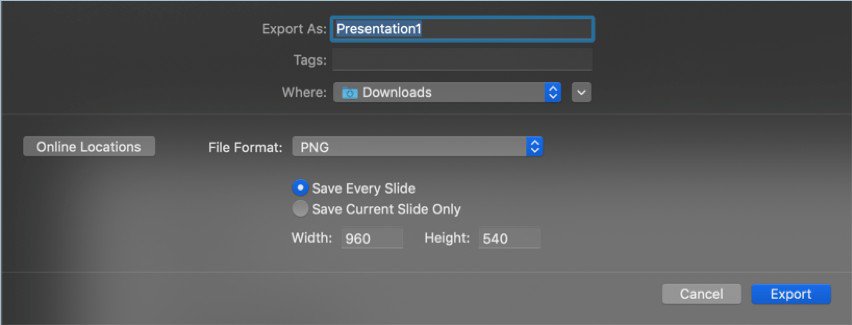
Go to File > Export. In File Format, select the image format you want to use (JPEG and PNG are most commonly used). Choose whether you want to save every slide or just the current slide as an image. Then hit Export.
On Windows:
Option 1 (Save a Copy option):
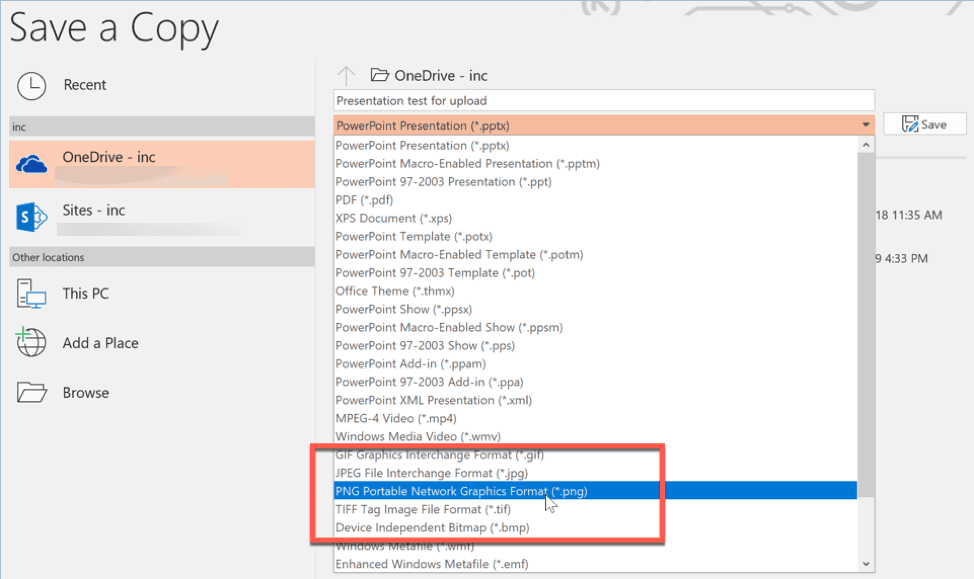
Go to File > Save a Copy. Choose the image file type you want to use for your images. Then hit the Save button. You’ll then be asked whether you want to export all slides as images or just the current slide.
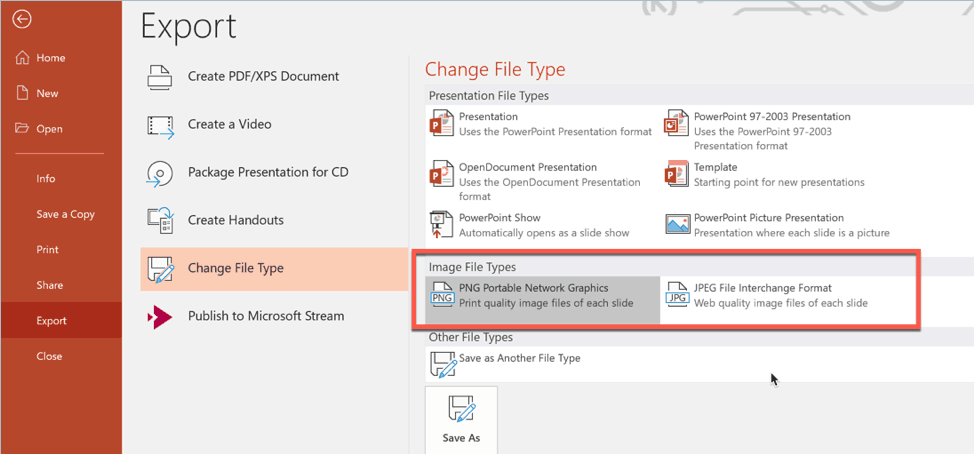
Option 2 (Export option):
Go to File > Export > Change File Type. In Image File Types section, choose whether you want the slides to be exported as PNG or JPEG. Then click on Save As.
Once you’ve got your images, go on your favorite social media sites and share your presentation images with your followers!
9. Broadcast your presentation slides on webinar
In the past, seminars could only be conducted in person. But nowadays, thanks to fast Internet technology, you can now hold seminars over the web, hence the name “webinar.”
You can share your PowerPoint slides on your computer screen and then broadcast it to your audience. The good thing is they’re not limited to being passive viewers either. This is because many webinar software allows for a certain degree of interactivity. Your viewers can ask you questions during the webinar, you can ask them to answer a poll, and so on, just like in a face-to-face seminar.
Webinar software like GoToWebinar and WebinarJam offer a ton of features. You can pre-record your presentation, so you don’t need to be physically doing your webinar live. You can also upload your recorded webinar to YouTube, your website, and social media.
If you don’t want to pay for webinar hosting, you can use Facebook Live, YouTube Live or Google Hangouts to stream your presentation. Here’s a good tutorial to guide you through the process:
10. Use Microsoft’s Office Presentation Service
For Mac users, you’re going to have to skip this part. Unfortunately, the Office Presentation Service is only available on Windows computers at this particular point in time. This free service makes it easy for PowerPoint Windows users to share their presentations online. Now, this is just a basic service, mind you. It doesn’t come anywhere near the features offered by any webinar platform, but for a free service it’s serviceable.
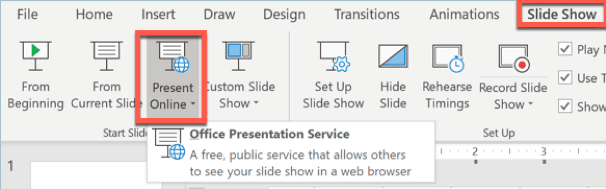
Basically, all you need to do is just go to the Slide Show tab, then click on Present Online.
You’ll then see this dialog box below:
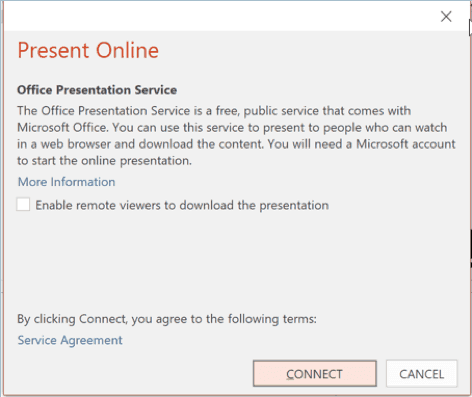
You can choose to let your audience download your presentation or not. If you want them to, then make sure you tick the checkbox that says, “Enable remote viewers to download the presentation.” Then hit the Connect button.
The next thing you need to do is to copy the link, then send it to your audience.
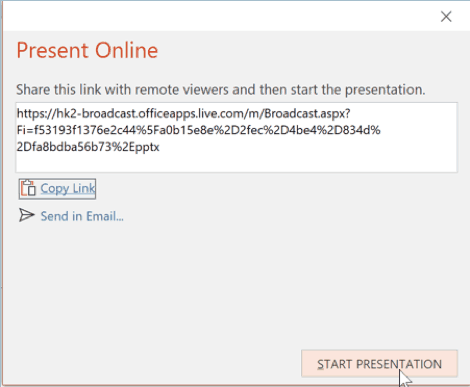
When you’re ready to start your presentation, hit the Start Presentation button. And that’s basically it! Everyone with a link can now view your presentation online!
Conclusion
Creating and presenting PowerPoint presentations take a lot of time. If you want to make the most of it, then you should share your presentation with everyone who stands to benefit from the information you’ve laid out in your slides.