
Want to try something uniquely creative yet still fun? That’s what we just did in last Play Saturday’s activity! Although we at 24Slides often express our artistic abilities through PowerPoint slides, videos, websites or corporate materials, we also thought of other ways we can showcase our creativity—and that is, to create doodle artworks and transfer them to T-shirts!
We bet it’s something you’ve never tried before as well. That’s okay. Not many people have explored this simple kind of screen printing technique.
The technique that we used was unlike the conventional screen printing with all of its complicated machine and chemical stuffs. One of our designers has studied this in elementary school, and if an elementary student can do this, well, it should be a piece of cake, isn’t it? It may initially seem old school or traditional at first glance. But combine our team’s superb designing skills with the art of screen printing and you can come up with a very cool t-shirt you can proudly wear!
So without further ado, we give you a rundown of how our Play Saturday went and how you too, can decorate your own T-shirt.
For this activity, we were divided into 6 groups and as ideas for the designs, we thought of creating new doodles of the 24Slides Logo.
Now for the exciting part: getting to try out our unique screen printing technique.
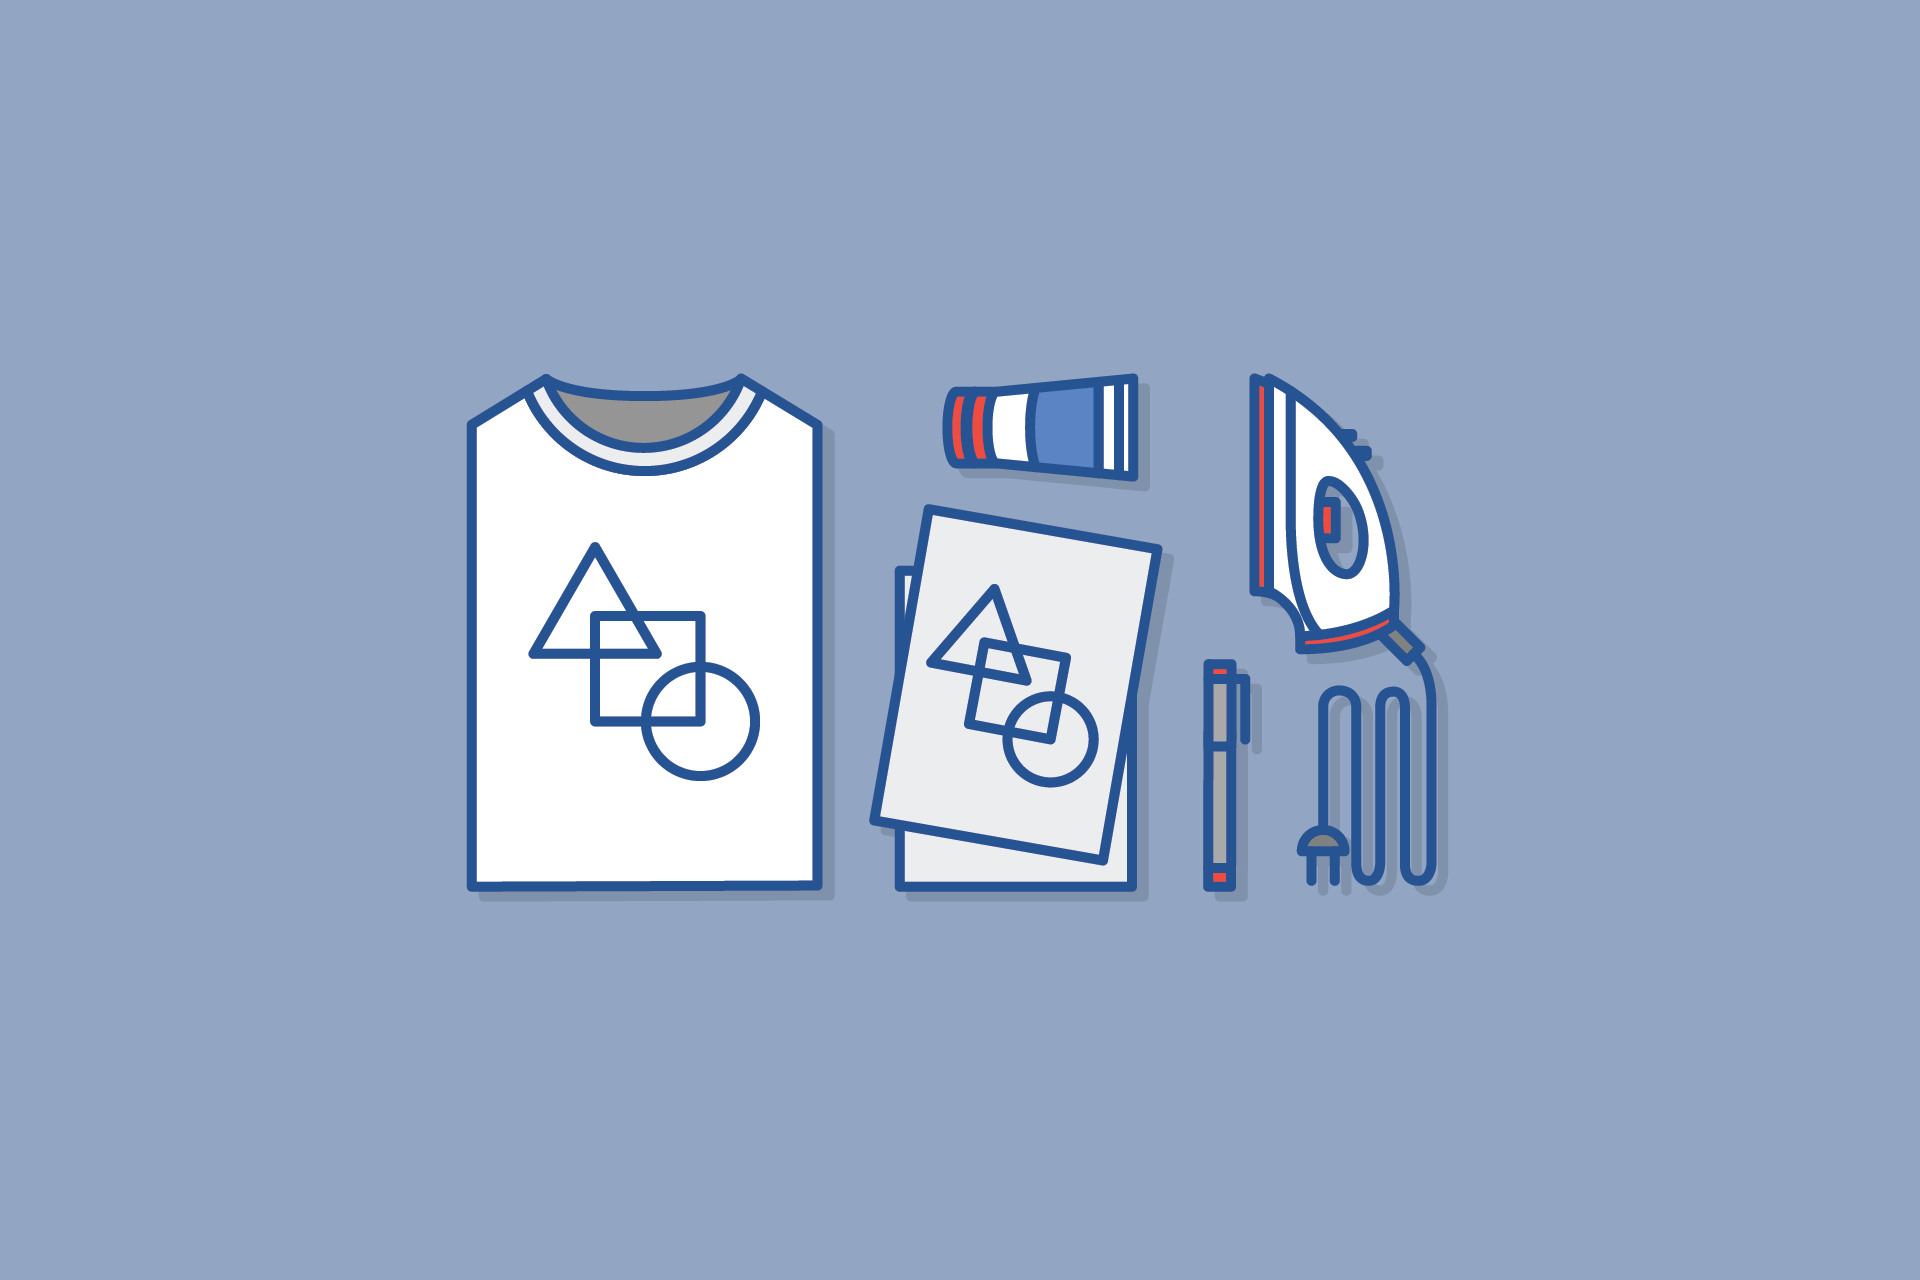
Before starting, here are a few things to prepare:
- White t-shirt
- Flat iron
- Anti-mosquito lotion
- Your design. (this should be photocopied using a conventional photocopy machine, just printing your design using the usual printer machine may not be effective because the powdered ink that is used in photocopy machine is what will stick to the t-shirt)
Here are 10 simple steps we did which you can easily try by yourself too:
- Create your doodle design on a piece of paper. For our part, we created doodle designs of the 24slides logo. Some of us opted to directly design digitally on PC.
- Scan the design so it will be a digital picture file.
- Reverse the picture so it will mirror the original.
- Print the mirrored picture.
- Duplicate it using a photocopy machine.
- Rub a sufficient amount of anti-mosquito lotion on the design. While doing so, preheat the flat iron.
- Place the ‘’lotioned’’ side of the paper on the surface of the t-shirt.
- Iron the paper thoroughly.
- Gently peel off the paper.
- Your homemade DIY screen printing t-shirt is now ready to wear!
Awesome and cool, isn’t it?
To showcase our cool DIY t-shirts, we also came up with a team PowerPoint presentation containing design descriptions, team photos, behind-the-scene photos, and look-book photos that you can see below:
![]()
As you can see from our photos, you too can turn simple designs and drawings into something fabulous and something you can proudly wear and call your own even with little design knowledge! And if you run out of gift ideas for this Holiday season, why not use this handy technique to create personalized gifts for your loved ones? Enjoy doodling!
P.S. Hey, after you make your own DIY t-shirt with your cool designs, why don’t you try to make a PowerPoint presentation like we did? Who knows, your look-book photos may help to sell your design and jump-start your very own clothing brand.