How To Add Animations To PowerPoint

TL;DR
- How to Add Animations to PowerPoint (The Quick Answer): The fast-track 6-step workflow to turn flat slides into dynamic visuals in under a minute without getting lost in ribbon menus.
- The 4 Types of PowerPoint Animation: Decoding entrance, emphasis, exit, and motion paths, complete with a color-coded cheat sheet so you always grab the right visual tool for the job.
- How to Sequence Multiple Animations: Master On Click, With Previous, and After Previous triggers to dictate slide pacing like a pro instead of furious remote-clicking.
- Adding Multiple Animations to One Object: The secret to stacking entrance, emphasis, and exit effects on a single element without accidentally overwriting your work.
- Why PowerPoint Won't Let You Add Animations: Fast, painless fixes for grayed-out buttons, Protected View lockouts, stubborn SmartArt diagrams, and grouped shape glitches.
- Advanced Animation Techniques: Elevate your presentation with custom trajectory paths, millisecond timing controls, and Morph transitions for broadcast-quality flair.
- When Animation Hurts Your Presentation: The honest truth on why you should skip motion entirely on C-suite investor decks, dense data slides, and print-ready PDFs.
- PowerPoint Animation FAQ: Quick-fire answers to your most frustrating trigger bugs, reordering steps, and animation sequencing headaches.
- Get Animated Slides Without Building Them Yourself: How to skip late-night timeline-wrangling and let dedicated designers build an executive-ready, animated deck in 24 hours.
More Than Presentations – One Design Partner
From infographics and reports to full marketing collateral, built on demand.
The Quick Answer: 6 Steps to Add Any Animation
If you're staring at a flat slide asking yourself, "How do I add animation to PowerPoint without creating a total visual circus?", you are in the right spot! Adding strategic motion to static elements takes less than 10 seconds. Whether you want to gently fade in a text box or fly in a key data metric, here is the exact 6-step workflow to add animation in PowerPoint:
- Select your object: Click the text box, image, chart, or icon on your slide canvas that you want to bring to life.
- Open the Animations tab: Navigate to the top ribbon menu and click Animations.
- Choose your motion effect: Browse the gallery of green entrance effects (like Fade, Fly In, or Appear) to select how your element arrives.
- Fine-tune with Effect Options: Click Effect Options right next to the gallery to customize direction (e.g., flying in from the left instead of the bottom).
- Layer extra effects (Optional): Click Add Animation in the Advanced Animation section if you want to stack emphasis or exit triggers onto the same object.
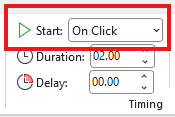
- Set your timing trigger: Use the Start dropdown in the Timing group to choose how the motion fires (On Click, With Previous, or After Previous).
That’s all it takes! You’ve officially mastered how to add animation to PowerPoint in under a minute.
The 4 Types of PowerPoint Animation: Entrance, Emphasis, Exit, Motion Paths
Think of PowerPoint's animation engine as a color-coded control panel for your visual storytelling. Before you start spraying motion everywhere like visual confetti, it helps to know which tool to grab.
PowerPoint divides its effects gallery into four distinct categories. Knowing when and how to include animations in PowerPoint across these four styles keeps your slides structured, readable, and engaging:
| CATEGORY | COLOR CODE | PURPOSE | POPULAR EXAMPLES |
|---|---|---|---|
| Entrance | Green | Brings new elements onto the slide | Fade, Fly In, Appear, Zoom |
| Emphasis | Yellow | Draws focus to elements already on screen | Pulse, Spin, Grow/Shrink, Teeter |
| Exit | Red | Clears elements off the slide | Disappear, Fly Out, Fade Out, Shrink |
| Motion Paths | Gray | Moves elements along a set trajectory | Lines, Arcs, Loops, Custom Path |
Entrance Effects (Green) – Fade, Fly In, Appear
Entrance effects determine how an object makes its grand debut on your slide canvas. When you are learning how to insert an animation in PowerPoint to reveal bullet points one by one, this is your go-to category.
- Best for: Controlling narrative pace so your audience reads along with you instead of skipping ahead to the bottom of the slide.
- Pro Tip: Stick to subtle choices like Fade or Appear for professional decks, and save dramatic choices like Bounce for less formal moments.

Emphasis Effects (Yellow) -- Pulse, Spin, Grow/Shrink
Emphasis effects trigger after an element is already sitting on your slide. Instead of arriving or leaving, the object draws immediate eye contact by changing size, flashing, or moving in place.
- Best for: Highlighting a key chart metric during a sales pitch or adding animations to PowerPoint when you reach a crucial slide takeaway.
- Pro Tip: Use Pulse or Grow/Shrink on hero numbers to lock in audience focus without overwhelming the layout.

Exit Effects (Red) -- Disappear, Fly Out, Fade Out
Exit effects dictate how elements take their bow and leave the stage. Knowing how to insert animations in PowerPoint that dismiss old content is crucial when you need to free up screen real estate on complex, multi-stage slides.
- Best for: Removing answered questions during a Q&A section or clearing away old graphic layers to make room for a new point.
- Pro Tip: Match your exit styles to your entrance styles. If an item Fades In, let it Fade Out for a balanced aesthetic.

Motion Paths -- Custom and preset movement lines
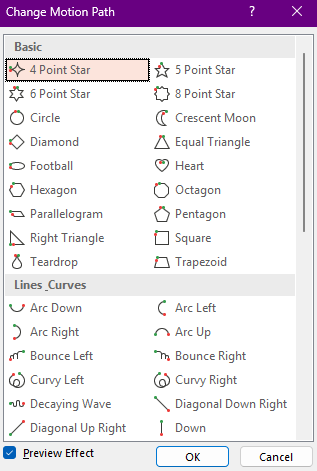
Motion paths take objects on a visual journey from Point A to Point B along a predetermined line, arc, or custom hand-drawn loop. It is the most flexible way to add animation in PowerPoint when standard entrance or exit motions feel too rigid.
- Best for: Illustrating process workflows, showing product delivery routes, or guiding the viewer's eye sequentially across a map.
- Pro Tip: Hold down the Shift key while adjusting motion path endpoints to lock movement strictly along straight horizontal or vertical lines.
Animation Categories at a Glance
Need a quick cheat sheet before tweaking your timing settings? Here is a handy breakdown of how each PowerPoint animation style behaves on your slide canvas:
| CATEGORY | COLOR CODE | WHEN IT TRIGGERS | BEST USE CASE |
|---|---|---|---|
| Entrance | Green | Object arrives on slide | Introducing a new data point |
| Emphasis | Yellow | Object already on slide | Drawing attention mid-slide |
| Exit | Red | Object leaves slide | Clearing a slide before a transition |
| Motion Path | N/A | Object moves along a track | Directing eye movement across a diagram |
How to Sequence Multiple Animations (On Click, With Previous, After Previous)
If every effect on your slide requires a manual click, you’ll end up furiously tapping your presenter remote like a video game controller. Set them all to fire at once, and your slide turns into instant visual chaos.
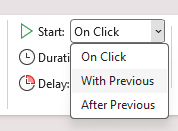
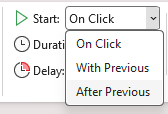
Mastering the Start timing menu is how you direct slide traffic like a seasoned pro. Here is how the three trigger options work when you add animation in PowerPoint:
On Click – waits for a mouse click or spacebar press
This is PowerPoint's default setting. The animation holds its horses until you physically click your mouse, press the spacebar, or hit the right arrow key.
- Best for: Key presentation milestones where you need complete control over when a new point appears.
With Previous – runs simultaneously with the prior animation
The ultimate multitasker. This tells PowerPoint to launch the effect at the exact same millisecond as the animation right before it.
- Best for: Grouping effects together, like having a title Fade In while a supporting icon simultaneously Grows alongside it.
After Previous – triggers automatically when the prior effect ends
The domino effect. As soon as the preceding animation finishes its movement, this effect immediately kicks off on its own, zero clicking required.
- Best for: Building automated, multi-step visual sequences that feel buttery smooth.
How to Reveal Information Sequentially
Want your audience to follow your story step-by-step instead of overwhelming them with a wall of content all at once? Here is how to animate any sequence of elements, whether they are text boxes, visual cards, or icons, so they appear cleanly one after another:
- Animate the first element: Select your first piece of information, click Animations, pick Fade (or your favorite entrance effect), and set Start to On Click.
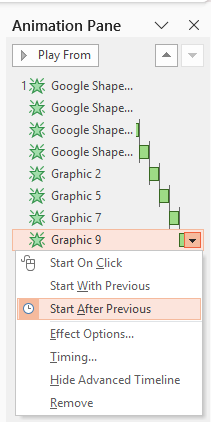
- Animate the second element: Select the next item, apply Fade, and set its Start to After Previous.
- Animate remaining elements: Repeat the process for each remaining item, applying Fade and keeping Start set to After Previous.
Now, with just a single click or spacebar tap, your presentation kicks off on your cue: the first item appears instantly, and the remaining elements automatically cascade onto the screen right after it in a smooth, automated chain reaction!
(Pro tip: If you prefer to pace your speech and pause between talking points, simply set each subsequent element to On Click instead so you retain total control over the reveal with every tap of your remote!)
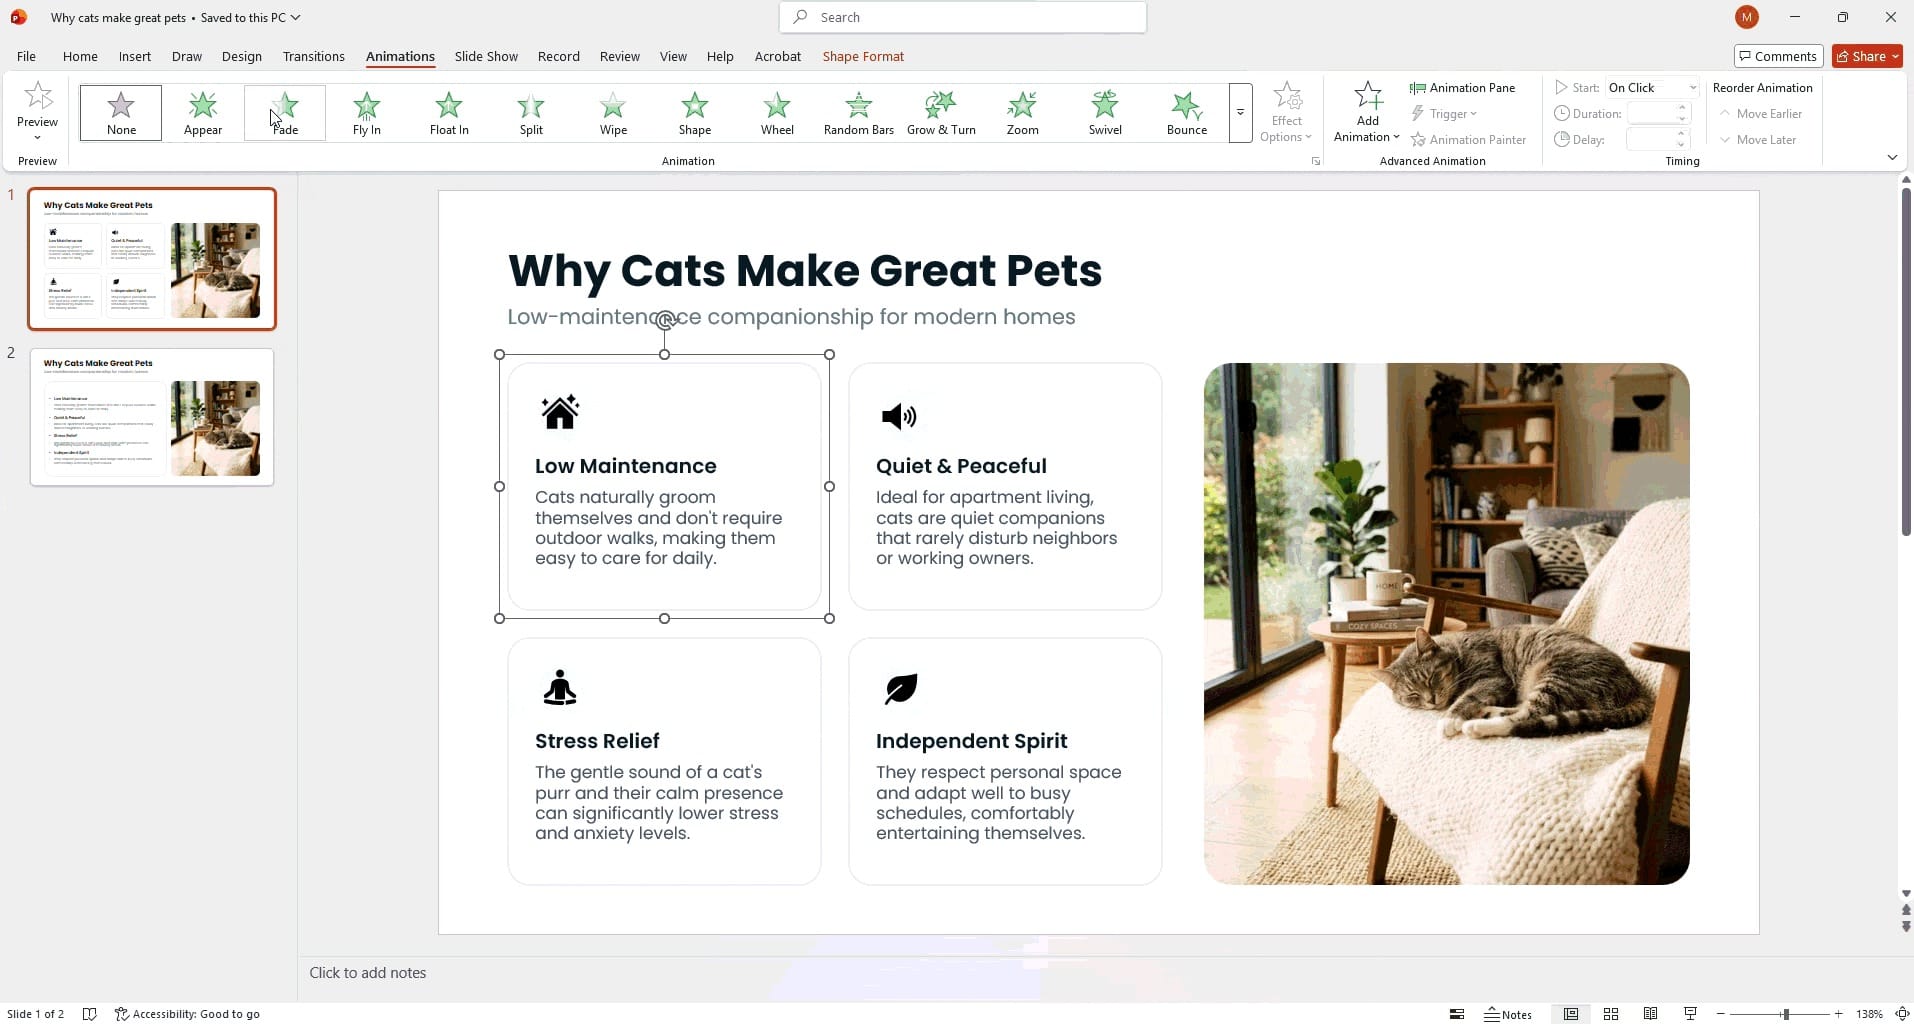
How to Add More Than One Animation to the Same Object
Here is the classic rookie trap that catches almost everyone off guard: you add animation to PowerPoint on an image, pick a shiny new effect from the top gallery to give it a grand exit... and poof! Your original entrance animation vanishes into thin air.
Why? Clicking an effect directly from the primary gallery overwrites your existing animation. If you want to layer multiple movements onto a single object, like having a chart Fade In, give a subtle Pulse, and then Fly Out, you must use the Add Animation button.
How to Layer Effects Without Overwriting:
- Select the object that already has your first animation applied.
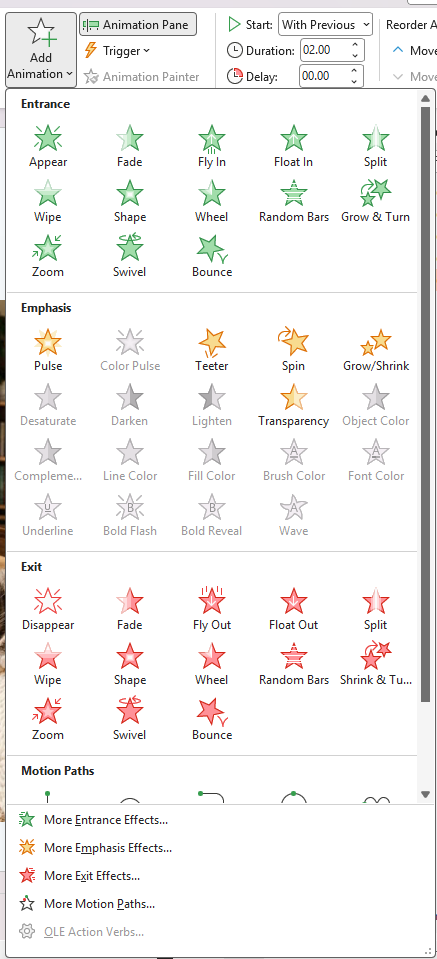
- Go to the ribbon and click Add Animation (located in the Advanced Animation group).
- Choose your secondary effect, such as an Emphasis Grow/Shrink or an Exit Fade Out.
Pro Move: Master the Animation Pane
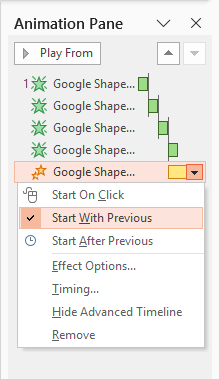
To inspect your layered creation, click Animation Pane on the ribbon. Your object will display stacked, color-coded tags showing every effect tied to it.
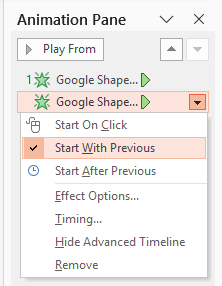
If you want two objects or effects to trigger at the exact same moment, select the second tag in the panel and set its trigger to With Previous. Need to change the sequence? Simply click and drag the animation tags up or down in the panel (or hit Move Earlier / Move Later) to reorder your motion timeline in seconds.
Common Reasons PowerPoint Won't Let You Add Animations
Ever clicked the Animations tab only to find every single button grayed out or acting completely rogue? Before you blame your mouse, here are the three most common roadblocks stopping you from adding motion, and how to bypass them instantly:
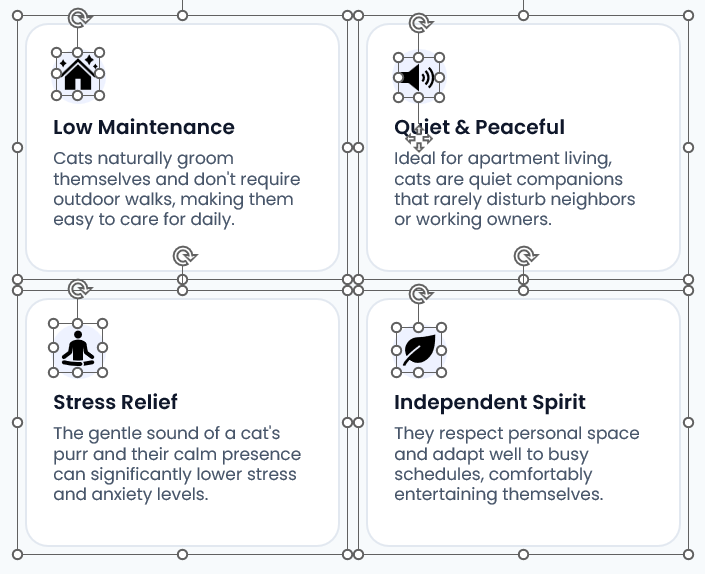
Grouped objects need to be grouped first, then animated as a set
Trying to make a multi-part icon or complex visual layout move together? If you select five loose shapes and apply an effect, PowerPoint treats them as five separate events (or locks up entirely). Select all your elements and hit Ctrl + G (or Cmd + G on Mac) to group them into a single container before applying your animation.
Protected View or read-only mode disables the Animations tab
If you opened a presentation from an email attachment or web download, PowerPoint shields it in "Protected View," turning the entire Animations tab ghost-gray. Look for a bright yellow bar at the top of your canvas and click Enable Editing. If the file is marked Read-Only, go to File > Save As to store a fresh, fully editable copy on your computer.
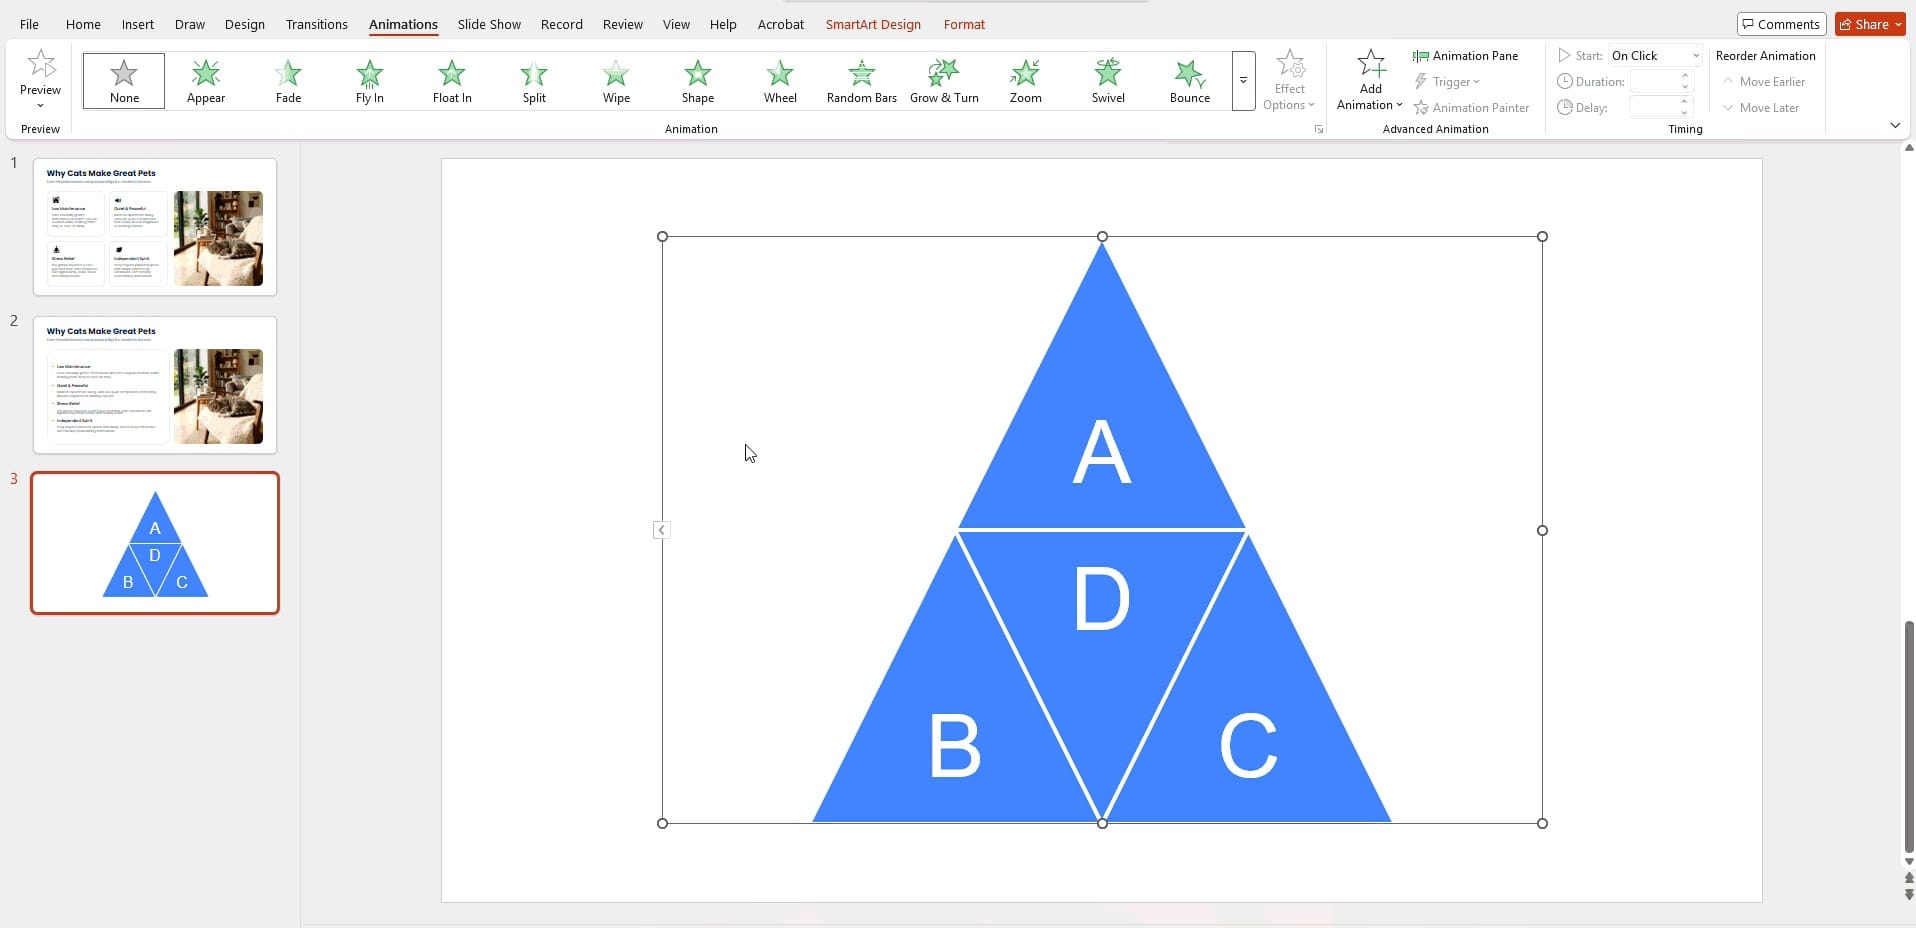
SmartArt and certain chart types have restricted animation options
SmartArt diagrams and linked Excel charts don't play by regular shape rules. Standard animation styles won't highlight until you click Effect Options and tell PowerPoint how to break down the graphic (e.g., animating a pie chart By Category or SmartArt One by One). If a stubborn graphic still refuses to cooperate, convert it into standard vector shapes (Convert to Shapes) to unlock total motion control.
Advanced Animation Techniques: Morph, Motion Paths, and the Animation Pane
Ready to step beyond basic entrance effects and level up your slide game? Advanced PowerPoint features let you create cinema-quality motion without touching complex video editing software.
Here are three power-packed techniques to take your presentation to the next level:
- The Morph Transition: Technically a slide transition, Morph creates buttery-smooth shape transformations between slides. Want an object to seamlessly shrink, change color, and relocate as you advance your deck? Check out our step-by-step guide to mastering PowerPoint Morph and Zoom transitions to unlock total visual magic.
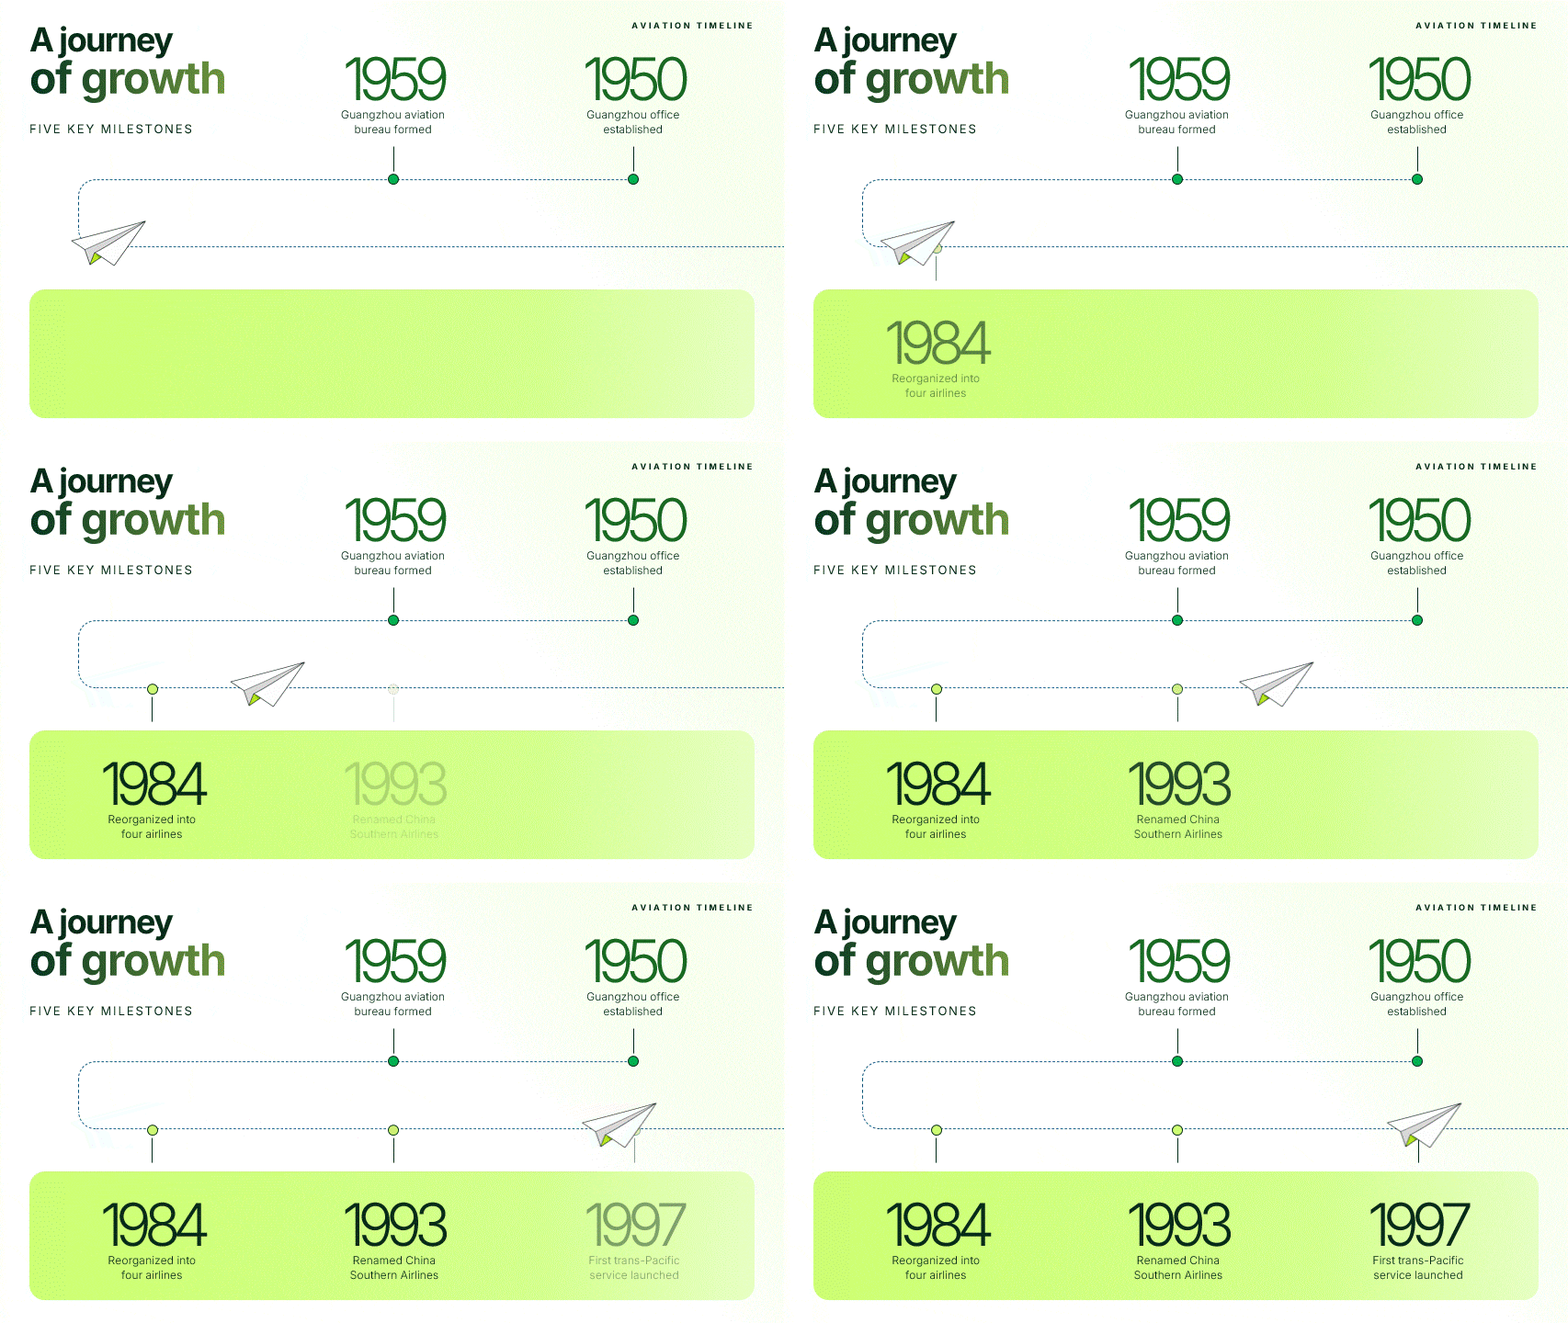
- Custom Motion Paths: Draw freeform trajectory lines to guide logos, product mockups, or process arrows along exact routes across your canvas.
Animation Pane Precision: Open the side panel to fine-tune micro-delays, tweak effect durations down to the millisecond, and stack triggers like a seasoned director.
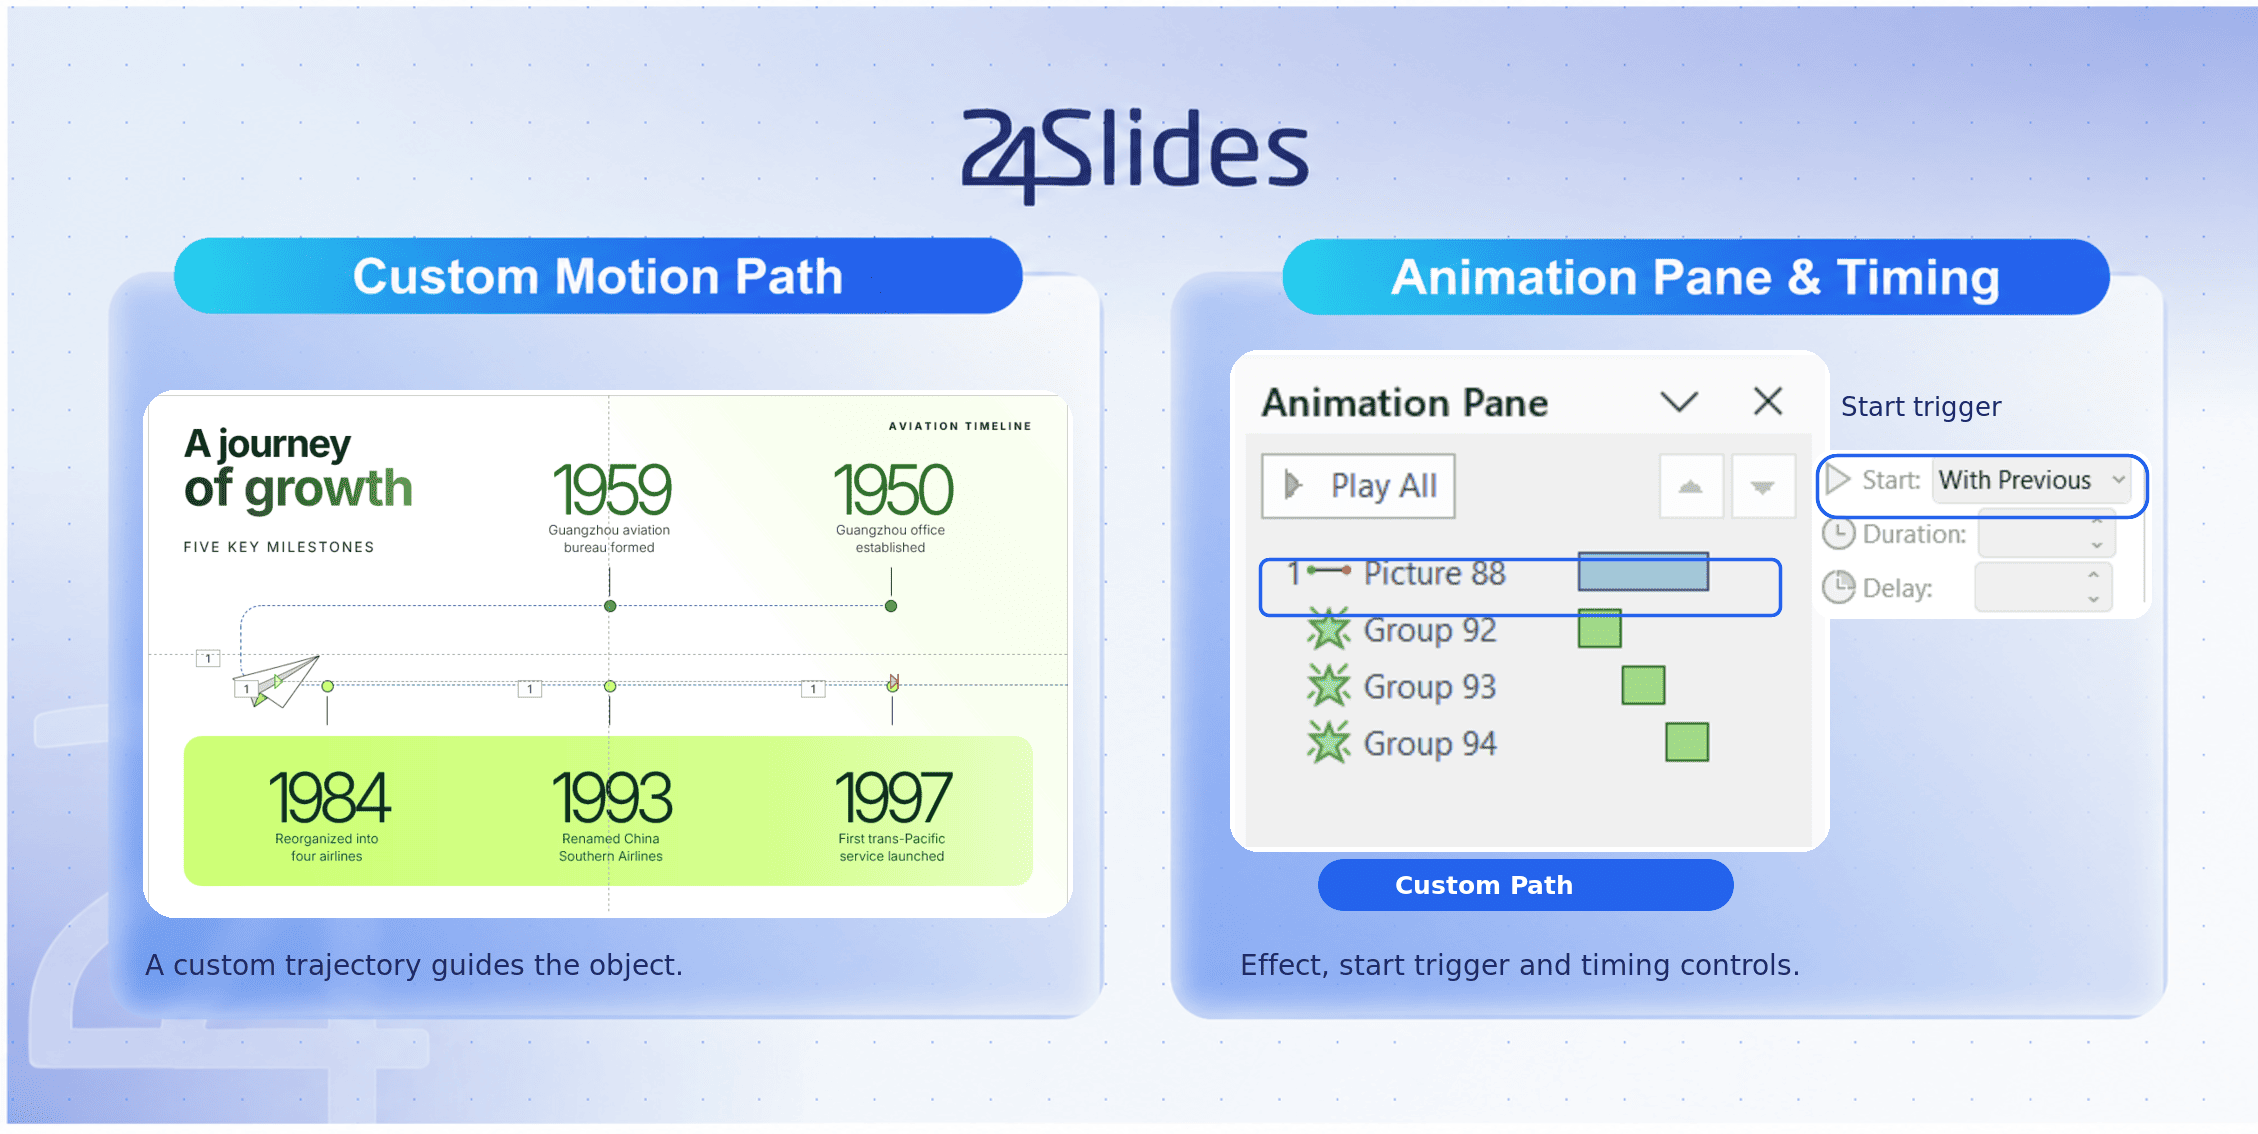
Combining custom motion paths with precise timeline triggers transforms standard decks into dynamic, broadcast-ready visual experiences!
When Animation Hurts Your Presentation (Not For You)
Just because PowerPoint lets you animate every pixel on screen doesn't mean you should. Knowing when not to use motion is what separates amateur slide decks from boardroom-ready presentations.
Here is where you should hit the brakes and skip motion entirely:
- Board and Investor Decks: Skip animation entirely on board and investor decks where every second of delay reads as friction, not polish. C-suite executives want immediate, clear answers, not a dramatic three-second entrance delay.
- Dense Data & Analytics: Dense data slides with 3+ charts should not carry entrance animations -- the audience needs to compare numbers immediately, not wait for a fly-in sequence.
- PDFs and Asynchronous Pre-Reads: If your presentation will be read as a PDF or printed, animations are invisible and wasted design time.
At 24Slides, our dedicated design team crafts thousands of high-stakes corporate decks every year, and we routinely advise enterprise clients to strip away unnecessary motion. True design expertise isn't about flexing every tool in PowerPoint, it's about knowing when to prioritize raw executive clarity over fancy choreography.
FAQ
How do I make things appear one at a time in PowerPoint?
To reveal items sequentially, select your text boxes, icons, or visual cards and apply an entrance effect like Fade or Fly In. If you want total presenter control over your speaking pace, set each item's Start trigger to On Click so they arrive with every tap of your mouse. For automatic, cascading reveals, set the first item to On Click and change all subsequent elements to After Previous in the top ribbon menu.
How do you animate two objects at the same time in PowerPoint?
To launch multiple animations simultaneously, apply an effect to your first object, then apply an effect to your second object. Next, select the second animation tag and change its Start setting in the Timing group from On Click to With Previous. Both elements will now execute their motion together at the exact same millisecond. Alternatively, you can select both objects at once, hit Ctrl + G to group them into a single container, and apply one animation effect to the set.
Why won't PowerPoint let me add animations?
If your entire Animations tab is grayed out, your presentation is likely open in Protected View after downloading it from the web or an email attachment; simply click the bright yellow Enable Editing button at the top of your screen to unlock it. If only specific buttons are grayed out, make sure you have selected the outer border frame of your object rather than leaving a blinking text cursor active inside it. Lastly, linked Excel charts and complex SmartArt diagrams require you to set an Effect Options sequence before individual elements will animate.
How can I create advanced animations in PowerPoint?
You can create broadcast-quality motion by combining Custom Motion Paths with precise timeline triggers inside the Animation Pane. To create dynamic multi-stage effects, use the Add Animation button to stack entrance, emphasis, and exit effects onto a single object without overwriting your original work. For seamless, morphing graphics between slides, pair your animations with PowerPoint's Morph Transition.
How do I remove or reorder an animation once it's applied?
Click Animation Pane on the Animations tab to open your side timeline panel. To reorder your sequence, drag and drop the color-coded animation tags up or down in the panel (or click Move Earlier / Move Later in the ribbon). To remove an animation completely, select its numbered tag on your slide canvas or inside the panel and press Delete or Backspace on your keyboard. You can also select the object and switch its effect choice in the main animation gallery back to None.
Get Animated Slides Without Building Them Yourself
Step onto the stage with a show-stopping, beautifully animated presentation that commands the room, without spending your entire weekend wrestling with timing triggers and frame sequences. Whether you were searching for how to add animations in PowerPoint for a high-stakes client pitch or simply need your slides to feel executive-ready by tomorrow morning, you don't have to do the heavy lifting alone.
At 24Slides, we turn flat, static slides into polished, dynamic presentations that captivate your audience. Instead of spending hours tweaking motion paths, hand off your raw deck to our team. Our dedicated, brand-trained designers will craft custom visual choreography tailored strictly to your brand guidelines, all delivered within our standard 24-hour turnaround.
Ready to save hours and elevate your next presentation? Send us your slides today and see how effortless adding animations to PowerPoint can truly be!
Make Every Important
Presentation Count.
Get reliable, brand-trained design capacity whenever you need it. Never let internal bottlenecks ruin a high-stakes pitch.
Discover 24Slides ➝