How To Work With Multiple Images In PowerPoint

Images and pictures can spice up your presentation in a way that text cannot. Nowhere is this more accurately depicted than in the idiomatic expression, “A picture paints a thousand words.” You can only put so many words on a single slide. The best course of action would then be to use images or videos that will help you get your message across far more effectively than plain text can. With that said, in today’s article, I’m going to show you how to work with multiple images in PowerPoint.
5 Different Ways To Quickly Insert Multiple Images In PowerPoint
There are a couple of different ways you can use to quickly add multiple images to your PowerPoint slide. Note, however, that if some of the options don’t seem to be available on your end, then you may need to update your copy of PowerPoint. An Office 365 subscription would also be ideal, so you get all the latest updates to all Microsoft Office apps (including PowerPoint, of course).
1. Copy and paste images into your slide
You can quickly copy a photo from your image gallery, web browser, or any other compatible app on your computer. All you have to do is hit CTRL+C on your keyboard to save the image to your clipboard. Take note, however, that some apps do not support copying multiple images which means you can only copy and paste one image at a time to PowerPoint. To paste the image(s) to PowerPoint, hit CTRL+V on your keyboard. Alternatively, you can go to Home > Paste if you want to see other Paste Options.

2. Use the Insert menu in PowerPoint
The Insert tab is where you go to add various elements or objects on your slides. In the Images section of the Insert tab, you’ll notice you can insert different types of photos. You can add pictures saved in your computer as well as online pictures, screenshots and even an entire photo album for your slideshow.
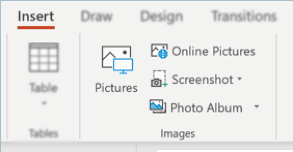
Let’s go through these different image types you can insert on your slides:
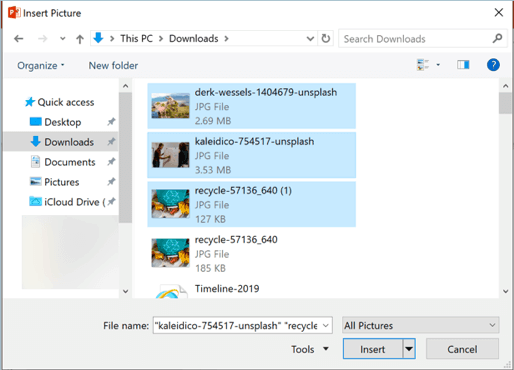
- Pictures. Use this option if you want to insert 1 or more images that are saved on your computer. You can CTRL+click on the images you want to add. Likewise, you can also hold down the SHIFT key if you want to add images that are saved right next to each other.
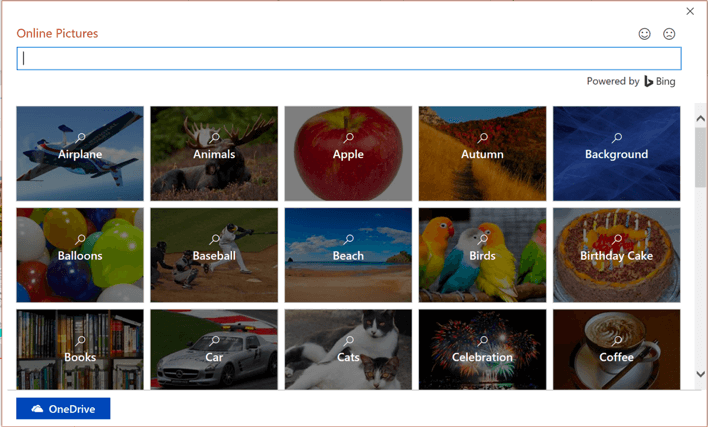
- Online Pictures. Use this option if you want to search for images on Bing (Microsoft’s search engine) or access your photos on OneDrive. Note that you will need to be signed in to your personal OneDrive account to access the photos saved there.
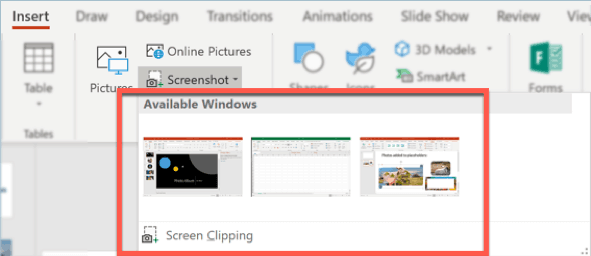
- Screenshot. You do not need to open up a separate app to take screenshots and add it to your PowerPoint slide. You can now insert a screenshot or screen clipping straight from PowerPoint. Note, however, that you can only take full screenshots of open PowerPoint, Word, Outlook, and Excel files. If you want to take a screenshot of other apps, you will need to select the Screen Clipping option.
- Photo Album. If you want to show off your latest product photos (or your travel photos to a white-sand beach somewhere), then this is the option for you. Imagine if you’ve got 100 photos on your photo album and you’d need to insert one photo for each slide. That’s going to eat up a lot of your time! Fortunately, the Photo Album option will help make your life easier.

You can add as many pictures as you want to your photo album. You can reorder the pictures, add captions and even turn all your colored pictures into black and white. For album layout, you can have up to a maximum of 4 pictures in a slide, and you’ve got several frame shapes to choose from as well.
3. Use the layout option in PowerPoint
When inserting a new slide, you can choose a layout option that allows you to add images with just a single click. To view the available layouts, you can double click on the slide you want to edit and then click on Layout.

In the screenshot above, you can see that only the Two Content and Comparison layouts have picture placeholders. If you want to add layouts with even more picture placeholders, you will need to edit the Slide Master.
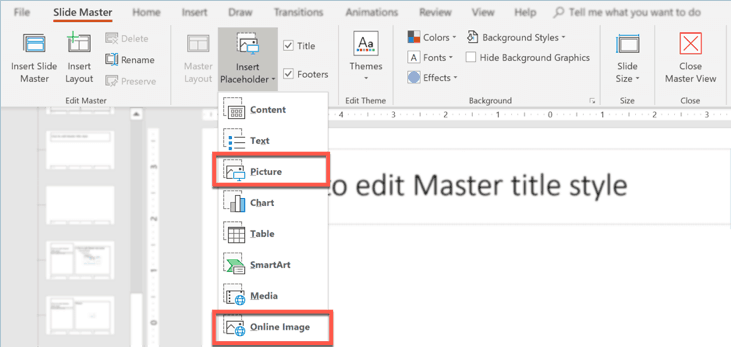
To edit the Slide Master, go to View > Slide Master > Insert Layout. A new slide will appear on your screen. Click on Insert Placeholder and select either Picture (to add an image stored on your computer) or Online Image (to add an image from the web).
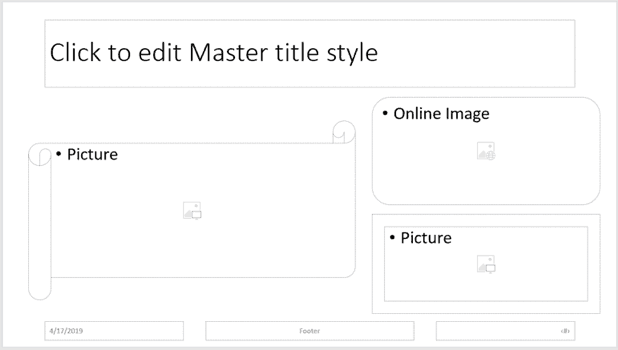
Once you have added the placeholders on the slide, you can then close the Master View.
For this example, I created a new layout with two pictures and one online image. I’ve also formatted the shapes of the placeholders, so it’s not the usual rectangle used in most placeholders. Here’s what it looks like:
When I closed the Slide Master view and went back to Normal View, the new custom layout I just made is now shown as an option in the Layout menu. Here’s a screenshot:

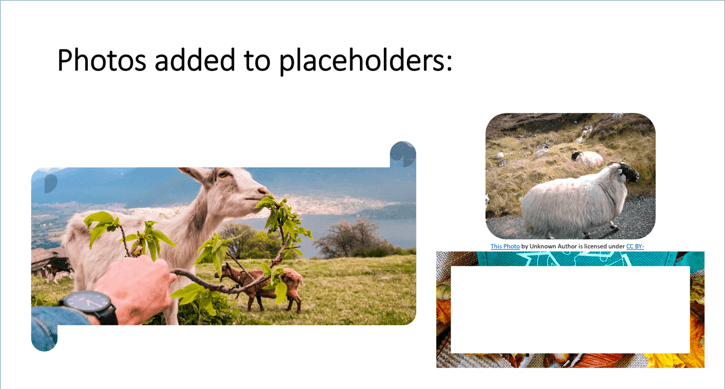
So, I clicked on Custom Layout and added images to the placeholders. This is what the slide looks like now:
4. Use the ‘Shape Fill with Pictures’ option
Use this method if you want to use various shapes for your images. Say, for example, you want a circular image, a heart-shaped image, a square image, etc. Sure, you can use the Picture Layout or Picture Styles menu to change the look of the image. But the ‘Shape Fill with Pictures’ method opens up a lot more possibilities (and shapes) for your images.
Here’s how you do this:
- Click on Insert > Shapes and select the shape you want to use.
- Draw the shape on the slide.
- Click on the shape to open up the Drawing Tools
- In the Format tab in Drawing Tools, click on Shape Fill then select Picture on the dropdown list.
- In the dialog box, choose whether you want to insert pictures from a file (on your computer) or from the web.
Here’s an example slide I made just for you:
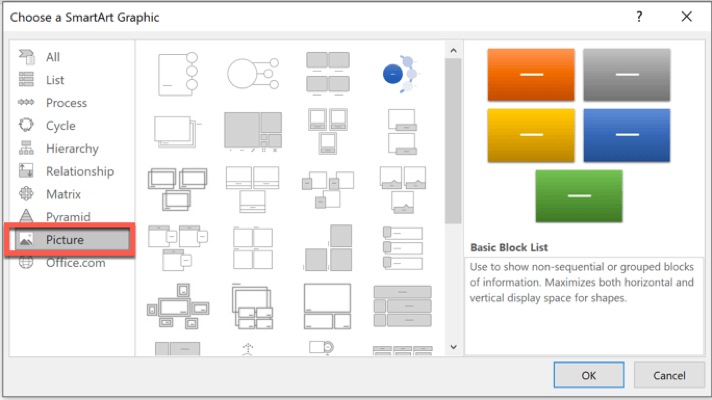
5. Use the SmartArt option
SmartArt has a lot of practical uses in real-world presentations. They not only look good, but they also help save a lot of time. The good news is SmartArt isn’t limited to adding text; you can also quickly insert images in many SmartArt graphics.
To add a SmartArt graphic, go to Insert > SmartArt. Browse the different categories and click on the graphic you want to use. Alternatively, you can just go directly to the Picture category to see the graphics with built-in image placeholders.
Once you’ve added the SmartArt graphic to your slide, you can then click on the placeholder to quickly add a picture from file or from the web. You can also easily change the layout, colors, add more shapes, etc. by accessing the SmartArt Tools menu. You can quickly access this hidden menu by clicking on the graphic you want to edit. That’s it!
How To Quickly Transform Multiple Images in PowerPoint
In this section of the article, I will show you a few tricks you can use to quickly transform the look of multiple images in PowerPoint – all at once!
· How to resize multiple photos
Resizing multiple images one by one is no fun. Fortunately, PowerPoint makes it easy for you to resize multiple images all at once. There are a couple of techniques you can use to make your images smaller or larger.
Method 1: Manual method
To select multiple images, press CTRL on your keyboard and click on the images you’d like to resize. Drag a sizing handle on any of the images and move it towards the center (to make the images smaller). If you want to scale or make the images bigger, then drag the sizing handle away from the center.
Here are a few more tips to consider:
Press and hold the OPTION key while simultaneously dragging the sizing handle. This will keep the images’ center in the same place. If you want to maintain the image proportions, you’d need to press and hold the SHIFT key on your keyboard.
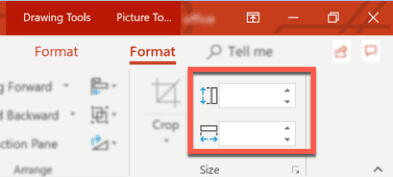
Method 2: Set exact height and width in Picture Tools
If you want more precise measurements for your images, instead of just eyeballing the size, then you’ll find your answer in the Picture Tools menu. First, click on the images you’d like to resize. The sizing handles will appear and a new tab (Picture Tools) will appear on the Menu Bar. Click on Format and go to the Size group on the far-right side of your screen. Type in your desired height and width, or click on the up/down arrows.
Method 3: Use SmartArt graphics
This is probably the least commonly used method when resizing images. You can quickly change the look of your entire slide by simply converting the images to SmartArt graphic. Here’s how you do this:
- Click on the images you want to convert to SmartArt. This will open up the Picture Tools
- Go to the Format tab and click on Picture Layout. You’ll then see a bunch of different picture layouts. Hover your mouse over the layouts to see the real-time changes taking place on your slide. Your images will magically transform right before your eyes!
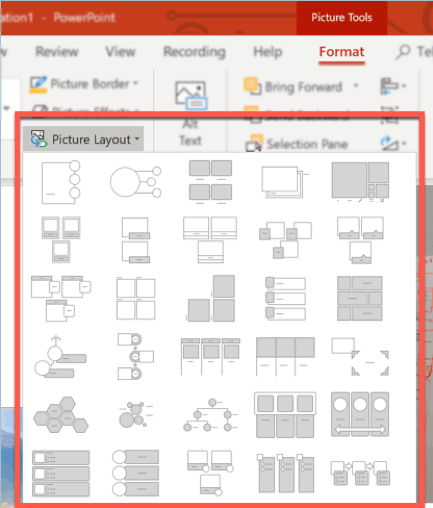
- Click on the picture layout you want to use. The SmartArt Tools menu will appear on screen. Go through the different options to customize your new SmartArt graphic.
What’s really awesome about this method is that SmartArt is pretty intuitive. Whether you’re resizing two or ten images, the resulting SmartArt graphic is always perfectly sized and will have no problems fitting on the slide.
However, you may notice that some of the photos may be cropped. Let’s say you’ve resized your family pictures, but in a couple of those photos your face has been cropped out. To solve this problem, go back to Picture Tools and click on the Crop button. When you do this, you’ll see the full image and you can then move the image around until your face appears within the resized photo.
Also, if you’re looking to make a photo collage for your PowerPoint slideshow, this is the technique you should be using. SmartArt will perfectly resize your images in just a few clicks and you’ll have your photo collage in no time!
· How to blend 2 or more pictures
Depending on the effect you want to achieve, you can easily blend 2 or more pictures in PowerPoint in just a few clicks. Here are a few tricks you can use:
- Make a picture transparent by going to Picture Tools and adjusting the transparency levels. Doing so will allow the image behind it to be seen.
- Apply Soft Edges to the photos by going to Picture Tools and selecting Picture Effects. Click on Soft Edges and select the preset variation you want to use. Alternatively, you can always specify the soft edge size if you want a more custom look.
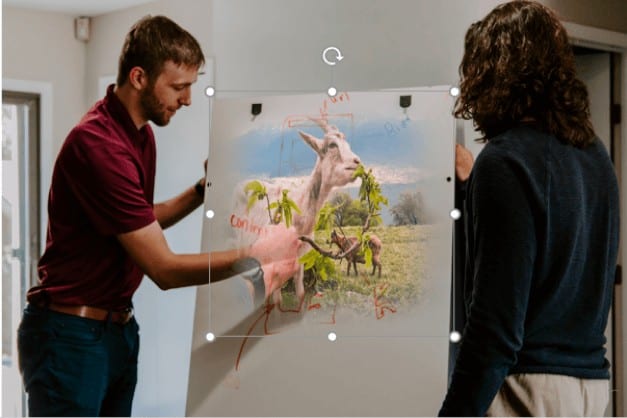
So, I made an example slide where I applied the two techniques above. I put the goat picture on top of the whiteboard and set the transparency to 20%. I also set the soft edge to 50%. Here’s the final result:
· How to use animation effects to make images appear one after another
There may be times when you don’t want all your images to appear all at once. Instead, you want them to appear one by one. Fortunately, doing this isn’t all that hard. If you’ve already got an animation order in mind, all you have to do is go to the Animations tab. Then select the animations for the various elements on your slide.
There are plenty of animations you can choose from. You can choose from various Entrance, Emphasis, Exit and Motion Paths animations. Just remember, however, that animations are meant to be used sparingly. If you overdo your animations, your audience is in danger of becoming ill with motion sickness!
Check out the best practices when adding transitions and animations to your slides if you don’t want your audience to hate you.
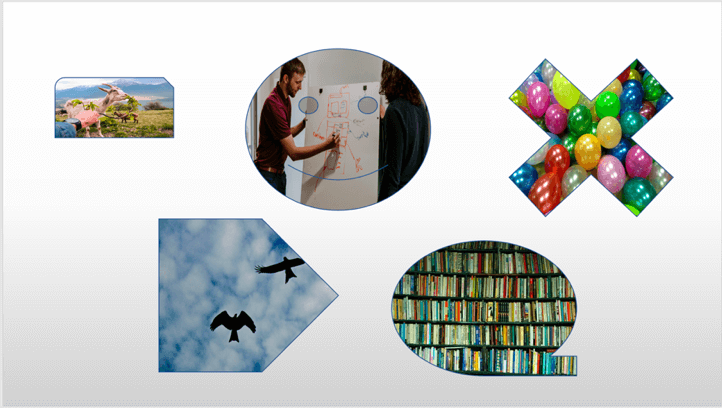
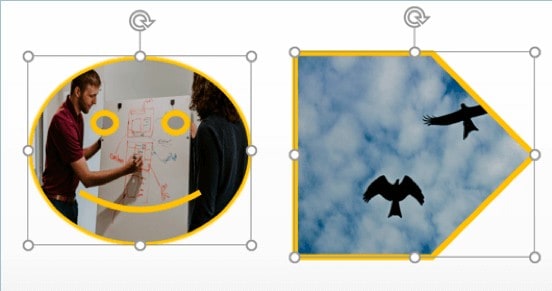
· How to crop multiple images
When you’re working with 2 or more images, your crop options are limited. You can’t do a normal image crop or crop it to a certain aspect ratio. You can only use the Crop to Shape option. Here’s how it works:
Click on the images you want to crop. Then go to Picture Tools > Format. As you can see in the screenshot below, only the Crop to Shape option is clickable. The other options are greyed out:

The good thing about this cropping option is that you can convert your images into fun-looking shapes. You’re no longer limited to working with a rectangular or square shape. You have plenty of different shapes to choose from and make your pictures look even more exciting!
· How to adjust the color of your pictures
If you want to give your images a uniform look, you can apply a filter. Fortunately, you don’t need a separate photo app to apply filters. You can do it directly on PowerPoint. Here’s how:
Click on the images you want to re-color. Then go to Picture Tools > Format. Look for the Color button and select from the preset variations or use a custom color by clicking on More Variations.
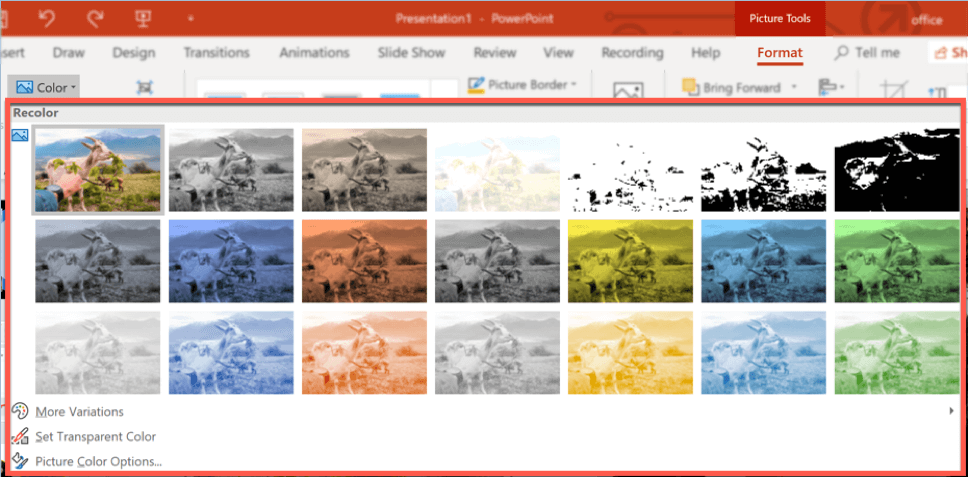
If you want to get creative, you can click on Set Transparent Color to make a single color transparent. If you choose to make the color red transparent, then all instances of red in your selected images will become transparent.
The Power of Using The Right Image in Presentations
Your PowerPoint slides are your presentation’s visual aid. It’s supposed to help your audience understand what you’re telling them. You may think your speech is enough to get people to pay attention. Maybe, maybe not. For the most part, however, we are visual learners and a visually-attractive slideshow will win over a text-based one.
There’s nothing wrong with text-based presentations per se. With typography and a bit of graphic design knowledge, you can certainly transform your plain-looking slides into something more eye-catching. But in some cases, great typography simply isn’t enough to get people’s eyeballs glued to your presentation.
Let me give you an example. Look at the two slides below and tell me which one looks better:
Slide 1 (text-based slide):

Slide 2 (image slide + caption):

Both of these slides refer to the same thing – feeding the goats. However, if you’re trying to convince people to go check out your farm, they probably won’t be too interested if you just show them Slide #1.
Why? Because it’s boring! With a text-based slide, you’re basically asking people to imagine what feeding a goat looks like. You’re letting their brains do the extra work. What if they don’t know what goats look like? There are plenty of goat breeds out there. What kind of goat are they going to feed? There are so many questions that can’t be answered with a text-based slide.
With Slide #2, however, you’re showing people exactly what they’re going to do at the farm. They no longer need to imagine what the goats look like. They can easily see themselves feeding the goat. The image speaks volumes and will help you do your job more effectively.
Imagine listening to a 20-minute presentation where all the slides look like Slide #1. How do you think you’re going to feel? Do you think you’ll enjoy the presentation? Or will you tune out and scroll through your Instagram feed instead?
When designing your presentation slides, it’s important to place yourself in your audience’s shoes. You can’t win their trust and get them to engage in your presentation if they’re not paying any attention to you. With the right images, however, you’ll have your audience awake, attentive, and eating from the palm of your hand!
Ready To Work With Multiple Images In PowerPoint?
Your presentation is so much more than a bunch of slides with text, graphics, and other objects in it. It’s supposed to support your presentation’s message, not take away from it. With that said, the right images can capture your audience’s attention and help drive your message home. Apply the various tips and tricks for working with multiple images in PowerPoint and drive your presentation message home!
You might also find this interesting: How To Work With Tables, Graphs And Charts In PowerPoint