How To Convert Keynote To PowerPoint

If you’ve ever wondered how to convert Keynote to PowerPoint, then you’re in the right place. In this article, I’ll give you a step by step guide on how you can convert your .KEY file into something that’s compatible with PowerPoint. Later on, I’ll also be covering some of the major issues you’ll encounter on the converted file, and what you can do to fix these.
Why convert Keynote to PPT if it’s already a great presentation app?
Keynote is a free presentation app that runs exclusively on Mac computers and iOS devices like the iPhone and iPad. Now, a lot of people may love using Keynote for their presentations. But the fact that the app only works on the Apple ecosystem is a bit of a downer. That said, here are some reasons why you may need to convert your Keynote file to PowerPoint:
- You’ll be collaborating with non-Mac users
For many Apple fans, MacOS is the greatest computer operating system ever. But, of course, plenty of Windows users beg to disagree. And unfortunately, in the battle for computer OS supremacy, Windows still reign supreme.
The sad truth is that there are far more people who can’t access Keynote (because it’s exclusive to Apple) than those who can. Therefore, you (as part of the minority) need to do the adjusting.
What this means for Keynote users is that if you intend to collaborate or work with non-Apple users, you’ll need to convert your Keynote file first. Otherwise, your colleagues or teammates won’t be able to open your .KEY file on their computer. It’s as simple as that.
In critical business presentations where there might be a lot at stake, it’s best to be prepared and just convert the file to PowerPoint. You want to make sure everyone on the team can access your file.
The best way to ensure this is to convert your Keynote to a more universally recognized presentation file format. This is either the .PPT or .PPTX format.
- You’ll be presenting on a non-Apple device
You’ll likely present in venues where they use a dedicated presentation computer. More often than not, these computers are Windows-based, meaning it can’t open your Keynote. You will therefore need to convert Keynote to PowerPoint first if you want to be able to do your presentation.
Likewise, if you’re the only Keynote user on your team and everyone’s on Windows, then it’s best to just do the conversion process ahead of time. This way, if your team leader decides to have everyone use just one computer during the presentation, then you won’t be caught by surprise.
- You don’t want to bother with purchasing additional accessories
If you can, in fact, use your Mac laptop for your presentation, then good for you. But you will then need to think about having the right accessories so you can connect your laptop to the projector, TV or monitor. This is because these external displays require either VGA or HDMI. Unfortunately, these ports are absent on the modern MacBook.
The most recent line of MacBook ultraportable laptops only have a couple of USB-C | Thunderbolt ports. So, you’d need to have a bunch of adaptors with you if you want to ensure your laptop can connect to a projector, TV or external monitor.
And, don’t forget, you also need the right cable to connect your adaptor to the projector. It can get quite confusing if you’re not exactly a technical kind of person, so it may be best to ask for help from someone who knows this stuff.
While you can definitely export your Keynote to PowerPoint (among other file formats), it’s not going to be like a native PowerPoint experience. Which is neither app’s fault really – they just happen to be created by two different giants in the tech industry.
The good news is exporting your Keynote to PowerPoint is generally a straightforward experience. Now, it’s not without hiccups. You’d still need to give your converted document a thorough look to make sure everything’s actually where it’s supposed to be. But for the most part, the conversion process itself is quick and easy.
Step-by-step guide to convert Keynote to PowerPoint
I’ll be dividing this section into two – how to convert on both MacOS and iOS. For this tutorial, I downloaded a free corporate Keynote template from Louis Twelve which I found on Behance.
Let’s dive into the first part:
How to convert Keynote to PowerPoint (MacOS)
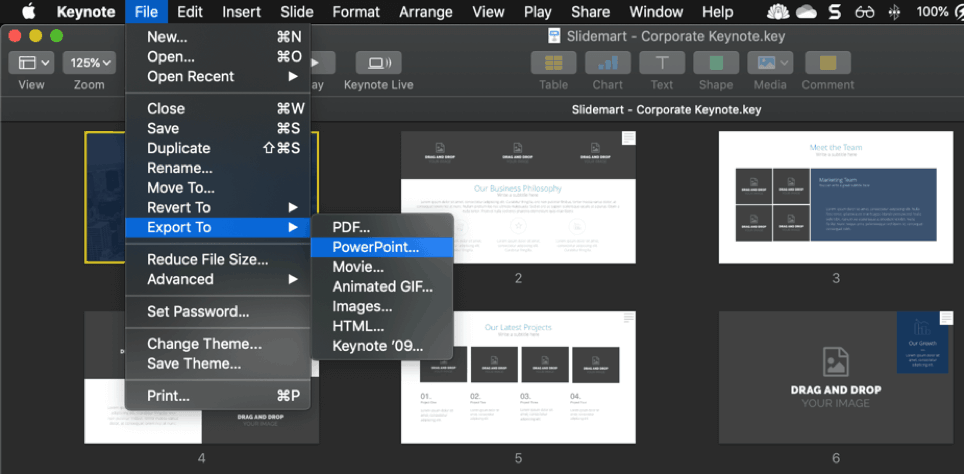
First, you’ll need to open up your Keynote file. Then go to File > Export To. From the dropdown list, click on PowerPoint.
You’ll then see this ‘Export Your Presentation’ dialog box on your screen. Make sure you’re on the PowerPoint tab.
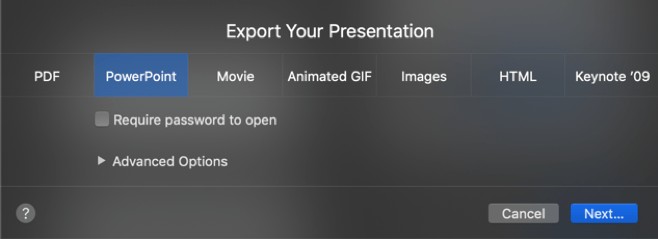
As you can see, the menu is quite straightforward. You can choose to lock your file with a password or not by ticking the box that says ‘Require password to open.’
By default, Keynote will convert the file to the more recent .PPTX format. But if you’re going to be presenting on an older PowerPoint version, then click on the Advanced Options button. And you’ll see this on your screen:

Select .PPT if you want your file to be compatible with PowerPoint 1997-2003. Otherwise, leave it at .PPTX. Once you’ve made your choice, click on the blue ‘Next’ button.
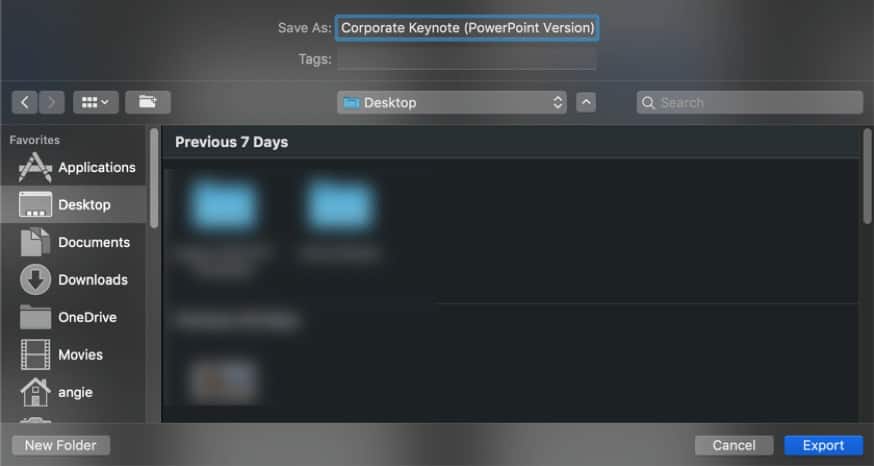
On the next screen, you’ll be asked to give your file a name and where you want to save your new PowerPoint file. Type the file name in the ‘Save As’ field. Then navigate to the folder where you want to save your file. Hit the blue ‘Export’ button when you’re ready to export.
The conversion process is generally very fast. For small files, it will only take a couple of seconds. For more media-intensive files, it may take longer. To check out your new PowerPoint file, navigate over to where you chose to save it.
Double click the file and you’ll notice that instead of Keynote popping up, it will now be PowerPoint. Of course, this will only work if you have PowerPoint installed on your computer! If you don’t have PowerPoint on your Mac, then Keynote will open up the newly converted file (yes, Keynote can open PowerPoint files).
How to convert Keynote to PowerPoint (iOS)
This is the process you need to follow if you want to convert your Keynote to PowerPoint on an iPhone or iPad.
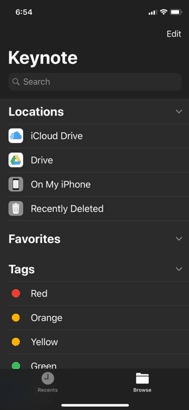
First, open up Keynote on your device. Then select the folder where you’ve saved your Keynote file. For instance, it could be on iCloud Drive, Google Drive, or any other cloud service connected to your device. Alternatively, you can also search for Keynote files by choosing from your Favorites list or even from your color-coded Tags.
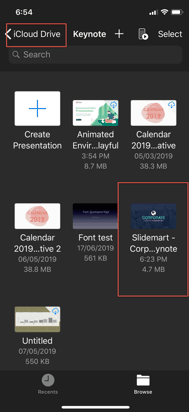
In my case, I save all my Keynote files to iCloud because I find it more convenient especially in terms of accessing the same files on my Mac. So, here’s the file I want to convert to PowerPoint (same file I used in previous example):
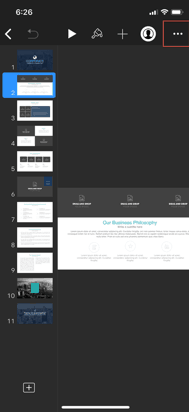
The next thing we need to do is to tap on the file and open it. Then, tap on the ellipsis icon (…) on the top-right corner to open up more menu settings.
You’ll then see the screen below. Tap the Export option.
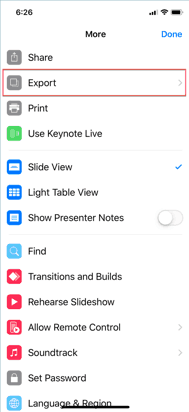
In the Export screen, you’ll see there are a number of options for you to choose from: PDF, PowerPoint, Movie, Animated GIF, Images, Keynote Theme. Since this tutorial is all about converting Keynote to PowerPoint, make sure you tap on PowerPoint.

Note that unlike the conversion process on MacOS where you can choose between .PPTX and .PPT, on iOS devices you’ve got no say in the matter. All converted presentations files will be in .PPTX format. So, keep this in mind if you know you’re going to be using an older computer.
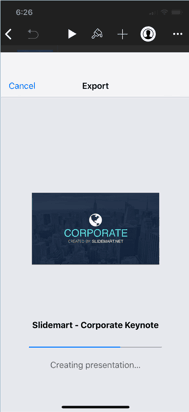
That said, once you tap on PowerPoint, you’ll briefly see this window on your screen. It’s basically letting you know that Keynote is converting or creating your new PowerPoint presentation for you:
Now, during the export process, Keynote may find some issues. It will give you a list of things you may want to look over. So you can decide if you’re going to proceed with the export process or not. Here are some issues encountered for the Keynote template I used:

As you can see, Keynote gave me a list of 5 fonts which may or may not cause my exported PowerPoint file to look different from the original Keynote file. Basically, it’s telling me that Calibri and Open Sans are missing and text on the exported file may look different.
If you think you can live with these issues and continue the export process, tap on Continue.
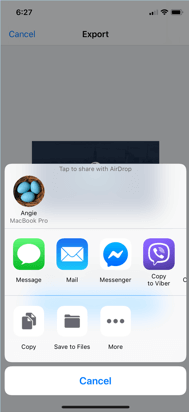
Once the file is exported, iOS will then ask you what you want to do with your new PowerPoint file. You can share the file via AirDrop or send it via SMS or social media. Alternatively, you can save it to your iPhone (or iPad) by tapping on ‘Save to Files.’
The conversion process from Keynote to PowerPoint is easy and straightforward on both MacOS and iOS. However, you may find that your new PowerPoint file isn’t as picture-perfect as it seems.
Two common issues that can arise from the conversion process
In this section, I’ll list down the most common issues and problems that arise when converting Keynote to PowerPoint. Even the most basic Keynote file (that is, there’s not a ton of fancy texts and animations on it) will likely run into some issues.
- The missing fonts problem
This is probably the most common problem. If you checked out the step-by-step iOS Keynote to PPT conversion process I shared above, then you’ll notice that I got a message about fonts. Specifically, it said Calibri and Open Sans are missing and may cause the exported file to look different from the original file.
Aside from looking different, the new font may also cause the text to be displaced. This is because the replacement font may be of a different size. That is, it may be a few pixels wider, narrower, taller, or shorter. This will, of course, result to its neighboring elements being moved around. So, you’ll find some text overlapping on other elements or being totally moved to the side.
Also, the replacement font may not convey the same emotion that the original font was meant to do. For instance, some fonts are perfect for business presentations because they look more formal and elegant. Others are perceived to be ‘fun’ and as such, are great for team-building types of presentations.
If you want your audience to be excited about something, you’d use a font that can help build up their excitement as well. But all these will be for nothing if the replacement font on your newly-converted PPT file fails to bring out the same emotion in the audience.
So, the best course of action for this problem is to look for a similar font that will not only look the same. But will also evoke the same emotion in your audience. Easier said than done, I know, when there are so many fonts to choose from.
In the next section, I will be covering some tips on how to make sure there are no font issues in the converted file.
- Animations and transitions are not converting correctly
There are two types of animations in Keynote – object animation and slide transition.
Object animation basically refers to the animation effects applied to a specific object. If there are 5 different elements on a slide, you can add animation effects to each one.
Slide transition, on the other hand, refers to the animation when moving or transitioning from one slide to the next.
That said, there are 3 different types of object animations on both Keynote and PowerPoint:
On Keynote, these are (1) build in, (2) action, and (3) build out.
On PowerPoint, these are equivalent to (1) entrance, (2) emphasis, and (3) exit effects.
They work basically the same way. The only difference is that not all animations on Keynote are present on PowerPoint, and vice versa.
So, it’s really not surprising at all that your Keynote animations and transitions aren’t going to convert perfectly into PowerPoint. The best way to go about avoiding this issue is to stick to animations that are present on both apps. For instance, you may want to use either the appear or fade animations. These are available on both apps and are also relatively simple animations.
While fancy animations are available on either app, I highly recommend keeping things simple. You don’t want to give your audience a headache when viewing your presentation!
Now, I’m sure there are other issues that can arise especially when dealing with complex presentations with lots of elements on it. Don’t take your slides at face value – always go through each slide and make sure it’s what you’re expecting.
Solutions to preserve your Keynote slides’ look
I’ve got 3 solutions here that you can follow if you care about how your Keynote slides’ look and want to preserve it for your presentation.
- Convert your Keynote to PDF
While this may not be the ideal solution, you should give this method a try if all you care about is making sure your slides’ appearance remain intact. Each slide will have its own page in the PDF document.
When converting to PDF, all your fonts, images and graphics will be preserved. However, if you have video and/or audio added to your slides, you’re going to lose them. You will also lose all your animations and transitions.
Another good thing about PDF files is that they are highly portable. That is, you can save your PDF presentation on a flash drive, and you can open it on literally any computer!
To convert your Keynote into a PDF file, go to File > Export To > PDF. These are the export options for you to consider:

You can choose to include your presenter notes, print each stage of builds, include skipped files, select the image quality, and add a password to the PDF.
- Convert to video or export Keynote as movie file
There’s a great advantage to exporting your Keynote as a movie file. You not only get to keep the static elements on your slides, you also get to retain all animations and transitions! This is actually the best method you can use if you want to make sure your fancy Keynote animations remain intact!
The downside to converting your slides to video is that you don’t get to control when the slides move on to the next slide. Technically, you can, but you have to do it all in advance when you record your slideshow. You have to time everything perfectly if you want your video and your speech to sync perfectly. In your actual presentation, you can either leave the slides to just play automatically or you can pause the movie from time to time.
To export your Keynote to movie format, go to File > Export To > Movie. Here’s a screenshot of the export screen:
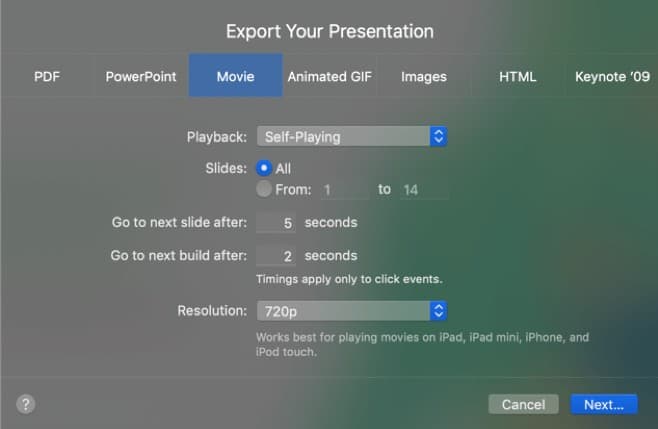
For playback, you can choose between self-playing and slideshow recording. You can also choose which slides you want to convert into a movie, plus you can also control the timings. For resolution, the default is 720p. If you want higher or even custom resolution, click on the Resolution dropdown. You can also select the compression type you want to use for your Keynote movie.
- Convert to images then copy to a new Keynote file
If you’re not looking to convert your slides into PDF or movie format, you should try this third method. This technique works great for preserving the appearance of your slides and you can even add simple slide transitions, but that’s about it. The good thing is all your hard work in Keynote isn’t going to go to waste (except if you add videos to your slides but I’ll give a workaround for that later).
So, here’s how this process works. Once you’ve finished your Keynote presentation, click on File > Export To > Images. You’ll see this Export menu box on your screen:
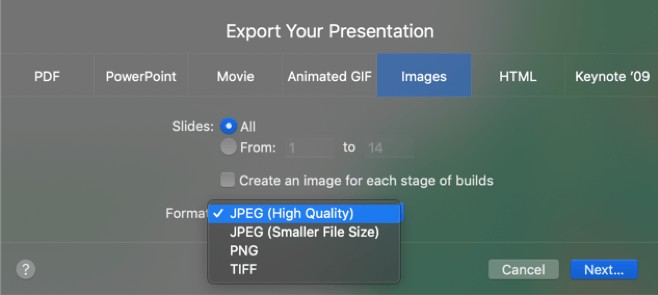
Choose the slides you want to convert to images. Then select the image format you want to use. You can also opt to create an image for each stage of builds, but for this method, you can just leave this box unticked.
Once the slides have been converted to images, you can create a new Keynote file and you can then insert all your new images to the new Keynote. One image goes into one slide.
As you can probably tell, it’s going to look like a duplicate of the original Keynote file. The only difference is the second Keynote is comprised of ‘flattened’ elements. That is, the original elements have been converted to an image. This method will preserve the look of your slides when you do the export process again – this time it will be from Keynote to PowerPoint.
What about if you’ve added a video to the original Keynote? Well, since this isn’t going to get converted to image file, you can just insert the video in the converted PowerPoint file!
Of course, for this to work, you need to have access to PowerPoint. If you don’t have Microsoft Office installed on your computer, you can sign up for a free Office account. Then, you’d be able to access PowerPoint Online for free!
While you can, in fact, insert videos to PowerPoint Online, you’re limited to using only online videos. So, if you absolutely need to insert that video, consider uploading that to YouTube or Vimeo first.
By the way, if you need ideas on how to repurpose your Keynote (or PowerPoint) presentation slides, you should give this article a read!

Final Words
So now you know how to convert Keynote to PowerPoint. It used to be such a laborious task, but fortunately, that’s all in the past now. Apple is constantly updating Keynote to make sure its users get the best of both worlds – the ability to use Keynote and better compatibility with PowerPoint. While it’s still not a perfect conversion process, the converted file is definitely more usable today than it ever has been in the history of Keynote.
You might also find this interesting: PowerPoint vs Keynote: Which Is The Best Presentation Software?