How to Make a Picture Transparent in PowerPoint

Since PowerPoint is mainly a visual aid for presentations, it’s no wonder that images play such a big role in designing one. But sometimes a little bit of editing is needed so your images fit your presentation just right. Here you’ll learn how to make a picture transparent in PowerPoint in 3 easy steps.
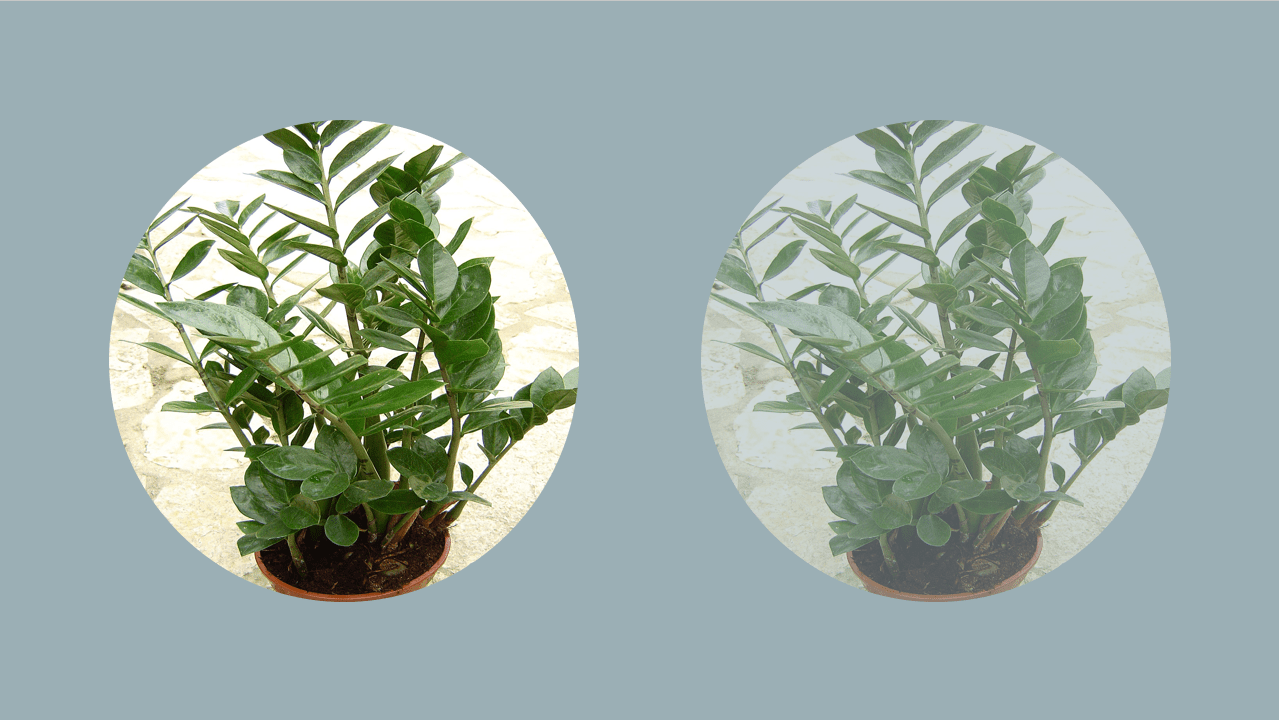
Making a picture transparent in PowerPoint refers to the act of taking a premade picture and altering it so it seems less bright, almost see-through. This is a great option for pictures that are maybe too eye-catching. Pictures are supposed to be an aid for the presentation. However, they can easily become distracting for the audience, turning them to a hindrance rather than an aid.
For example, it can work very well if you want to use a picture as a background for your presentation. In some cases, the picture might get in the way of the text in your slides. If your picture makes your presentation hard to follow, then it’s definitely no good. Luckily, making a picture transparent is a great option for fixing this. Knowing how to make a picture transparent in PowerPoint can help you tune up your presentations. They will look more polished and professional, and it’ll add another great option for your overall design skills.
If you’re working with more than one picture in a slide, knowing how to make a picture transparent in your presentation PowerPoint can also be useful knowledge. You can make them transparent to overlay them. You can even edit just one of them so they’re not competing with each other. Knowing how to make a picture transparent in PowerPoint can become a really useful resource for presentations.

How to make a picture transparent in PowerPoint
Here you’ll find 2 different methods to make a picture transparent in PowerPoint. Take into consideration that each one serves a different purpose, so you might want to read both!

Method 1 for making a picture transparent
This method is for when you want to turn transparent a specific color or part of your picture. For example, the background. This can be extremely useful in cases where you’re working with a specific color palette and the background color of your selected picture clashes with it.
1- Insert your picture and selected it.
2- Go to the Picture Format tab > Colors.
3- In the drop-down menu, select the option Set Transparent Color.
4- Now all you have to do is click on the color you want gone! PowerPoint will immediately make all that same color transparent.
Take into consideration that since this is a pretty automatic process, the results might not be a sharp as expected. The more defined the colors are and the better the picture’s quality is, the better the “Set transparent color” option will work. Otherwise, it might end up looking pixeled and patchy. And no one wants a pixeled picture in its presentation!
Method 2 for making a picture transparent
This method is perfect for those wanting to make a whole picture translucent. Maybe it’s so it works better as a background. Or so it doesn’t compete for the audience’s attention with more important slide elements. In any case, this method will help you edit any picture you choose.

1- Instead of copying and pasting (or inserting directly) your chosen picture, you need to insert a shape. A rectangle will do just fine! You can also experiment with other shapes to customize your picture. You can do so in the Insert tab > Shapes.
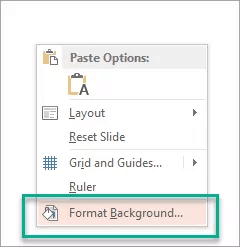
2- Now its time to insert your picture into the shape you just created. Right-click your shape and select the option Format Background to open the side menu.
In the Fill options, select the Picture or texture fill. Now you just have to search your picture. If you pick the File option, you’ll get a File Explorer menu for you to look for your saved picture.
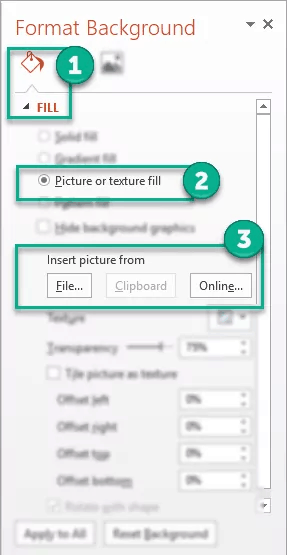
Since pictures on their own don’t have the transparency option, inserting them into an editable shape is what makes it possible to edit their transparency. If you skip these 2 first steps, the transparency option won’t even appear!
3- The shape you had created should now be filled with the picture you chose. And now you can edit the picture’s transparency. In the same side menu, in the Fill options, just below “Insert picture”, you will find the Transparency option.
The best part is that you can pick how transparent you want your picture to be. 50% is usually the go-to, but you can tinker around with the transparency options until you find the one that fits your slide.
It is a pretty straight forward process!
Keep working on your PowerPoint skills!
Even if this kind of edits might seem unimportant, these are the kind of details that can go a long way when making your presentation look more polished. Pictures and visual elements are a big part of PowerPoint presentations, so learning how to work with them is usually time well spent!

If you want to know more about working with images in PowerPoint, here are some amazing tips to help you make an even better presentation.