A Detailed Guide: Working With Text In PowerPoint

PowerPoint without text seems kind of weird, doesn’t it? Sure, you can have a slideshow of images and graphics, and maybe even embed videos on your slides. But without text, your audience will probably be confused about what the presentation is all about. On the other hand, too much text (or a text-based presentation) is not such a great idea either. So, what’s the right way to dealing and working with text in PowerPoint? Continue reading because this is what you’re going to find out in this article!
The power of using text in PowerPoint
The written word has been – and continues to be – a powerful medium of communication. Even with the advent of modern technology, nothing can quite replace text. A message delivered verbally is powerful in its own right. But when you write it down and people can actually see your words, your message becomes even more powerful.
A verbal message can be misinterpreted or misheard, a written one not so much. This is because as humans, we are visual creatures. When we see something with our very own eyes, we tend to believe and accept it as real.
This is why PowerPoint is such a powerful software. It allows presenters to share a visual form of their message. In short, it’s a visual aid. And text is one of the best elements you can use to educate and persuade your audience. With a single word, you can change how others around you think and act. The written message on your slides can influence your audience in ways you may not have thought of.
But there’s a caveat to using text though. Just because it’s a powerful communication tool doesn’t mean you should overdo it on your slides. The truth is that while text is indeed useful, it can also be detrimental when there’s too much of it on slides.
Who in here wants to watch a presentation with nothing but text on it? Do you want to see 100 slides that look like the slide below? Or would you rather be somewhere else doing something more productive?
This isn’t the right way to work with text in PowerPoint!
Slides that look like the above screenshot led to the rise of the phenomenon known as ‘death by PowerPoint.’ So, if you don’t want to ruin a possible career in speaking and presenting, then make sure you use text the right way.
Let’s start with the basics of using text in PowerPoint
In this section of the article, I’ll show you some quick tips to adding text as well as formatting it to make your presentation come alive.
1. How to add text to existing text placeholders
Fortunately, adding text to PowerPoint is a fairly straightforward process. When you first open up PowerPoint on your computer, you’d most likely see the Title slide layout with its two text boxes:
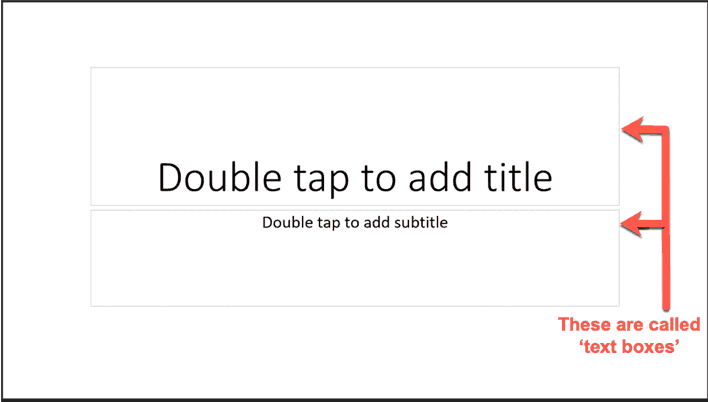
To add text, all you have to do is just follow the instructions on the slide – double tap to add a title or subtitle. All other layouts on the default PowerPoint theme have text boxes. All except for one, the blank layout.

2. Don’t see a text box? Here’s how to insert a text box on your slide
If, for instance, you use a blank layout for your slide, you’d need to add a text box first so you can, well, add some text. You can’t just type something on the slide without adding a text box. To do this, go to Insert > Text Box. You’ll notice that your normal selection cursor will change to a precision cursor. When this happens, this means that you can now draw your text box anywhere on the screen.
Once you’ve drawn your text box, you can start typing anywhere on the box. The default font in PowerPoint is Calibri. If you’re not happy with that and would like to use something else, you’d need to choose something else from the fonts dropdown.
3. Preview how your text looks
Previewing your text is easy. Simply highlight the text you want to edit, then go to Home > Fonts. Click on the fonts dropdown (make sure text is still highlighted). Hover your cursor over the different options and you’ll notice the text will change its appearance. Here’s a sample:
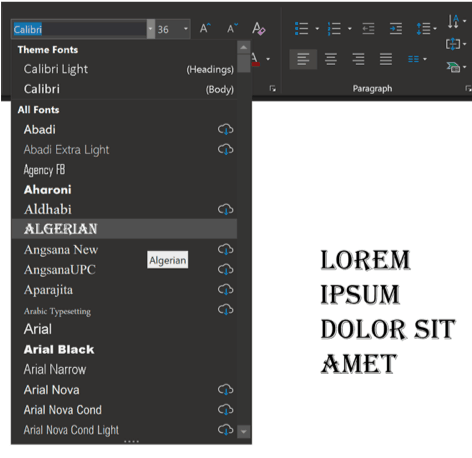
In the screenshot above, I hovered my cursor over the Algerian font, and my text on the slide automatically changed its appearance.
The good thing is you don’t need to click on any font to get a preview. Just hover your mouse and you’ll see which font looks great for your text! If you’re happy with a particular look, then that’s when you click on the font name to make the edit official.
4. How to replace the font used on your slide
There are two ways to go about this. You can either (1) change the font before typing anything, or (2) type something and then change it afterward. The good news is either of this method will result to a new (hopefully, better-looking) font in just a few clicks.
When it comes to font choices, you’re not limited to using whatever came with your operating system. You don’t need to stick to Calibri or Arial or Times New Roman. You can download any font from the web and install it on your computer, so you can use it in PowerPoint.
For free fonts, I highly recommend using Google Fonts in your presentation. It’s open source and you’ve got over 900 fonts to choose from! You can either download your favorite Google fonts manually or you can use a font manager app like SkyFonts.
Just be careful, however, not to go too crazy on the fonts. It’s so easy to nitpick on how fonts look. Before you know it, you’ve wasted hours just going through and comparing various fonts. So, keep things simple if you want to keep your sanity. Pick 2 or 3 fonts for the entire presentation to give it a more uniform and professional look.
5. Want to change the default font for your current presentation?
It can get quite annoying changing the font for every single slide. Imagine needing to create 100 slides, and needing to change the font for every one of those slides! Oh, the horror! I’d probably be pulling my hair out in frustration by the 5th slide!
Fortunately, PowerPoint makes it easy for you to change the default font. Here’s how:
Go into View > Slide Master > Fonts > Customize Fonts, like so:
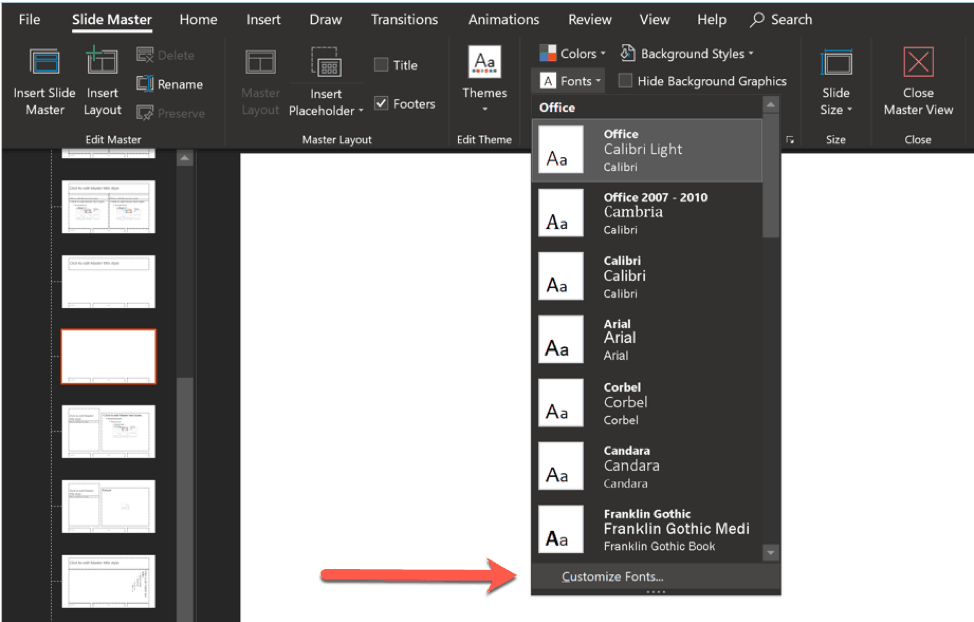
When you click on Customize Fonts, this dialog box to create new theme fonts will appear on your screen:
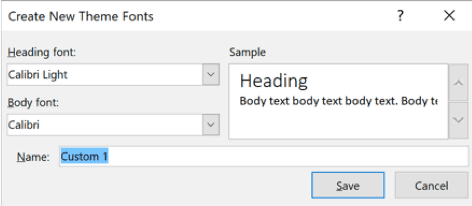
Select your Heading font as well as your Body font. Check the sample box on the right to see if the pair will look good on your slides. When you find the right combination, give your new theme font a name, then hit the Save button. All your slides will now use your new font pair. I you want to use a third font on some of the slides, you can manually do so. Note that this font pair will only be saved in the current presentation. It’s not going to automatically carry over to future presentations.
6. Changing the default font on future presentations
If you want to use the same font pair over and over again in future presentations, then you will need to save it as a PowerPoint template. This is the only way you can avoid going back to Calibri and updating fonts every single time.
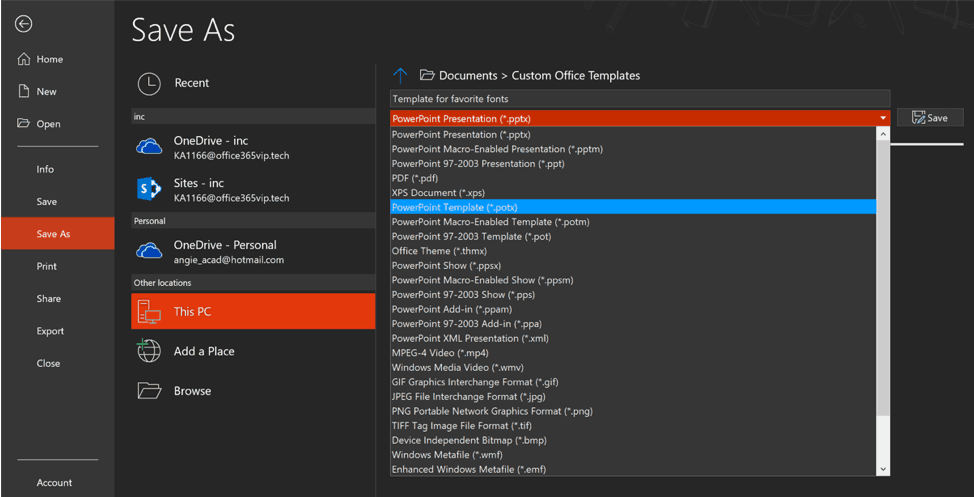
To save a presentation (and your favorite fonts) as a template, click on File > Save As. Navigate to your Documents folder and look for the folder Custom Office Templates. Give your new template a name and make sure you choose PowerPoint Template (*.potx) on the dropdown. Finally, hit the Save button.
Now every time you open a new PowerPoint file, you’ll see a new tab called Personal where your new template is stored. If you’re on an open PowerPoint file, don’t just hit CTRL+N (or Command+N) on your keyboard as it’s just going to open a blank file straight away. Instead, click on File > New, and you’ll see something like this:
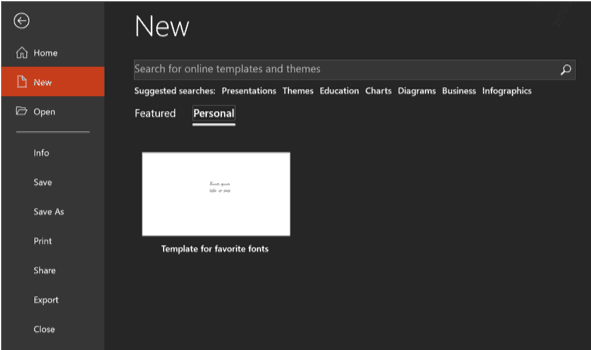
As you can see, my new template named ‘Template for favorite fonts’ is now one of my template options every time I open a new PowerPoint presentation!
Formatting text options in PowerPoint
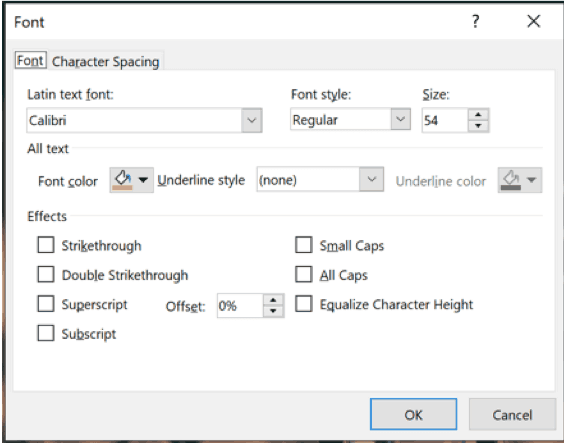
You’ve most likely used Microsoft Word before. If you have, then you’ll feel right at home with PowerPoint’s font options. Let me give you a quick rundown of what you can do to format your text. But first, here’s a screenshot of what the Font box looks like so you can follow through with the tutorial:
(1) The Font Box options
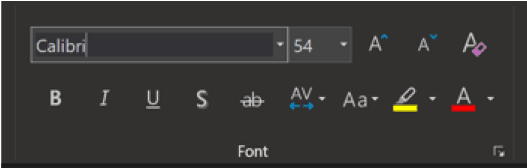
Font box (top row from left to right):
- Font – click on the dropdown to select a new font for your text. Alternatively, if you already know the font you want to use, you can type it directly on the font box.
- Font size – select the font size for your text. For presentations, make sure the font is sized appropriately, that is, it should be readable by everyone in the room. This would be around size 30 or more.
- Increase font size – make your text a bit bigger. Keyboard shortcut is CTRL + SHIFT + >.
- Decrease font size – make your text a bit smaller. Keyboard shortcut is CTRL + SHIFT + <.
- Clear all formatting – click this button to remove all formatting in your text and reset to the default formatting style.
Font box (bottom row from left to right):
- Bold – make your text stand out by making it bold (keyboard shortcut: CTRL+B).
- Italic – italicize your text (keyboard shortcut: CTRL+I).
- Underline – underline the text you want to emphasize (keyboard shortcut: CTRL+U).
- Shadow – click the S button if you want to add a slight shadow behind your selected text.
- Strikethrough – if you want to emphasize how NOT to do something, then the strikethrough button is your friend.
- Character spacing – each font has default spacing, but you can override that in PowerPoint. Here are your character spacing options: very tight, tight, normal, loose, very loose. There’s also a custom spacing option, so you can really position your text based on the look you’re trying to achieve.
- Change case – say you’ve got a bunch of text written on your slide, and you need to change the case all of a sudden. You don’t need to manually retype the entire thing, you just need to change its case in PowerPoint. Options are: Sentence case, lowercase, UPPERCASE, Capitalize Each Word, and tOGGLE cASE.
- Text highlight color – make your text stand out by highlighting it in a bright color.
- Font color – click this button to change the color of your text. You can choose from Theme Colors, Standard Colors, as well as pick colors from a color wheel. There’s even an eyedropper tool, so if you want to copy color from, say, an image on your slide, you can use this tool to quickly edit your text color.
More font options (click on small arrow in the bottom right corner of the font box)
If you need to get more granular control over how your font looks, then you can click on the small arrow in the bottom right corner of the font box. As you can see in the screenshot below, you can select the underline style and color, you can double strikethrough text, add superscript and subscript, and even equalize character height. And in the next tab, you can access the character spacing options for your text.
(2) Paragraph box options
In this section, we will talk about the different paragraph options so you can organize and arrange the text in your slides. Here’s a screenshot of the Paragraph box:
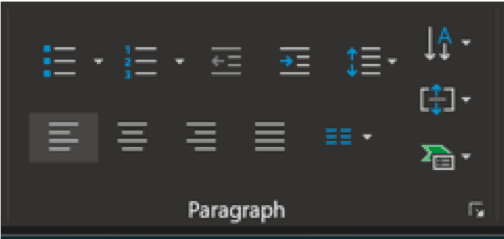
Paragraph box (top row from left to right):
- Bullets – if you want to use a bulleted list on your slide, click this button. If you want to change how the bullet looks, click on the small white arrow beside the bullets icon.
- Numbering – this will help you create a numbered list on your slide. If you want more numbering options, click on the white arrow beside the numbering icon.
- Decrease list level – this will decrease the indent level.
- Increase list level – this will increase the indent level.
- Line spacing – the default line spacing (or the space between lines of text) in PowerPoint is 1.0. Click this button to increase the line spacing to make your text easier on the eyes.
- Text direction – you don’t need to stick to the horizontal way of displaying text. If you want variety, you can play around with the text direction. You can change your text’s orientation to vertical. You can also stack your text and rotate it to your desired direction.
- Align text – change how your text is aligned within the text box. You can align it from left, center, right, left middle, center middle, and right middle.
Paragraph box (bottom row from left to right):
- Align left – click this button to align your text to the left
- Align middle – this will center your text in the middle of your text box
- lign right – this will align your text to the right
- Justify – this will distribute your text evenly within the borders of the text box
- Add or remove columns – the default for text is one column. If you want to add more, you can click this button.
- Convert to SmartArt graphic – instantly transform your text into a nice-looking graphic. This is especially useful if you have a bulleted or numbered list on your slide. But try playing around with plain text, and hover over the different SmartArt graphics to get a preview of how it’s going to look.
Top 10 tips to make your PowerPoint text come alive
Now that you know your way around the different text formatting options in PowerPoint, let me show you a few tips to make your text stand out!
1. Use WordArt to instantly transform your text
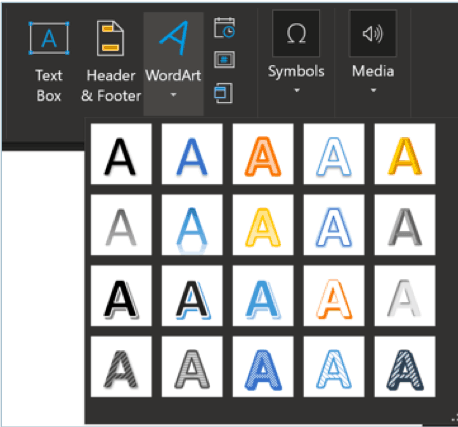
If you want to quickly stylize your text, you can use WordArt to do so. There are two ways to do this:
- You can highlight the text you want to apply WordArt effects to. Then go to Insert > Word Art and select the style you like. PowerPoint will duplicate and apply the WordArt effect to the duplicate text.
- Click anywhere on the slide. Then click on Insert > WordArt and select the style you want. PowerPoint will then display placeholder text on the screen which says ‘Your text here.’ Just type on the WordArt text box and you’re good to go!
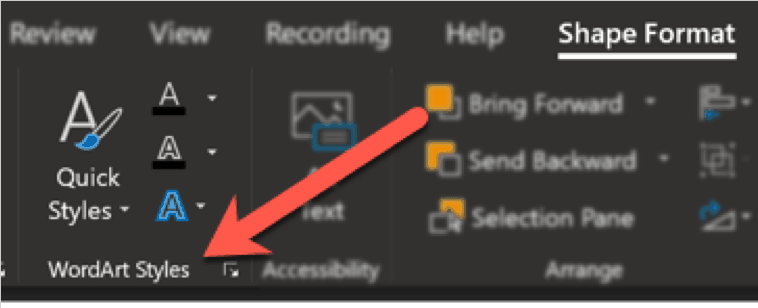
To further customize your WordArt effects, you can click on the text box to access the Shape Format menu. Navigate to the WordArt Styles section and apply Quick Styles, change Text Fill and Text Outline colors. The Text Effects button gives you the power to add shadow, reflection, glow, bevel, 3D rotation, and transform your text into curved or circular WordArt, and so much more!
Here’s a screenshot of the WordArt Styles menu:
2. Animate your text
Animation is great at keeping your audience engaged, but make sure you use it in moderation. A little bit of text animation can go a long way. Highlight the text you want to animate, then go to the Animations tab. You can choose from entrance, emphasis, exit and motion paths animation in PowerPoint. Here’s a guide on how to add animations to PowerPoint.
3. Adjust text direction inside text box
Bored with horizontal text direction? Well, you can make it so that your text is rotated 90 degrees, 270 degrees or stacked. To do this, you can right-click on the text you want to edit, and click on the Format Shape option. The Format Shape panel will appear on the screen. Go to the Text Box section, and in Text Direction, select the direction you want to use.
4. Curve your text around a shape
If you want to achieve a different look for your slides, try curving your text around shapes. Of course, you don’t need to do this for every shape, maybe do this once or twice on a few slides. Whether you have a circle or a square or any other shape on your slide, it’s relatively quick to curve text around it. Check out this YouTube video if you want ideas on how to implement this design:
5. Use Format Painter
There are so many ways you can format your text in PowerPoint. But did you know you don’t need to manually apply the same formatting to a new line of text? I’m sure you can imagine how stressful it would be to apply the same text formatting to 20 or 50 other slides! To copy a text’s format, here’s what you need to do:
- Highlight the text with format you want to copy.
- Click on the Format Painter button in the Home > Clipboard menu.
- Click on another line of text to apply the formatting to.
- If you want to copy the same format to multiple texts, just double click on the Format Painter button. Note that you can apply the format to text in other slides as well. Hit the Esc button on your keyboard to stop using Format Painter.
6. Duplicate text
Here is a nifty PowerPoint text feature. This works similar to Format Painter, but with a twist. If you don’t want to worry about the different text effects you’ve applied to your original text box, you can use the Duplicate text feature. Basically, what happens is that PowerPoint will duplicate the text including the formatting. So, now all you need to do is just replace the text with something else and your formatting will be in place.
This tutorial may help you understand this feature better:
7. Best font size and color to use
When it comes to presentations, making sure your text is legible is key to success. You don’t want to spend too much time making your text look fancy, but can’t be read by people at the back of the room. So, when working with text, you should consider the following:
- The right font – there are so many fonts to choose from. You can choose from free fonts and premium fonts. You can use whatever’s installed on your computer. However, if you’re looking for something new (and free), then I highly suggest you check out Google Fonts. It’s easy to download and install the fonts on your computer so you can use it in PowerPoint. If you’re going to be presenting on another computer, make sure you embed your fonts in the presentation so it’s going to appear exactly like you’re designed it.
- The right font color – for visibility, you want your text to contrast nicely with the background. This means if you’re going to be using an image as background for your text, then choose color that will make the text stand out in the foreground. Now, don’t even think of using green text on a red background (or vice versa). There may be contrast between red and green, but for text, it’s a big no-no. Here’s a tutorial on how to pick the right colors for your next presentation.
- The right font size – you don’t want people squinting at your slides. That’s just going to annoy them big-time. If you want people to take you seriously, then you need to consider their eyesight in return. Before you even design your slides, you should know beforehand where you’re going to be presenting. When you’re armed with this knowledge, you can then figure out the perfect font size so everyone can read whatever’s on your slides.
8. Overlay text on an image
Pictures add so much value to presentations. This is because as humans, we are very much visual creatures. As the old adage goes, a picture paints a thousand words. But did you know you can hit two birds with one stone by overlaying your text on an image? Here’s how.
9. Use drop cap
Give your text a dramatic look by using the drop cap technique. Basically, what happens is you make the first letter of the paragraph or section large enough to contain the rest of the text. While PowerPoint doesn’t have this feature baked in, Word does. So, if you don’t want to manually do a drop cap on your slide, you can just copy your drop cap text from Word and then paste it into PowerPoint.

(Image source: https://support.office.com/en-us/article/insert-a-drop-cap-817fd19f-40fe-4b73-95e8-f3c0f5e01278)
10. Check Design Ideas tab
The design ideas tab in PowerPoint has a lot of tricks up its sleeve. Go on and surprise yourself by typing out some text and adding some images on your slide. Then go to Design > Design Ideas. Note that you need an Office 365 subscription to use this feature in PowerPoint.
It’s important to mention as well that this feature doesn’t work with shapes yet. So, if you have shapes on your slide, you’re going to get a message saying shapes aren’t supported. But once you remove the shape(s), you’ll get a bunch of ideas from PowerPoint! Whether you use text and images, or just text or image, Design Ideas will help you boost your creativity. So, try it out and see how you can make your text (and the rest of your slides) come alive!
Final thoughts on working with text in PowerPoint
Text is important in presentations. But you’re not supposed to just type out your content on your slides. You don’t want people just reading your slides and not paying attention to you. When you use text properly, it can magnify your message and make it easy for people to understand what you’re telling them. It can help support the images and other visual media on your slides. That said, don’t underestimate the power of text and use it to your advantage in your next presentation.
You might also find this interesting: 30 Amazing Things You Can Do And Create In PowerPoint