How To Make Amazing YouTube Intros and Outros In PowerPoint

You probably already know PowerPoint is a very powerful presentation software. But did you know you can also use it to make amazing YouTube intros and outros? Now you don’t need to worry about spending hundreds of dollars to have a professional-looking video intro or outro created for you. With a bit of inspiration and some basic PowerPoint knowledge, you can actually create your very own YouTube intros and outros in PowerPoint!
What Are Video Intros and Outros Anyway?
For those who aren’t sure what intros and outros are, here’s a simple explanation:
Intros. Basically, intros are the YouTube video introduction. It’s that short 5-10 seconds or so at the start of the video that introduces the channel or YouTube personality. It would usually be something eye-catchy to draw you in and encourage you to continue watching. It’s usually accompanied by some nice music as well.
The first few seconds of a video are extremely important. If you start off with no intro, you’d look like a total amateur. And the thing with YouTube is that you have tons of competition. If you want people to watch your videos, you need a good introduction. It doesn’t have to be fancy, but it has to at least stop people from hitting the close button on their browser!
For instance, many YouTube content creators use a simple logo reveal and pair it with some catchy background music. It doesn’t have to be all that complicated. Check out channels in your niche and see what your competitors are doing.
Content is, of course, important too. But a good intro can do a lot of wonders for your brand. Your intro is your video’s ‘hook.’ So, it’s a good idea to make sure it represents your brand and the kind of content you produce on your channel. An effective intro will hook people into staying and watching your video.
According to YouTube itself, the first 15 seconds of a video are crucial. Within this timeframe, your viewer is going to decide if it’s worth staying around for the rest of the video or not. So, make your intro count!
Outros. The word ‘outroduction’ doesn’t exist; outro is just a word play on intro. It’s usually shown at the very last part of a video. It can be as simple as showing the channel name or logo on the screen, and then have it fade to black. Or it can be a call to action, like asking people to like the video or subscribe to the channel. A video that ends abruptly is not that uncommon. But your audience will appreciate that short outro to let them know they’ve reached the video’s conclusion.
That being said, the right intro or outro will help make your video stand out on an overcrowded platform like YouTube. Of course, it’s not the only factor at play. You’d also need to work on creating an eye-catching video thumbnail, and write up some captivating title as well. But having that amazing intro will help draw in more viewers to your channel. And a good outro can help you direct traffic to your other videos or even your website. In a nutshell, both are powerful branding tools for your business, so use it to conquer your target audience.
Why Use PowerPoint To Create YouTube Intros and Outros?
There are plenty of tools you can choose from to create your YouTube intros and outros. There are free ones and there are paid ones. All of these apps have their pros and cons, including PowerPoint.
Now, PowerPoint is a highly versatile software. It’s been THE presentation software for decades and it doesn’t look like any of its competitors are going to take over soon.
With that said, PowerPoint is also a powerful graphics creator. It’s got a ton of features that other software can only dream of. And since PowerPoint is highly accessible, that is, most computers already have a version of PowerPoint installed. It’s a great option to have for creating your very own YouTube intros and outros.
If you don’t have PowerPoint on your computer, I highly recommend you sign up for a Microsoft Office 365 subscription. You’ll get all the latest updates from Microsoft, so you can make even more amazing presentation slides, and YouTube intros and outros, of course!
Some Important Tips Before You Get Started
Here are a few tips you should take note of before you start working on your intro or outro video:
- First impressions are everything
Don’t you just love YouTube videos with captivating intros? They hook you in right from the very beginning, and before you know it, you’ve reached the end of the video! You obviously want the same thing for your videos. You want people to stay until the very end, so you need to think of an intro that will get them to stay.
Videos are all about the visual experience. It’s just like meeting potential clients or customers for the very first time. You want to put your best foot forward and impress them. You want to gain their trust. The same thing goes for YouTube. You’ve got so much competition online, you definitely need to think outside the box. Get people to stay and watch your awesome content.
- Plan out your intro/outro
Just like when you’re creating your presentation slides, it’s best to create an outline of what you want your intro or outro to look like. Plan out the text and animations you want to use, so you don’t spend too much time cleaning up and editing the video.
For example, what text are you going to use? Will you do a voiceover? Will you use a video or picture of yourself? Or will you download some stock photos from the Internet? Your intro may be just a few seconds long, but it’s absolutely essential for your video’s success.
Also, you should definitely factor in how many seconds you want your intro to last. You don’t want it to be too long because people are definitely going to get bored. And you don’t want it to be too short because people may not understand what your video, channel, or brand is all about. In short, you want your video to be just the right length. Five to ten seconds should be enough for most intro videos, so try to aim for this length.
- Don’t be afraid to look for inspiration
There are plenty of free resources on the web. It doesn’t have to be YouTube. But if you intend to publish on YouTube, then it’s best to check out what other creators in your niche are doing.
For example, if you’re in the pet grooming business, you can check out other pet grooming channels on YouTube. Watch their videos and see if you can do a better intro or outro than them.
Utilize your resources. If need be, you can ask a third party to check out your new creation and ask for some feedback. The point is that your video is going to be accessible to anyone. You want to impress them and give them a warm welcome to your channel!
- Use your logo and/or brand colors
Your intro should clearly identify who you are and what you do. It should define your channel and what kind of content people can expect from you. A logo reveal is super popular and serves its purpose very well.
The point is that your fans should be able to associate your intro with your brand. Make yourself stand out in people’s minds. If you favor primarily blue colors in your brand, then use the same shade of blue in your intro or outro video.
If you have a slogan, use it in the video as well. Don’t have a slogan yet? I highly recommend you get a catchy one, something that will stick in people’s minds!
A Practical Example of a Video Intro Made With PowerPoint
Here’s your step by step guide to creating your very first intro or outro for YouTube. For inspiration, I followed this 9-second intro video made by Michael Cao:
It’s simple enough and is fairly easy to recreate. Now, obviously, this sample video was made with Adobe Spark. But for tutorial purposes, I’ll show you how you can make a similar intro using PowerPoint.
But first, let’s break down the various elements used in the video, so it’s easier for us to recreate.
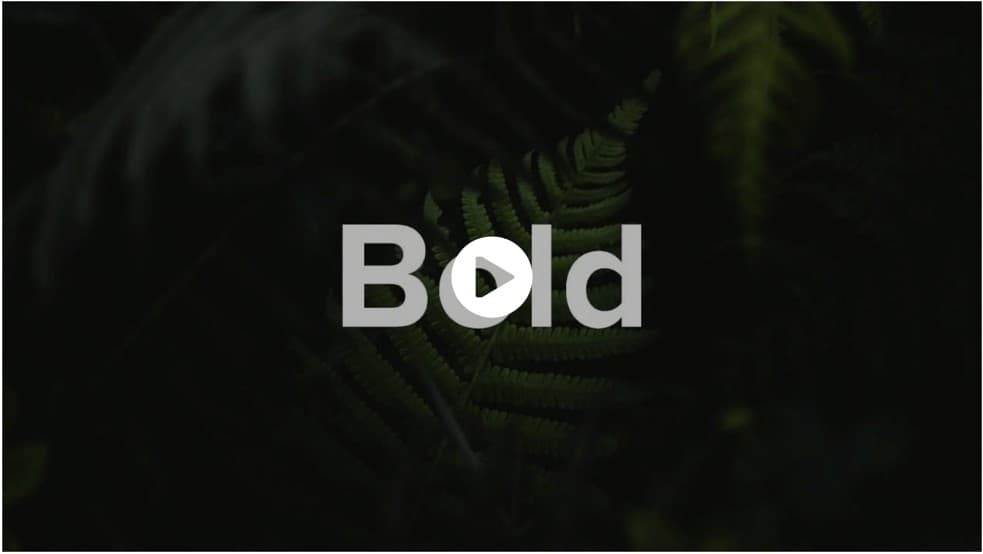
- 0:01 – fern background with text ‘Bold’
- 0:02 – fern background with text ‘Looks’
- 0:03 – fern background with text ‘With’
- 0:04-0:06 – girl background with text ‘Carolina’
- 0:07-0:08- fern background with text ‘Carolina’s Beauty Vlog’
- 0:09 – fade to black
Alright, let’s begin!
Step 1. Download a nice photo you can use as background image. For this example, I searched Unsplash for ‘fern leaf’ photos because I want the final product to look as close to the sample video. Here’s what I downloaded:

Photo by Nick Cooper on Unsplash
Step 2. Add the image as your background in PowerPoint. You can do this by clicking on Design > Format Background. Alternatively, you can also right-click on any blank space on the slide and then click on the Format Background option.
The Format Background panel will appear on the right side of your screen. Click on Picture or texture fill. Then click on Insert picture from file and locate the file you just downloaded from Unsplash (or wherever your source was).
Here’s my new slide background:

Step 3. The background image is a bit too bright. In the sample intro video, you can see the background image is a bit dark which makes the white text stand out. So, what we’re going to do is we’re going to overlay a rectangle shape over our background.
Go to Insert > Shape and look for the rectangle shape. Then draw it over the entire slide.
Next, select No Outline. For Shape Fill, select a dark color. For this example, I chose black. Now, doing this will obviously make the background image disappear completely.
So, you need to change the transparency level to something that will still show the image underneath while at the same darkening it by a few degrees.
You can play around with the transparency slider until you find the effect you’re looking for. In this instance, I set the transparency to 40%. This is what my new background looks like:
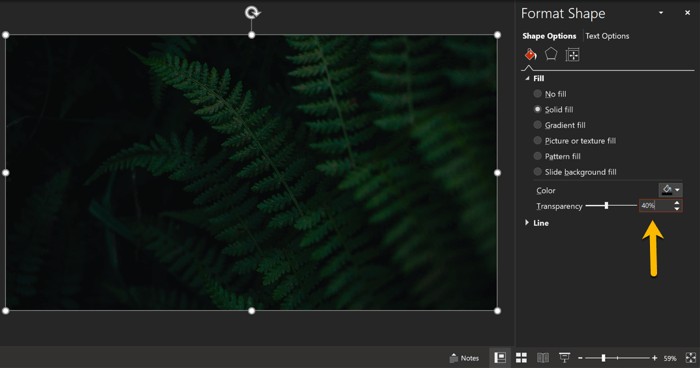
As you can see, the image is now a bit darker and looks more like our sample intro video. This will make the text stand out more.
Step 4. It’s time to add our text to the slide. In the sample video, the creator used the following text on the same background image: (0:01) Bold, (0:02) Looks, (0:03) With.
Click Insert > Text Box and type in the first word, Bold. I used the Arial font, and set the font size to 150.
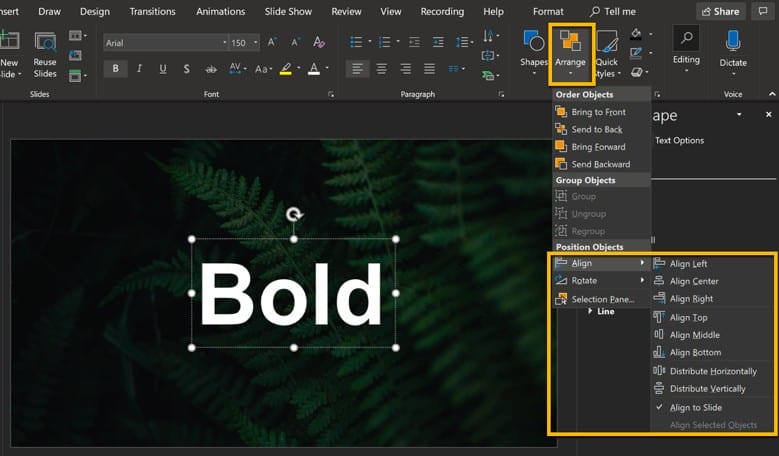
To center the text right in the middle of the slide, click on the text bar until the Shape Format tab appears. Then look for the Arrange button and click on Align Center and Align Middle.
Make sure as well that the Align to Slide option is ticked. At this point in time, the text now lies in the center and middle of the slide.
Step 5. Next, let’s add the other 2 words that uses the same background image. To make your life easier, you can just copy and paste the first text box and just replace the text. Then center and align the text.
What’s going to happen is you’ll have 3 text boxes stacked on one another. This can get confusing quickly, so you should open up the Selection Pane. You can do this by clicking on Home > Arrange > Selection Pane.

As you can see in the screenshot above, the text on the slide is now unreadable. But don’t worry though. Thanks to the selection pane, you can hide or show elements by clicking on the eye icon. Doing so will allow you to rename the elements, so it’s not something generic and confusing like Text 1, Text 2, and so on.
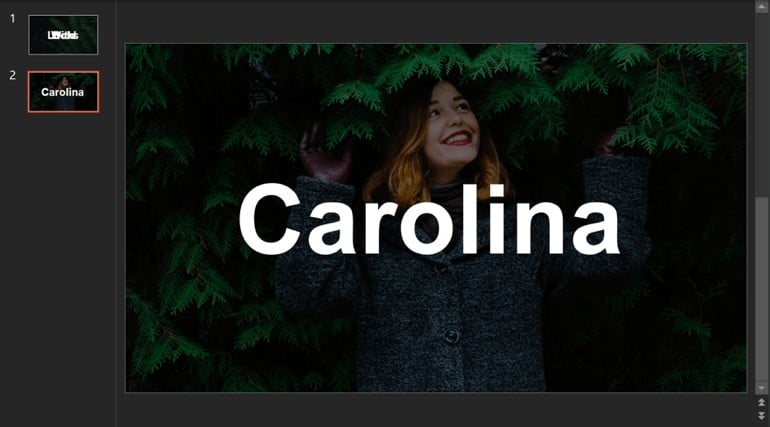
Step 6. In this step, we’re going to work on the second slide, and we’ll need to download an image of a girl with leaves. Here’s the closest thing I could find on Unsplash:

Photo by Inna Lesyk on Unsplash
So, I added a new slide in PowerPoint and added this new image as the background. Again, the image is a bit too bright, so I’m going to add another rectangle shape and overlay it on the image. Just like in the previous slide, I also set the shape’s transparency to 40%. Then, next, I added the text ‘Carolina.’
Tip: If you don’t want to format the text all over again, you can use the Format Painter tool in PowerPoint.
Here’s the resulting slide:
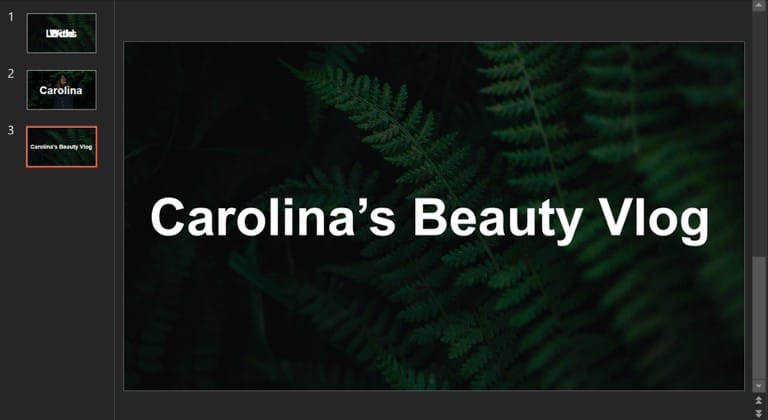
Step 7. In the original video, you can see that the creator re-used the first background image for the last sequence (0:07-0:08). So, I’ll need to add a third slide and use the first image as background again. Then, I’ll add the final text ‘Carolina’s Beauty Vlog.’
Alternatively, you can just copy and paste the first slide. Make sure you use the correct paste option, Keep Source Formatting. Once you’ve copied the first slide, remove the 2 text boxes (there are 3, remember?), and edit the remaining box to say ‘Carolina’s Beauty Vlog.’
You’ll notice that in the original video, the phrase ‘Carolina’s Beauty Vlog’ is in a single line. At 150pt Arial, the entire phrase isn’t going to fit in the slide. So, you’d need to make the font size smaller. I set the size to 80 and it managed to fit perfectly. Here’s the outcome:
Step 8. Now that we’ve designed all 3 slides, it’s time to make the whole thing come together. At this stage, we’ll be applying the animations and slide transitions. You can use the Selection Pane to hide/show elements to work on one element at a time.
Alright, so for slide number 1, here are the animations used:
Slide #1:
Slide transition – Fade
- Effect options – Through black
- Duration – 01.00
Animations:
- Text box 1 (Bold)
- Exit animation – Disappear
- Start – After previous
- Duration – 00.01
- Delay – 00.50
- Text box 2 (Looks)
- Entrance animation – Appear
- Start – With previous
- Duration – 01.00
- Delay – 00.00
- Exit animation – Disappear
- Start – After previous
- Duration – 00.25
- Delay – 00.00
- Text box 3 (With)
- Entrance animation – Appear
- Start – With previous
- Duration – 01.00
- Delay – 00.00
- Exit animation – Disappear
- Start – After previous
- Duration – 00.25
- Delay – 00.00
Slides 2 and 3:
For these slides, we’ve only got a single text box on each, so we’re not going to spend too much time animating these. We’ll stick to applying a simple Fade slide transition effect on both slides. I set the effect option to fade smoothly instead of having it fade through black.
Step 9. Let’s add some music into our PowerPoint file. You can actually do this step later when you import your PPT video into a video editor like Camtasia or Final Cut Pro. Anyway, adding music is really easy. I wrote a detailed guide here, so you should go check it out: How to add music to PowerPoint. I also included links to where you can download some free stock music for your intro video.
Step 10. Now that we’ve applied our slide transitions and animations, we’ll need to rehearse our slide show timings. We’ll be converting our PowerPoint file into video format, so the timings are important.
Go to Slide Show tab and click on Rehearse Timings button. You can follow the guide on this short YouTube video to help you record and rehearse your intro video.
Remember, our sample intro is only 9 seconds long, so we don’t want to end up with a video that’s longer than that. I think shorter is okay, however, so try to aim for a short video.
Step 11. So, now we’ve got our slides all set up. We’ve added music and we’ve also set up our slideshow timings. It’s time to export our PPT file into video format. Go to File > Export > Create a Video. Select the video size (Full HD or 1080p is good enough for YouTube). Make sure you choose the ‘Use Recorded Timings and Narrations’ on the drop down list. Then hit the ‘Create Video’ button.

You’ll be asked to name your new video file and the location where you want to save it. Wait a few seconds and you’ll have your new intro video!
Step 12 (Final step). Now that we have our new intro video, we will need to use a video editing software to stitch our videos together. So, the formula usually looks like this:
Intro video + main video + outro video = YouTube video
There are some good free video editors out there. Most of them will allow you to drag and drop video clips and photos, and add music to create your YouTube video. Some apps do come with a learning curve, so you may need to spend a few hours getting yourself up to speed. Check out Oberlo’s list of 22 free video editing software you can use right now.
And that’s it! We’ve just re-created the sample 9-second intro video in 12 not-so-easy steps. It’s certainly doable, but it’s not going to be quick and painless, especially if you’re relatively new to PowerPoint.
PowerPoint not for you? Here are some alternatives…
PowerPoint isn’t for everyone. Recreating a short and simple 9-second intro video can take anywhere from 30 minutes to an hour, or more. If you don’t want to go through all the steps above to create a short and simple intro or outro video for YouTube, then the good news is there are a lot of good alternatives out there. Here are some of the top ones:
Use a video intro maker app
Some of the apps on this list don’t require any technical know-how. Drag an element here and there, apply some animation, hit save and download, and ta-da! You’ve got your intro!
That being said, not all free intro creation apps are created equal. Some apps give you full control over the creation process, that is, you can add your own media files to the app. Adobe Spark is a good example of such an app. You can choose from pre-designed layouts and themes, add your own voiceover or any audio file of your choice.
Other free apps like Render Forest, Animaker, Biteable, and Video Creek offer a much more limited experience. You get a free intro, but it would have the app’s branding or watermark on it. Some apps limit the length of the video, the number of free intros you can make in a month. Others only allow you to download a low resolution version; if you want HD quality, you’d need to pay for it. Price varies from per video to monthly or annual subscription basis.
Download a video intro template
Whether you use free or premium video editing software, you’ll find plenty of video intro templates on the web. The most popular free video app seems to be Blender. If you use this software, there are lots of sites that offer free templates. For premium video apps like Adobe After Effects, Final Cut Pro, Camtasia, you’ve got a ton more free and paid options.
The good thing with using templates is that you have something that’s already ready-made. And with just a few clicks you can customize it and make it your own. The downside to this, of course, is that there may be hundreds or even thousands of YouTube intros out there that will look like yours.
Hire a professional video maker
If you want the best for your channel, and you’ve got the cash to spare, then hiring a professional is definitely the right step for you to take. You can tell a professional what your vision for your channel is. And they should be able to help you come up with ideas that will adequately reflect your brand and your message. Fortunately, there are plenty of places online where you can hire an expert. You can do a Google search or you can visit some freelance sites like Upwork or Fiverr, and look for a talented freelancer who can help you out!
Are you ready to make your YouTube intros and outros in PowerPoint?
Knowing how to make amazing YouTube intros and outros in PowerPoint is a skill not too many people have. If you’re willing to take the time to learn, you can apply this skill to not just make videos, but to also make your presentations super interesting! Get your video intro right and you’ll get far more video views than you’ve ever dreamt of. This, in turn, will have a positive effect on your channel. If you’re looking to monetize your YouTube channel, then this could lead to more dollars for you!
You might also find this interesting: How To Work With Multiple Images In PowerPoint