PowerPoint 101: The Ultimate Guide for Beginners

Feeling stuck with PowerPoint? We all have been there—needing a quick design but not knowing where to start or feeling overwhelmed by the endless features. The good news is that once you learn how to use PowerPoint effectively, it becomes a powerful tool for creating presentations that truly stand out.
Millions of users worldwide use Microsoft 365 services, making PowerPoint the presentation design software with the highest market share. And with good reason! PowerPoint's features stand out for its usability and originality.
In this article, we will cover the key PowerPoint basics, showing you how to make professional and eye-catching slides easily. Whether you're just starting out or looking to improve your skills, by the end, you'll feel confident creating presentations that impact any occasion.
Let's see what you're going to learn today with this PowerPoint Guide:
- What is PowerPoint?
- What are the best uses of PowerPoint?
- PowerPoint Basics: What are the components of PowerPoint Workspace?
- Mastering PowerPoint: What are the main features of PowerPoint?
- What are PowerPoint templates and where to find them?
- Time to practice! How to make a presentation in PowerPoint?
- Designing in PowerPoint isn’t for you? We have the solution!

What is PowerPoint?
Microsoft PowerPoint is a presentation design software included in Microsoft 365. This software allows you to design presentations by combining text, images, graphics, video, and animation on slides in a simple and intuitive way.
Over time, PowerPoint has evolved and improved its accessibility to users. For this reason, it has been adapted to the main operating systems and modalities:
- Windows
- MacOS
- iOS
- Android
- PowerPoint Online
Additionally, you can use Word and Excel in this online version. That way, you can make real-time changes in the cloud without fearing losing your files. Sounds great, right?
What are the best uses of PowerPoint?
PowerPoint has a versatile range of uses.
If you're wondering how to use PowerPoint for different tasks, here’s a list of the things you can create with this presentation design software:
- Business presentations or Pitch decks.
- Marketing, Sales, and HR plans.
- Project briefs and timelines.
- Inductions to new employees.
- Seminars and educational classes.
- Professional portfolio of photos or designs.
- Presentations of a research summary.
- Presentations for special occasions.
These are just a few examples of the multiple possibilities this Microsoft software offers. Your imagination is the only limit!
Stay tuned as we continue with this PowerPoint 101 Guide...
PowerPoint Basics: What are the components of PowerPoint Workspace?
In order to deeply understand this presentation design software, you need to recognize its main components. To master this tool, we must start with the PowerPoint basics!
A quick note before going any further: when opening PowerPoint, some of the commands in the ribbons will look grayish, and they won’t highlight when you hover the mouse over them.
This happens since some commands need to be selected to function. For example, if you want to change the color of a text, you first need to select it.
That being said, let's start with this Guide for PowerPoint beginners:
PowerPoint Main Window
The first aspect to learn is PowerPoint Main Window. To facilitate the explanation, we've organized its main elements with numbers from 1 to 10:
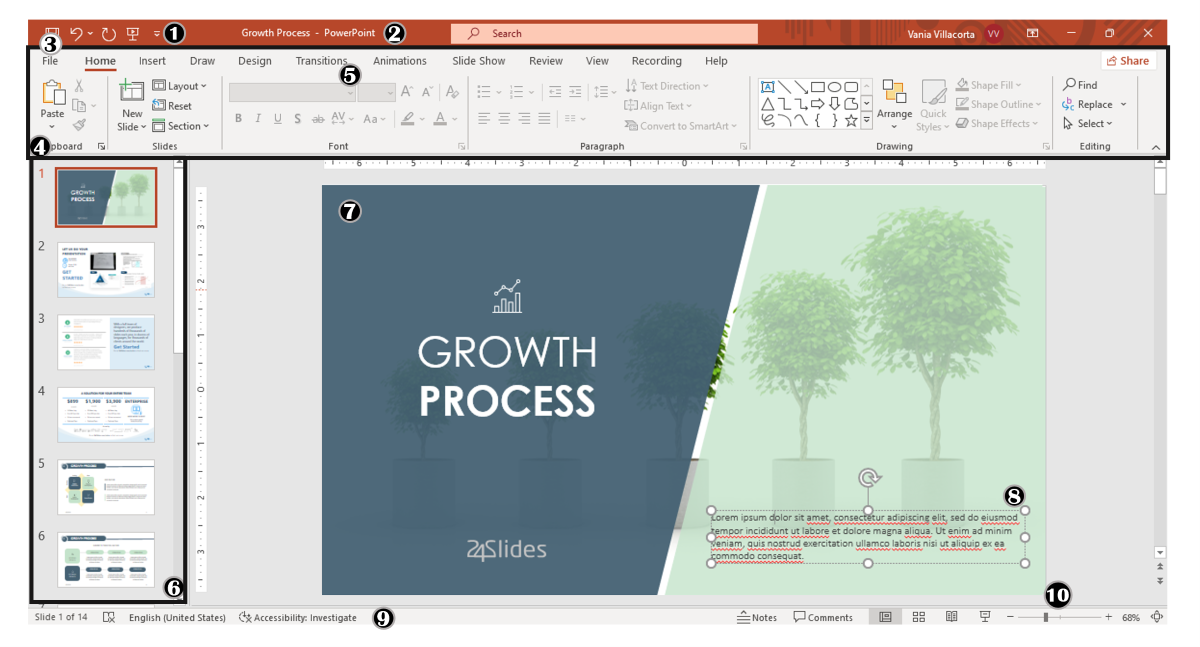
Based on that, the main components of PowerPoint window are the following:
1. Quick Access Toolbar: This toolbar allows you to customize commands so that you have them at hand. To do so, you only have to select it and go to "More commands."
2. Title Bar: This bar shows the name of your file and other "Suggested options," like Slide Master View. The options you get will vary depending on how you use the commands.
3. File Tab: You’ll see the Home Menu (PowerPoint backstage) by selecting this tab. There you can create a new presentation, save it, print it, export it, and many other options.
4. The Ribbon: It’s where PowerPoint tabs and tools are. These tools can also be called "commands" or “features”.
5. More Button or Down Arrow: These arrows allow you to view more tools or layout options.
6. Slides Pane: This pane shows your slides in thumbnail size. Right-clicking each slide allows you to perform more actions. It's perfect for PowerPoint beginners!
7. Slide: It’s PowerPoint's blank canvas and the frame that will be seen when presenting the file.
8. Placeholders: They are the dotted boxes that store your content.
9. Status Bar: This bar allows you to view the slide number, grammatical errors, speaker notes, and comments on your file.
10. Zoom: It allows you to enlarge or minimize your PowerPoint workspace. The range is 10 to 400%.
PowerPoint Tabs
The PowerPoint tabs are the control desk of your presentation. Since PowerPoint's features are too many, they're organized in tabs.
You can switch between tabs as you need. Once you click on a tab, it will open its ribbon, and there, you'll be able to see all the tools related to that particular category.
This PowerPoint tutorial for beginners will give you an overview of all PowerPoint tabs. Here you have them:
- Home Tab
- Insert Tab
- Design Tab
- Transitions Tab
- Animations Tab
- Slide Show Tab
- Review Tab
- View Tab
- Recording Tab
- Help Tab
1. Home Tab
The Home tab is the most common tab of PowerPoint. This is the tab you’ll probably use most if you’re designing your own presentation deck from scratch.

It allows you to add new slides and change the text characteristics: font, size, boldness, underlining, alignment, etc. If you've ever used Microsoft Word, these features will be familiar to you.
You will also find commands to edit the characteristics of the geometric shapes you insert. These include fill color, line color, and shape effects, among others.
2. Insert Tab
The Insert tab is exactly what its name suggests. This ribbon contains all the options for adding a new element to your PowerPoint presentation.

You can insert a picture, some geometric shapes, icons, or WordArt graphics, among other things. This tab is really helpful for PowerPoint beginners!
For example, if you have a lot of data in PowerPoint, you could add a chart or diagram to show your information in a more visual way. You can also embed videos or music into PowerPoint really easily.
- PowerPoint tip for beginners: To be able to write text on your slides, you need a text box. So, if you're designing your presentation from scratch, remember to go first to the Insert tab and add a text box to start writing.
3. Design Tab
If you are one of those people who enjoy choosing the design of a PowerPoint presentation, this tab will be your favorite.

The Design tab offers a wide range of premade designs, which will allow you to create more polished slides. Even better, this ribbon allows you to adjust the color palette and change the overall style of your PowerPoint deck.
The PowerPoint interface, as this basic PowerPoint Tutorial, is really intuitive. We believe that you won't have any problem with this tab!
4. Transitions Tab
Using transitions in PowerPoint is a dynamic way to move from one slide to the next during a presentation. This feature is PowerPoint's stamp, so don't miss it!

Some PowerPoint transitions are really classic, like wiping the old slide to present the new one. Others are somewhat over the top, like the “Vortex” or the “Airplane” effect.
If you click on each kind of transition, you’ll see a preview of how it would look when presented. Really cool, right?
5. Animations Tab
In case you want to add special effects for certain elements in your slides, the Animations tab in PowerPoint will interest you.

Like the Transitions tab, you will find various animation effects in this ribbon. It's a matter of trying and choosing the best one according to your needs!
6. Slide Show Tab
As its name says, the Slide Show tab is about presenting your slides. We really like that it gives you several options to show up your presentation!

Considering that you're a PowerPoint beginner, you're not likely to use the Slide Show tab very much.
But if you're curious about this command, you must read our article: How to Make a PowerPoint Slideshow that Runs Automatically?
7. Review Tab
The Review tab is not often used by PowerPoint beginners either.
However, if your job is related to writing or if you work at an international company, this tool can be extremely useful!

With this tab, you can check the slide's spelling, translate the text in real-time, and add comments to your slides. This last function can be helpful to give feedback to a colleague.
8. View Tab
This View tab allows you to change the view of your PowerPoint slides and make handouts from them, among other things.

As you can see, the majority of its commands are really specific. So you won't have any issues while designing; test and see!
In this section, our favorite command for PowerPoint beginners is Slide Master. Explore more about this tool in our guide!
9. Recording Tab
In the last versions of this design presentation software, PowerPoint added the Recording tab. As its name says, it allows you to record all your presentation slides.

This ribbon has advanced commands, so the most common action for a PowerPoint beginner is to take a screenshot or record the screen sequentially.
10. Help Tab
Finally, there’s the Help tab. If you have any problems or questions about using PowerPoint, you can go here to find a solution.
In the latest versions, Windows has added a “Show Training” option. You can click this command to practice the PowerPoint basics since it will download training templates.

We want to conclude this section of our article by saying that, as a PowerPoint beginner, you must recognize the objective of each PowerPoint tab to master the software.
The next objective is to dominate its most important features. We’re here to make it possible!
Mastering PowerPoint: What are the main features of PowerPoint?
This section is for you if you're ready to explore PowerPoint's tools in more depth.
As you may know, 24Slides specializes in creating outstanding presentations for any Design Project. So, we asked one of our experts about her favorite PowerPoint features, and we're excited to share them with you!
Carmen Navarrete, Graphic Designer at 24Slides, highlighted the following features that will make your presentations stand out from the crowd:
PowerPoint Feature #1: Crop to Shape
This first PowerPoint feature is simple but effective!
Let's see how to use it:
- First, choose an image you want to cut and insert it into your workspace.
- Once inserted, select it with the mouse.
- Go to the "Picture Format" tab.
- Press the arrow of the "Crop" button (right side of the screen).
- Select "Crop to Shape."
- Choose your favorite shape and customize your PowerPoint presentation!

PowerPoint Feature #2: Merge Shapes
If you don't like any figure enough, you can create one from scratch!
This is possible thanks to the "Merge Shapes" option. Follow these steps to unleash your creativity:
- First, choose an image you want to cut.
- Check the list of PowerPoint shapes (Insert tab > Shapes).
- Choose two or three figures you want to merge (they can be the same figure).
- Select the figures you are going to merge (see the image).
- Once selected, go to the "Shape Format" tab.
- Press the "Merge Shapes" option and the type of merge you want (test and choose!).
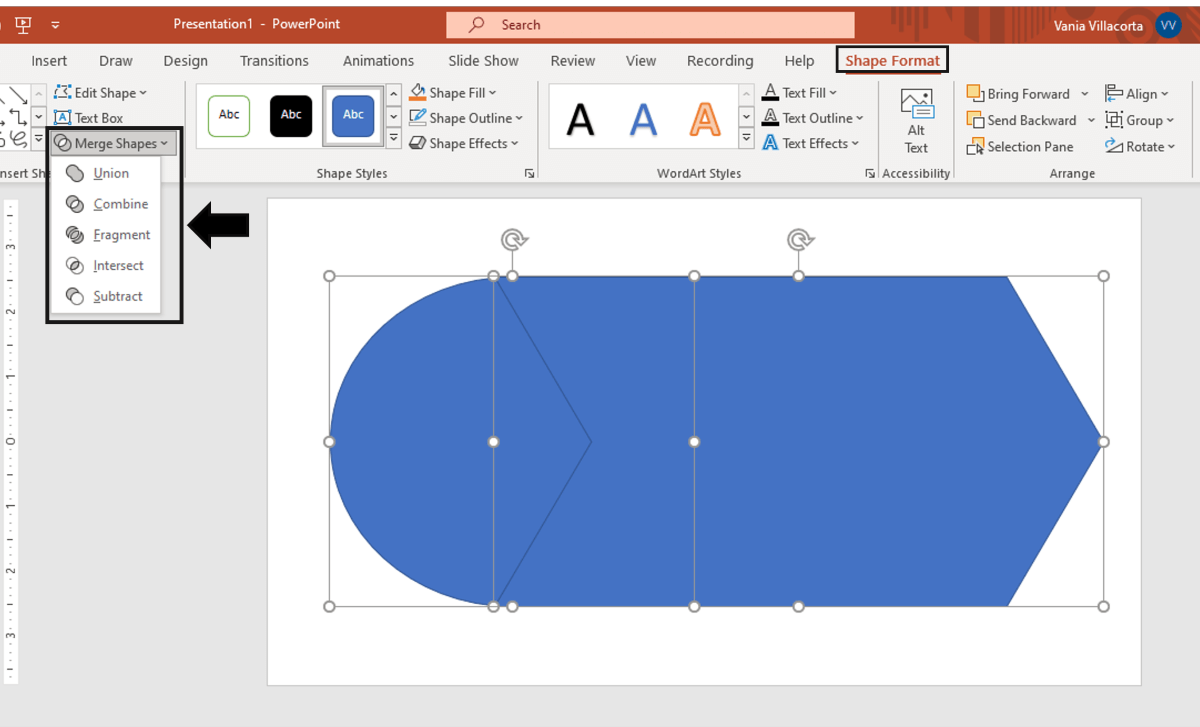
- A new figure will appear, and you must fill it with the image from the first step.
- Stay on the Shape Format tab and go to "Shape Fill" (button in the middle of the ribbon).
- Select "Picture Fill" and browse for your image.
- Select the image to fill your new figure, and that's it!

- PowerPoint tip for beginners: When your merged figure is ready, paste the image to the background of your slide to achieve a better result. This way, you can use your image as a canvas and see if both elements fit well.
PowerPoint Feature #3: Insert Icons
This PowerPoint feature is quite easy to follow for PowerPoint beginners!
Just follow these steps:
- Go to the Insert tab.
- Select the "Icons" option.
- A Microsoft 365 library will open, where you can search for the required icon.
- Now, you must insert it into your presentation and adapt it to your design.
- If you have an active Microsoft 365 subscription, you'll have access to a larger number of icons in PowerPoint.
- PowerPoint tip for beginners: If you want to learn more about icons in PowerPoint, read our article on How to Use Icons to Make Amazing PowerPoint Presentations.
PowerPoint Feature #4: Insert SmartArt
PowerPoint's SmartArt is one of the most popular and accessible tools to dominate while learning about PowerPoint basics.
To use it in your slide deck, you must:
- Go to the Insert tab.
- Select SmartArt.
- See all SmartArt categories and choose your favorite based on your needs.
- Add the text you have prepared and adapt it to your presentation.
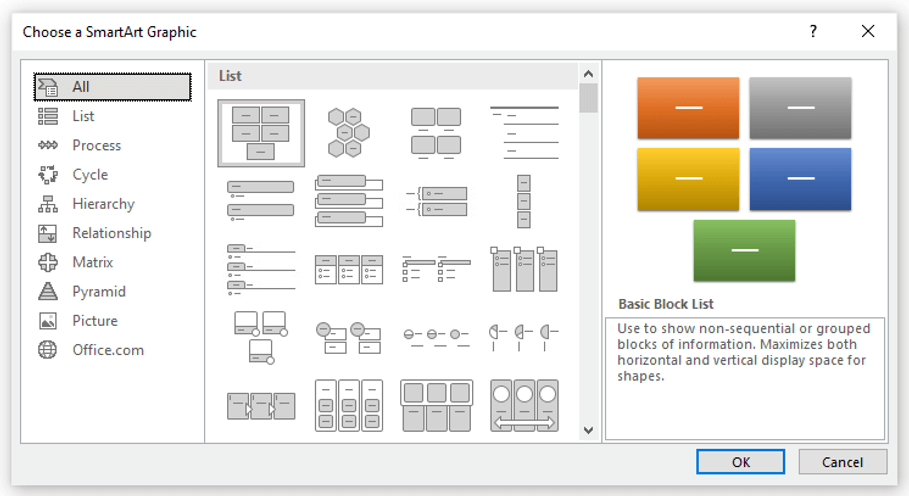
We want to give you some ideas to master this SmartArt tool in PowerPoint: you can make timelines, flowcharts, and even a Venn diagram in just a few seconds. Try and see!
PowerPoint Feature #5: Remove Background
If you don't know how to use Photoshop and want to remove the background from an image, in this PowerPoint 101 Guide, we show you how:
- First choose the image you want to remove the background from.
- Insert the image in the PowerPoint workspace.
- Select the image and go to the "Picture Format" tab.
- Select "Remove Background" (first option on the left).
- You can keep and remove parts of the image with the first two tools of the ribbon (see image).
- Keep in mind that all the sections highlighted in purple will be deleted.
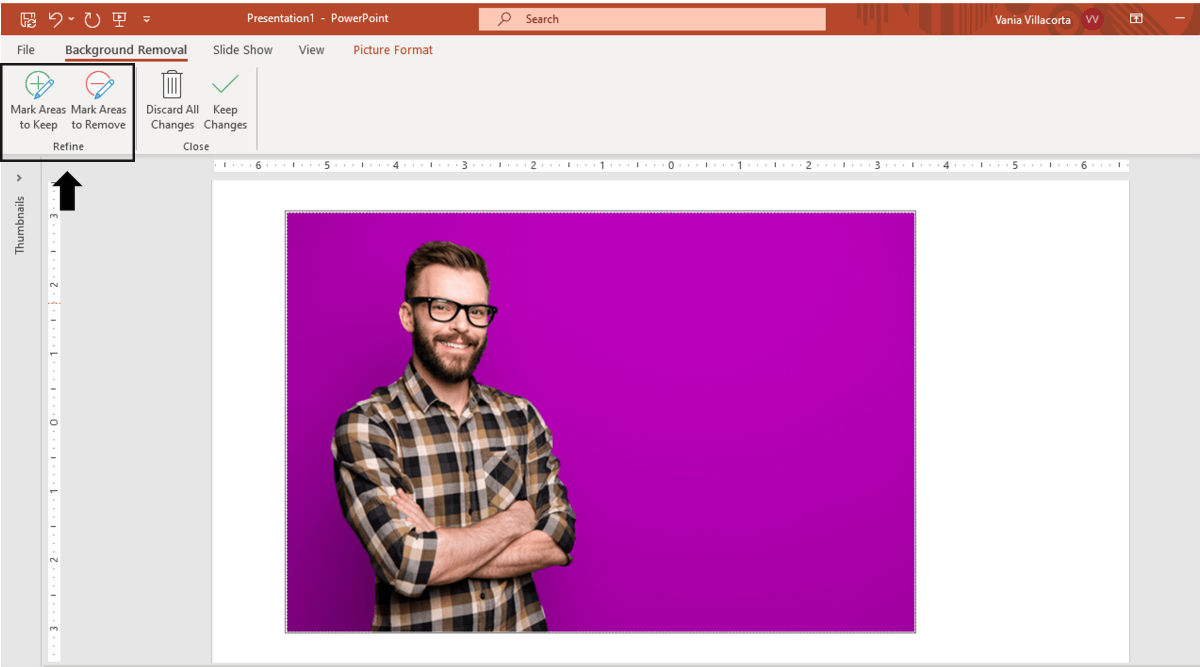
- We recommend zooming in to keep or remove parts of the image with more detail.
- Once you're done, press the "Keep Changes" button.
- Finally, adapt the new image to your PowerPoint presentation.

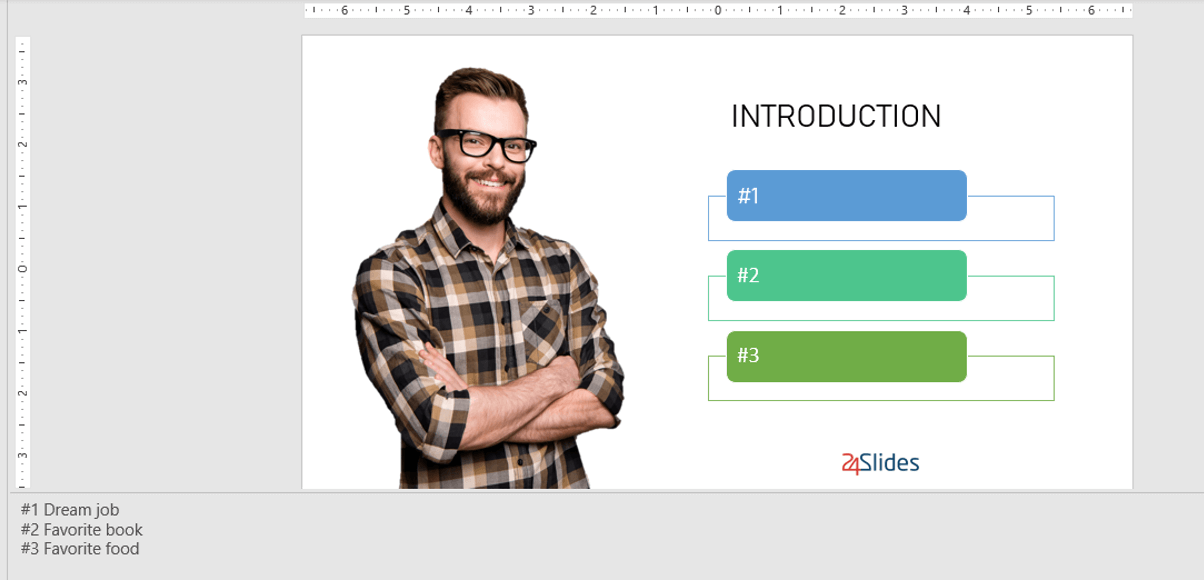
- PowerPoint tip for beginners: Choose a high-contrast photo or image for best results. In other words, the outline of the person or object you want to cut out must have clear edges and cannot blend with the image's background color.
PowerPoint Feature #6: Add Speaker Notes
The latest PowerPoint feature is a command you can use to prepare your speech before presenting to an audience.
Learning how to add speaker notes in PowerPoint is simple:
- Select the slide that needs some notes.
- Usually, there is a footer below the slide, but if not, you will have to activate it.
- Go to the View tab and select "Notes."
- The Speaker Notes section will appear, and you can add whatever you want!
- PowerPoint tip for beginners: In case you want to practice your entire presentation and have a lot of notes, go to the View tab and select "Notes Page" (fourth command). You'll be able to see all your Speaker Notes faster!
PowerPoint Feature #7: PowerPoint Translator
If you've ever wondered how to translate your PowerPoint Slides, we'll explain the step-by-step here:
- Go to the Review tab.
- Select the text you want to translate.
- Press the “Translate” button.
- A panel will open on the right side of the screen.
- Choose the language you need, and you'll see the translation in real time.
- If you press Insert, the text will change to the new translation!
PowerPoint Feature #8: Screen Recording
The process of recording your screen in PowerPoint is straightforward and intuitive. Let's see:
- Go to the “Record” or “Recording” tab.
- Press the "Record Slide Show" button or the “From Beginning” button (depending on your PPT version).
- A new window will open.
- Select the red record button and start recording!
- When you're done, select “Export.”
- By default, the video will be 1080 px. If you want to lower the video quality, go to "Customize export."
- Name the video, save it to a folder and that's it!
As you may have noticed, this software has endless PowerPoint design options for beginners. We encourage you to try and test each functionality!
However, we're clear that PowerPoint has different features, so it can be hard to know where to start. That's why understanding PowerPoint basics is crucial if you truly want to master this software.
Our PowerPoint 101 Guide continues; stay tuned to discover more great stuff about this Microsoft software. Keep reading!
What are PowerPoint templates and where to find them?
A PowerPoint template is a pre-made design that you can use for your own means, and that will save you a lot of time.
Templates in PowerPoint are a great resource for designing since all the structure is already done, and you only have to update the content. We can tell you they're the perfect resource for PowerPoint beginners!
They can be incredibly specific. For example, there are templates for a SWOT analysis or a complete Marketing report. Otherwise, templates can also be very general, with several slides with a similar design.
If you struggle with the artistic part of designing presentations, downloading PowerPoint templates will be a life changer!
How to download PowerPoint templates for free?
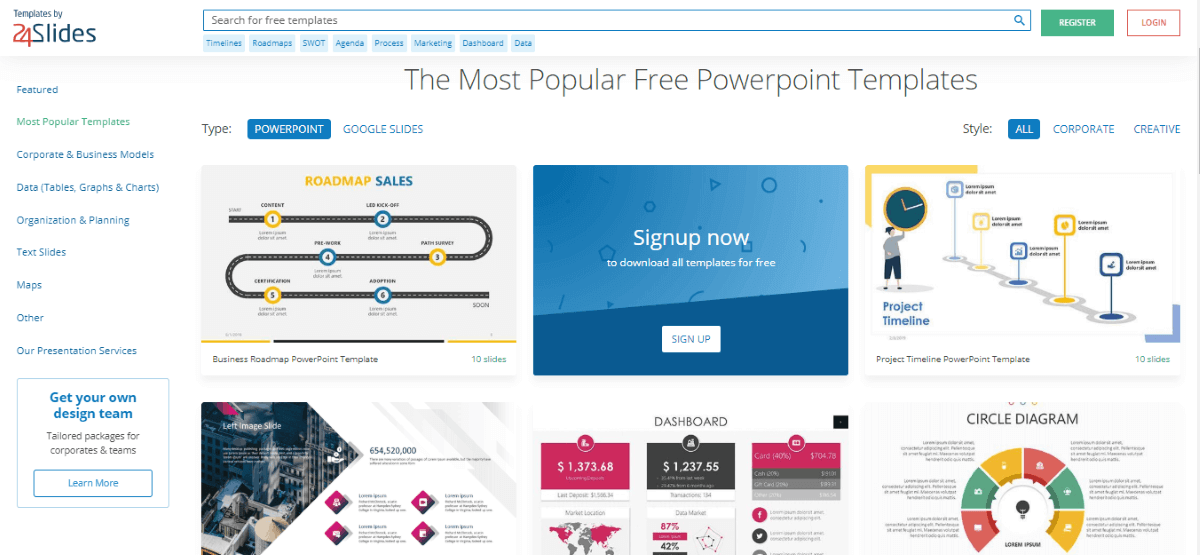
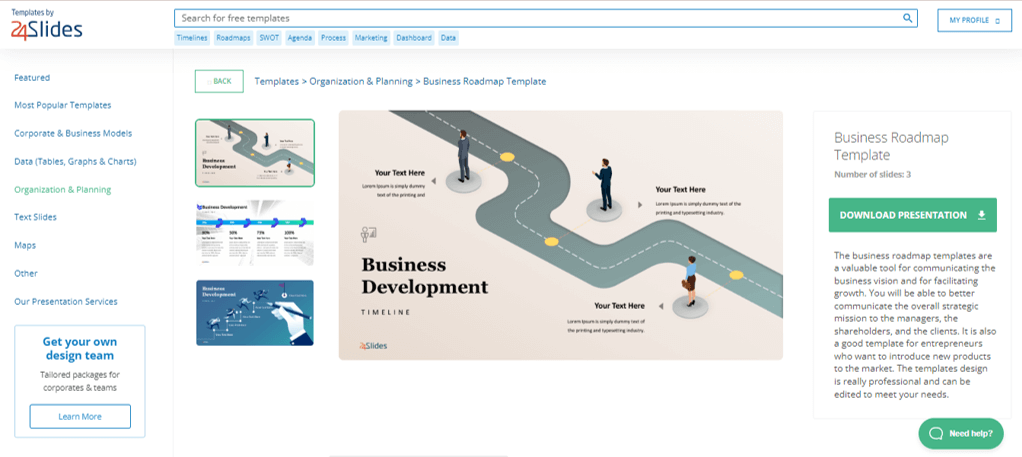
If you didn't know, 24Slides has an extensive repository of PowerPoint templates. But how to obtain them? It's really simple:
- First, create an account on our Free Templates Website with the button “Register” (that way, you can download everything without problems!).
- Think about the graphics you need and the ideal structure for your presentation deck (you can also change the color palette later!).
- You can download it in PowerPoint format (or, if you prefer, Google Slides format, which is also available in our repository).
- Edit and change everything you need for your PowerPoint presentation!
At 24Slides, our designers specialize in creating business and corporate PowerPoint presentations. However, you’ll also find a variety of other templates on our website, including data templates, timelines, roadmaps, matrices, diagrams, and more.
Keep in mind that a well-designed PowerPoint deck helps you communicate stronger messages to your audience. Don't waste this opportunity to make your presentation shine!
If you want to learn more about how to master PowerPoint, do not miss the last section. We'll show you some PowerPoint basics from the software itself!
Time to practice! How to make a presentation in PowerPoint?
A PowerPoint 101 Guide wouldn't be that useful with no examples. So, if you enjoy the step-by-step guides, this section is for you.
Now we want to show you how to make a simple PowerPoint presentation. But first, here are some tips to be more efficient in the process:
- Be clear about what type of presentation you're going to create (is it corporate, playful, or more creative?).
- Make a draft with the most important information you need to add and, thus, generate a good structure in your presentation.
- Get inspired by examples on the internet, but adapt them to your needs and audience.
- If you will create a business presentation, keep in mind your brand identity.
- Make sure your PowerPoint works, you may need to update to the latest version or pay for the subscription.
Step 1: Make a draft to structure your presentation
As we said before, writing a draft or script of your content will be vital to start on the right foot as a PowerPoint beginner.
This advice is so important that we choose it as the first step to learning how to make a PowerPoint presentation. Remember: Planning is key!
Regarding the process of planning, we share some good practices:
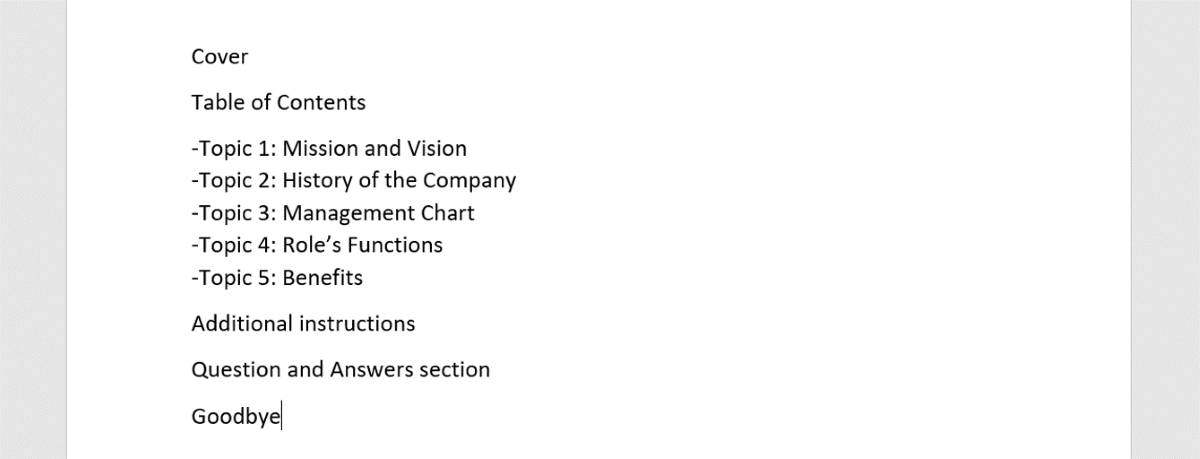
- If your presentation will be very long, write down all subtitles and content in a Word document. This will help you organize your ideas and give a correct sequence to your narrative. In addition to avoiding redundancies in the message you want to communicate.
- If your presentation will use many visual resources, we recommend choosing high-quality images. This will help you have a starting graphic base. Some good free image repositories are Freepick, Unsplash, and Adobe Stock.
- If your presentation is based on data, have all your results summarized or your most relevant conclusions at hand. The idea of making a PowerPoint presentation is to show your information in the simplest way possible for your audience.
Step 2: Create a new document in PowerPoint
Once you check that all the functions are working fine with the software, please open it and go to the File tab. If you've ever used Word or Excel, you'll probably find this Home Menu familiar.
In short, this is the main page of PowerPoint, where you can create a new presentation or open an older one. Let's see:
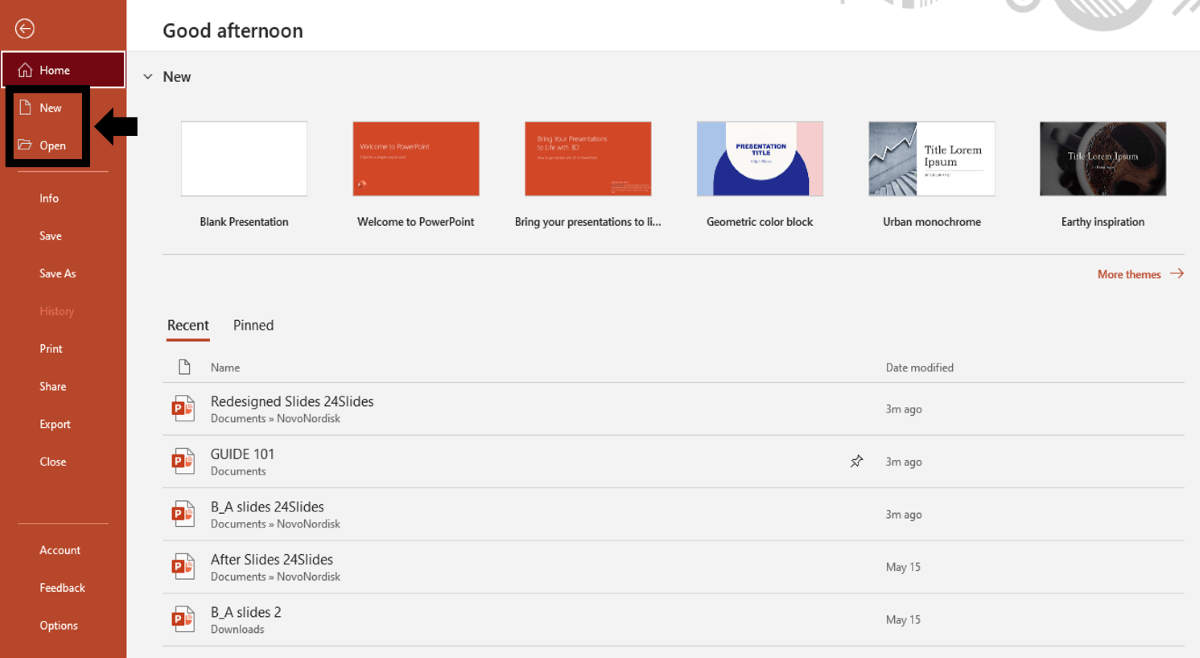
In order to follow this part of our PowerPoint Tutorial correctly, take into consideration the following points:
- On the lower side of the screen, you'll find your recently opened PowerPoint files. This option is great for saving some time.
- If you don't find the presentation you're looking for, click on the “Open” option at the left bar and find older files.
- Don't forget to save your presentation with a relatable name so you won't lose sight of it!
Step 3: Choose the perfect design for your presentation
With your information ready in a draft, it's time to choose the design of your PowerPoint slide deck. You must imagine that the available design options are endless!
For practical reasons, you have three options regarding the design:
- Start a design from scratch (very difficult for a PowerPoint beginner).
- Choose an established PowerPoint design or layout.
- Download a PowerPoint template and modify some details.
Don't worry if you don't know how to continue! In this PowerPoint 101 class, we're going to explain step-by-step how to design with an established PowerPoint design or layout:
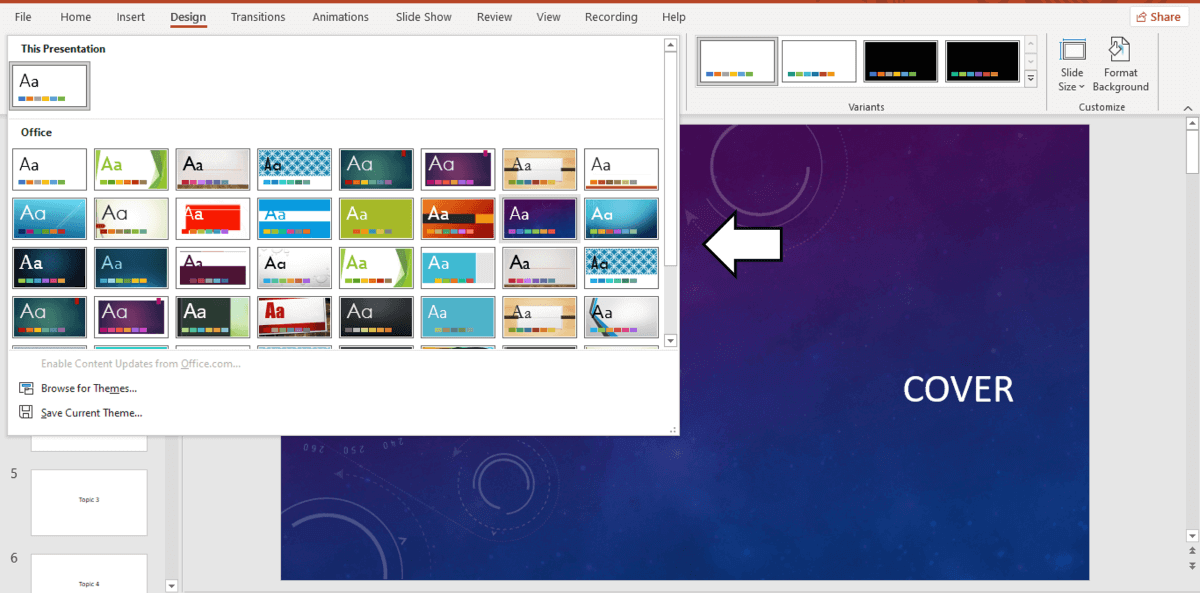
How do you set a default design in PowerPoint?
- First, go to the Design tab.
- Open the list of options by clicking on the third arrow.
- Choose the design you like the most for your PowerPoint presentation.
If you want to explore more PowerPoint designs, there is a way to research online. For that, you only need to:
- Go to the File tab (first tab, next to the Home tab).
- Select "More themes" (see image).
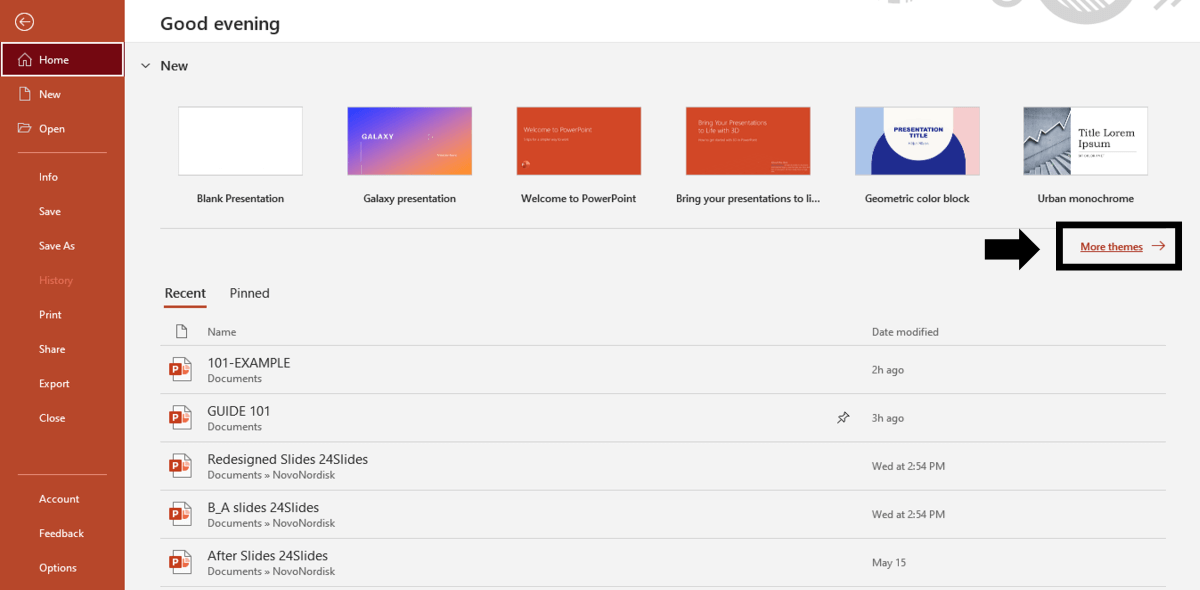
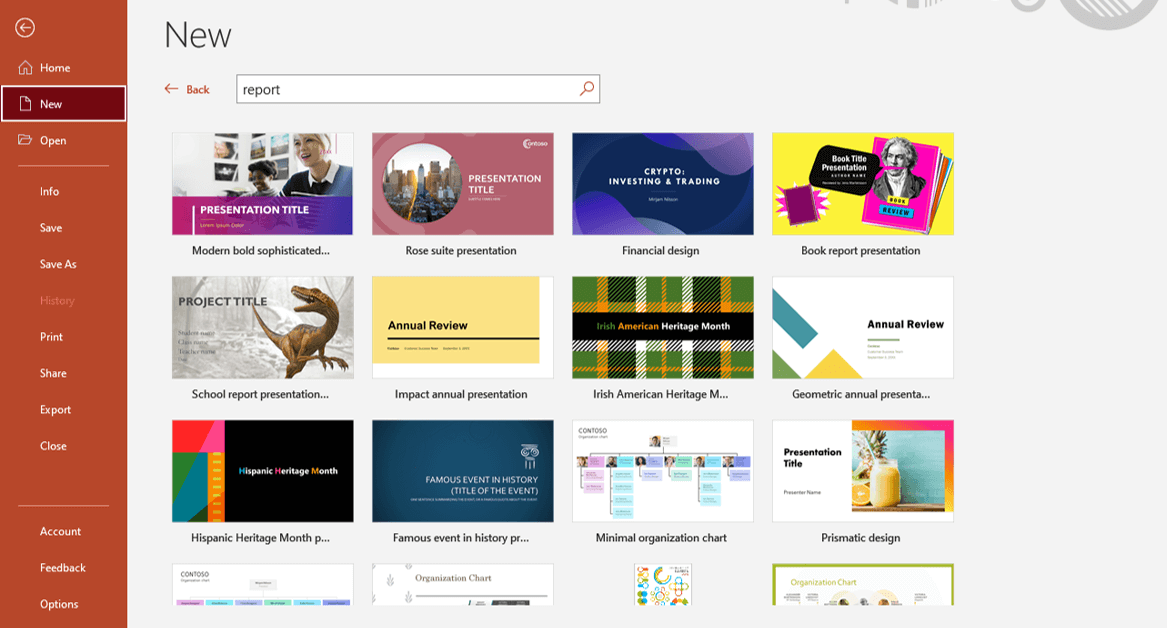
- Use the search engine and write the keyword you want (it can be related to your business or it can be a color).
- Check the list of PowerPoint themes and choose your favorite.
- Wait a few minutes while it loads and keep designing in PowerPoint!
How do you change the layout of one slide in PowerPoint?
In this PowerPoint 101 Guide, you will also learn how to configure the layout of each slide.
Keep in mind that to have a high-impact presentation, you must adapt your slides' design to the type of content you'll add. And using layouts is perfect for this purpose.
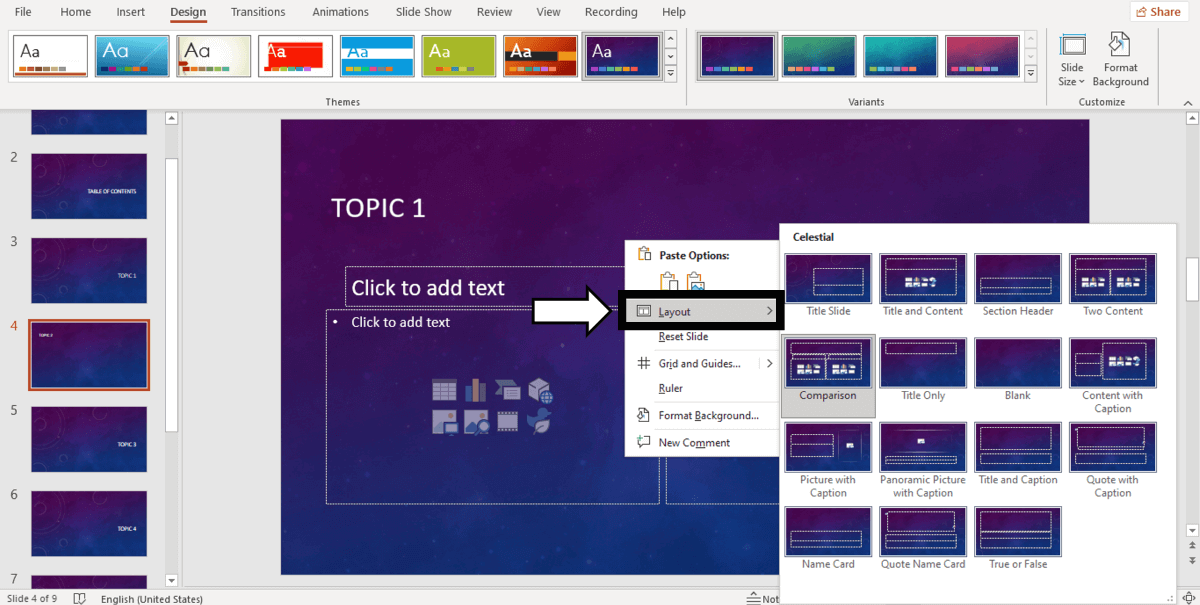
To change the layout type in PowerPoint, follow these steps:
- Right-click on the slide you want to change.
- Select the "Layout" option.
- You will find more than ten layout models.
- Choose the one that best suits your content.
- Repeat these steps for each slide (if you wish or require).
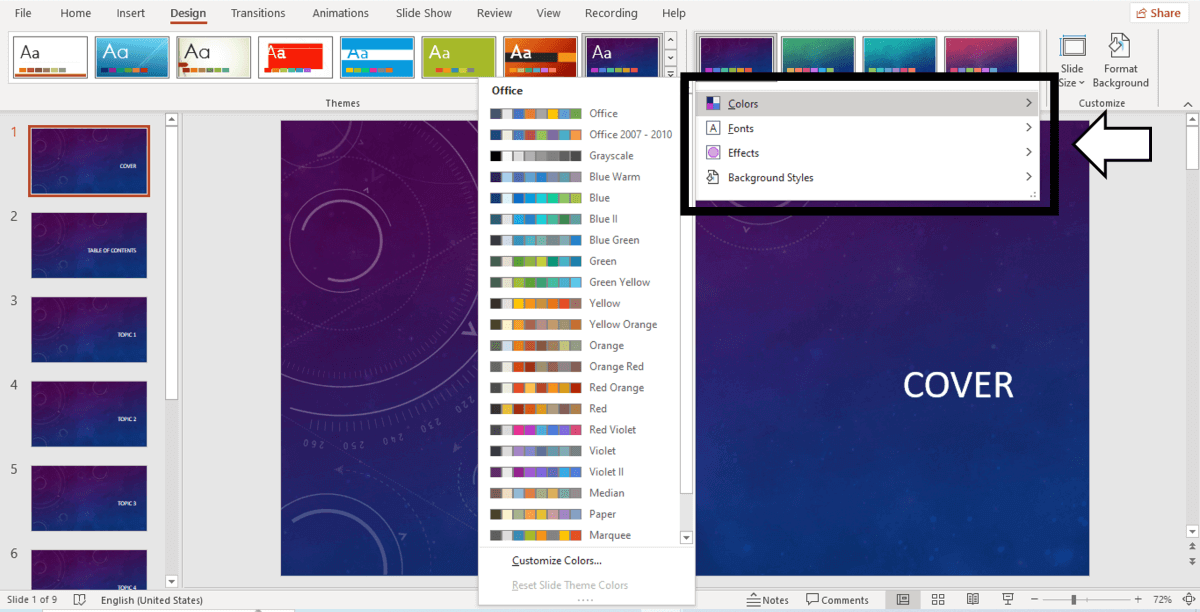
How do you customize your slides in PowerPoint?
The design process in this PowerPoint 101 Guide doesn't stop there.
You also can customize your presentation's color palette, font style, background format, and graphics effects.
Just go to:
- Design tab > Variants.
- Select Colors, Fonts, Effects, or Background Styles (as you need).
- If you're inspired and want to create your own background in PowerPoint, select Background Styles > Format Background.
- Finally, customize your slides as you want!
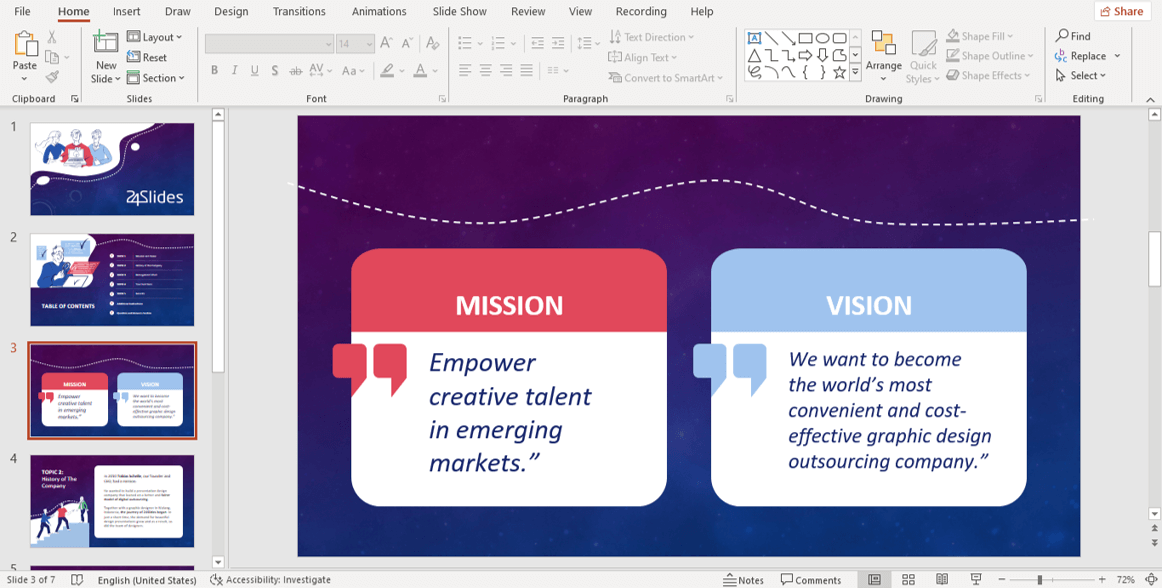
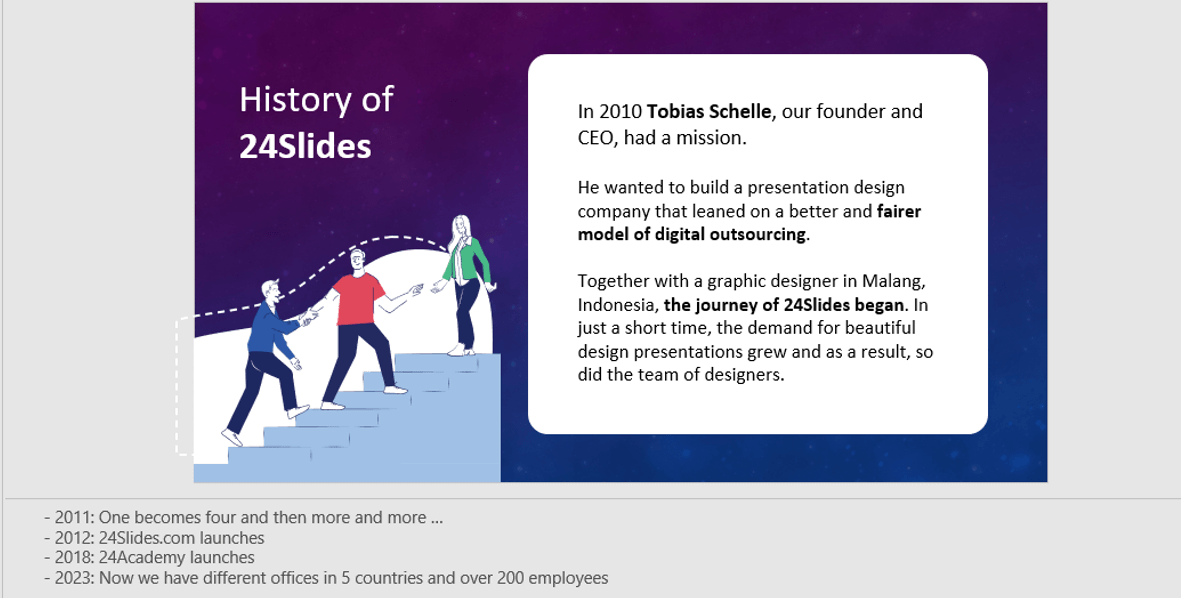
Step 4: Add all your information to your presentation
Now, it's time to add all your information to your slides. If your script is long, take your time to copy each part of it.
In this PowerPoint Tutorial, we're going to show how our design is going so far. We design at your side!
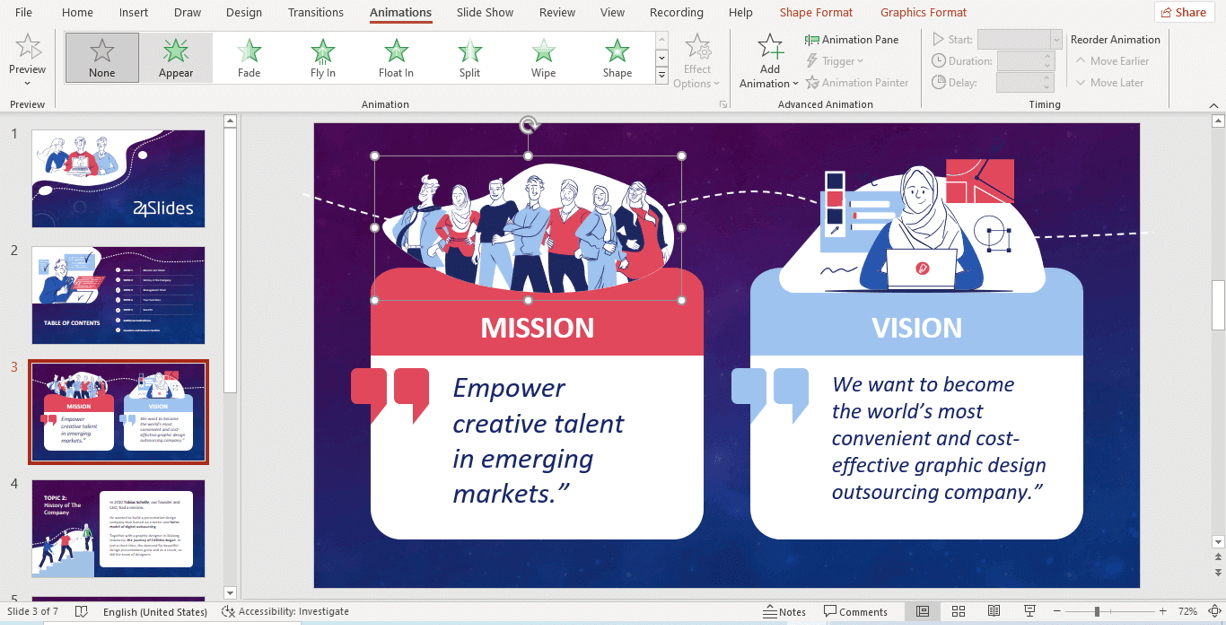
Step 5: Add transitions or animations to your presentation
The stamp of PowerPoint is its transitions and animations! Naturally, our PowerPoint 101 has considered these essential commands.
If you want to add them to your presentation and make your speech more fluid, follow these steps:
- Go to the tabs section of PowerPoint.
- Select "Transitions" or "Animations" and try your favorite effects.
- Remember that if you select Transitions, these will modify the entire slide, while Animations can be added to each element individually.
When choosing one Animation, you can eliminate it if you aren't 100% convinced. You only need to:
- Select the Animation number that appears on the corner.
- Press the "Delete" or "Backspace" button on your keyboard.
- Choose another Animation in PowerPoint if you want!
This “PowerPoint for dummies” is full of tips and tricks! So here is one more: Don't overuse transitions or animations in PowerPoint; they can make your presentation slower and unprofessional. Use this tool in a subtle way!
Step 6: Refine the final details
As always, every final product must be reviewed. Especially if you're learning the PowerPoint fundamentals with us.
We recommend reviewing each slide of your PowerPoint presentation one final time. In this process, you will be able to:
- Add icons if your presentation requires it.
- Change any image or illustration if they don't convince you.
- Change transitions or animations.
- Customize your presentation's color palette.
- Proofread your slides' text or add more information.
- Add speaker notes to your presentation.
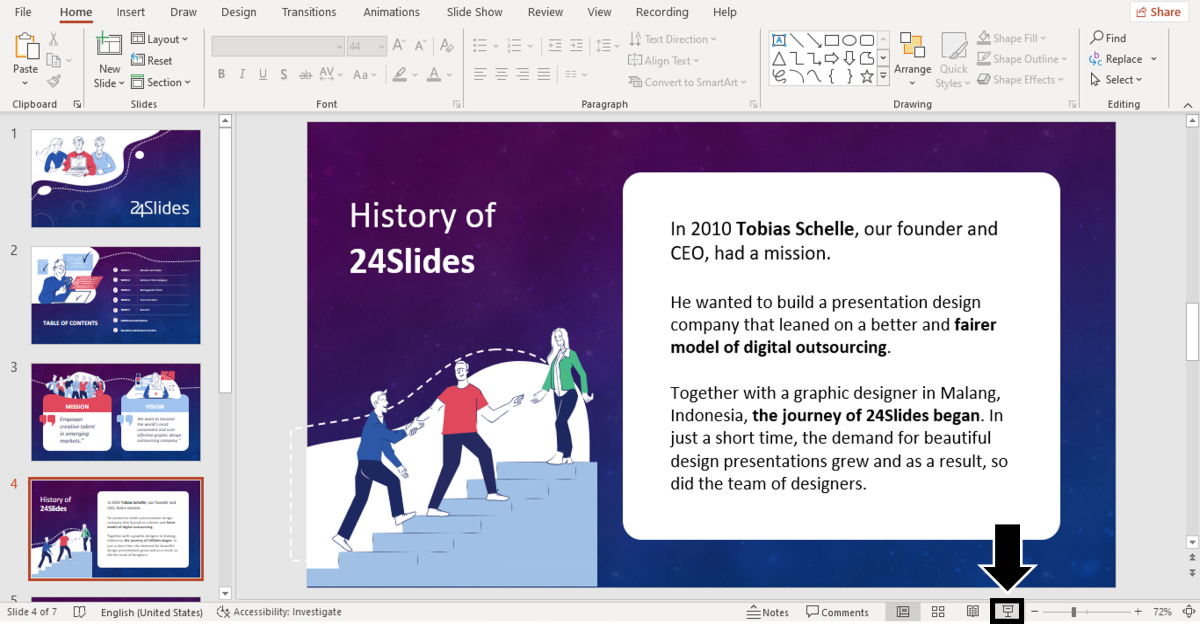
Step 7: Slideshow your presentation
When your presentation is finished, it's essential to know how to make a PowerPoint slideshow. This way, you can see your slides from the exact same perspective your audience will see them.
To slideshow your presentation in PowerPoint, follow these simple steps for PowerPoint beginners:
- Position yourself on your first slide.
- Go to the bottom right of the software.
- Select the "Slide Show" button (see image).
- Have a look at your presentation by clicking on each slide or pressing the right arrow of your keyboard.
- To go out from the Slide Show mode, you have to press the ESC key.
Now you can present your slides like an expert!
When you master this presentation design software, you'll be able to create amazing things in PowerPoint: infographics, diagrams, charts, pitch decks, business cards, calendars, you name it!
Designing in PowerPoint isn’t for you? We have the solution!
Learning how to use PowerPoint can be tough, but don’t worry, we’ve got you covered. Our team has developed a new service that simplifies the process of creating presentation decks in only 10 hours (yes, you heard it right!)
With 24Slides Pro, you no longer have to worry about PowerPoint basics. Our expert design team will help you transform simple presentations into polished, engaging slides.
Whether you need help with formatting or custom templates, we handle the design so you only focus on delivering your message. It's a stress-free way to elevate your presentations and get high-quality results every time.
Contact us today and start the change now.

Want to boost your beginner PowerPoint skills? Check out this content: