How to Create a Presentation in Canva: A Step-by-Step Guide

If you’re wondering how to make a presentation using Canva, you may not be taking full advantage of this powerful free design platform.
Canva makes it easy to create professional-looking slide decks in a fraction of the time. You can build a presentation manually using Canva’s templates and design tools or use Canva AI to generate a first draft in seconds.
In this tutorial, you’ll learn how to create a presentation in Canva manually and with Canva AI. Let’s get started!
TL;DR: How to Create a Presentation in Canva
✨ Two ways to create: You can build a presentation manually using Canva’s templates and drag-and-drop editor, or generate a first draft with Canva AI.
🖌️ For more creative control: Start with a template or a blank presentation, add your content, and customize the colors, fonts, visuals, and brand elements.
🤖 For faster results: Use Canva AI to generate a presentation from a detailed prompt. You can then request changes through the AI chat and refine the slides manually.
⚠️ Keep in mind: Canva AI can speed up the first-draft process, but its output may include small text, inconsistent branding, weak visual hierarchy, or layouts that need manual adjustments.
What You Need Before Creating a Canva Presentation
Creating a presentation in Canva is much easier when you prepare the key elements before opening the editor.
A clear structure, defined goals, and organized content will help you design faster and create slides that are visually consistent and easy for your audience to follow.
Create a Clear Presentation Outline
Organizing your presentation outline is the first step toward creating a clear and engaging slide deck. You should define the main sections of your presentation, including the introduction, key points, supporting information, and conclusion.
This structure will help you organize your ideas, avoid unnecessary slides, and create a logical flow from beginning to end.
Define Your Audience and Presentation Goal
Identify who will watch your presentation and what you want them to learn, understand, or do afterward. Your audience and presentation goal should influence your content, tone, visual style, and level of detail.
For example, an onboarding presentation for new employees requires a different structure and design approach than a monthly report for C-level executives. Keeping your audience in mind will help you prioritize the most relevant information!
Gather Your Content and Visual Assets
Collect your main content before you start designing is another advice we want to share with you. This may include written information, statistics, charts, images, videos, logos, or other supporting materials. Having these resources ready will reduce interruptions and make it easier to organize your slides.
Canva also provides a large library of photos, illustrations, icons, and other visual assets. You can use these resources to support your message!
Set Up Your Brand Kit in Canva
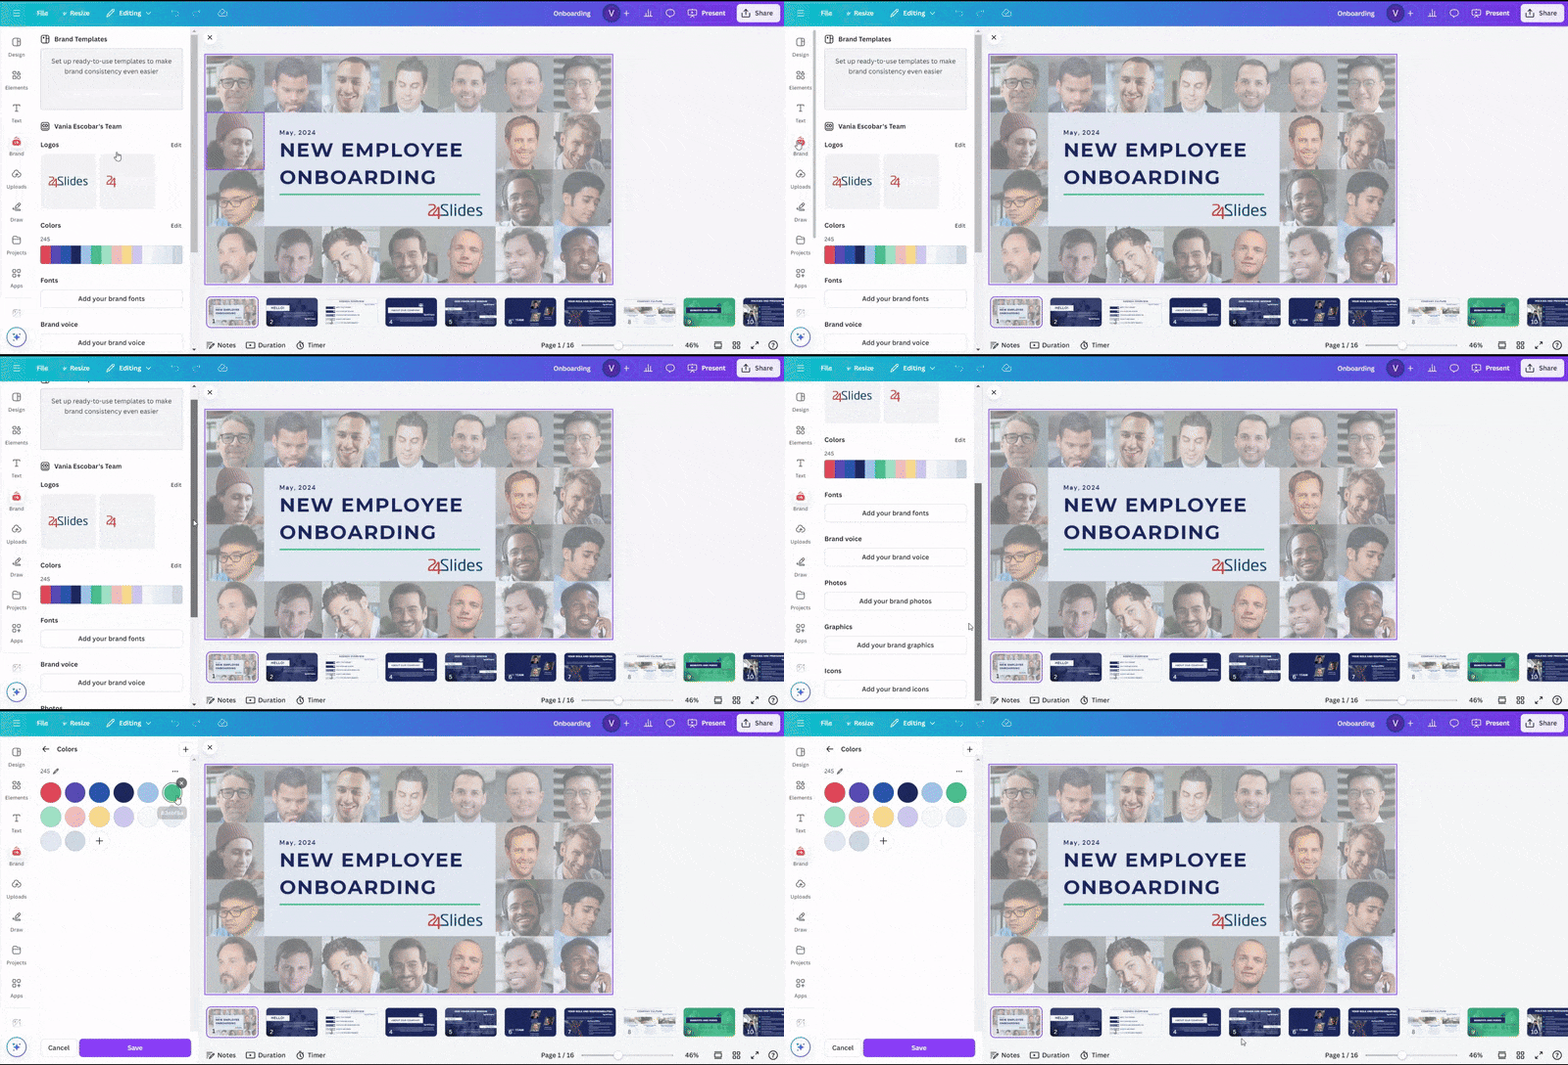
If you’re creating a branded presentation, set up your Canva Brand Kit before you start designing. Add your company’s logos, color palette, fonts, and other visual assets so you can apply them consistently throughout your presentation.
In order to set up your Brand Kit in Canva go to "Brand" in Canva’s left-hand toolbar and add all your brand assets. These include logos, colors, fonts, brand voice, photos, graphics, and icons.
And that’s it! Now you have a custom Brand Kit in Canva ready to be used next time.
How to Create a Presentation in Canva?
Designing a presentation in Canva is quite simple. If you already have an active account, follow these steps:
Step 1: Create a New Presentation in Canva
Go to “Create” on the home page and choose the Presentation format (16:9). This format is the most commonly used for online presentations.
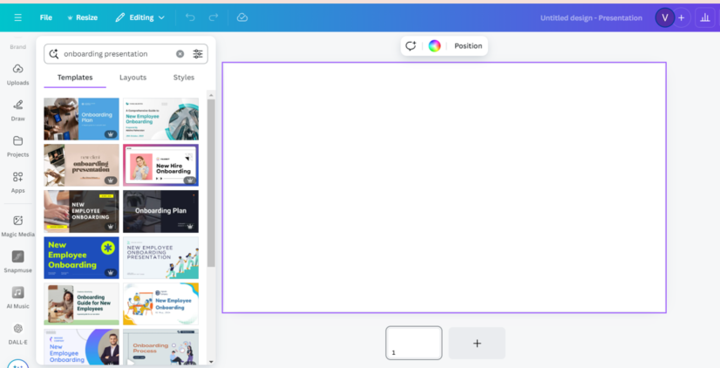
Clicking on it will open a new blank canvas on the platform. If you don’t have a rigid brand guideline, we recommend starting by choosing a template in the search bar.
For the purposes of this Canva review, we’ll create an “onboarding presentation” as an example.
Step 2: Add all your information
Now it’s time to add all your information to your Canva presentation.
During the process, it’s valid to remove or add information. As you keep adding more data, you’ll naturally make changes to your Canva deck.
Step 3: Customize your Presentation Design
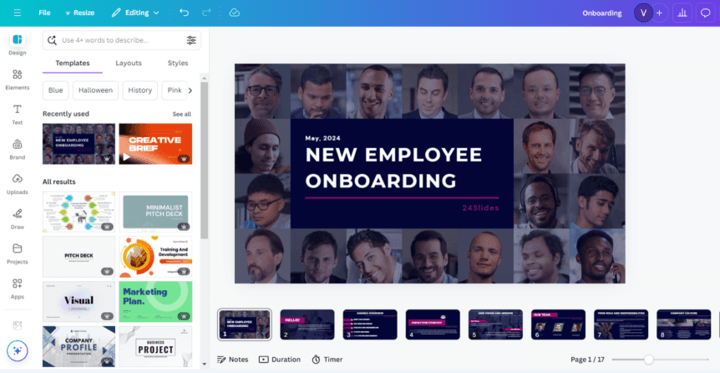
When designing a presentation, it’s essential to consider your color palette and other brand graphic elements. Learn how to manage this on Canva:
How to add a color palette to your Canva Presentation?
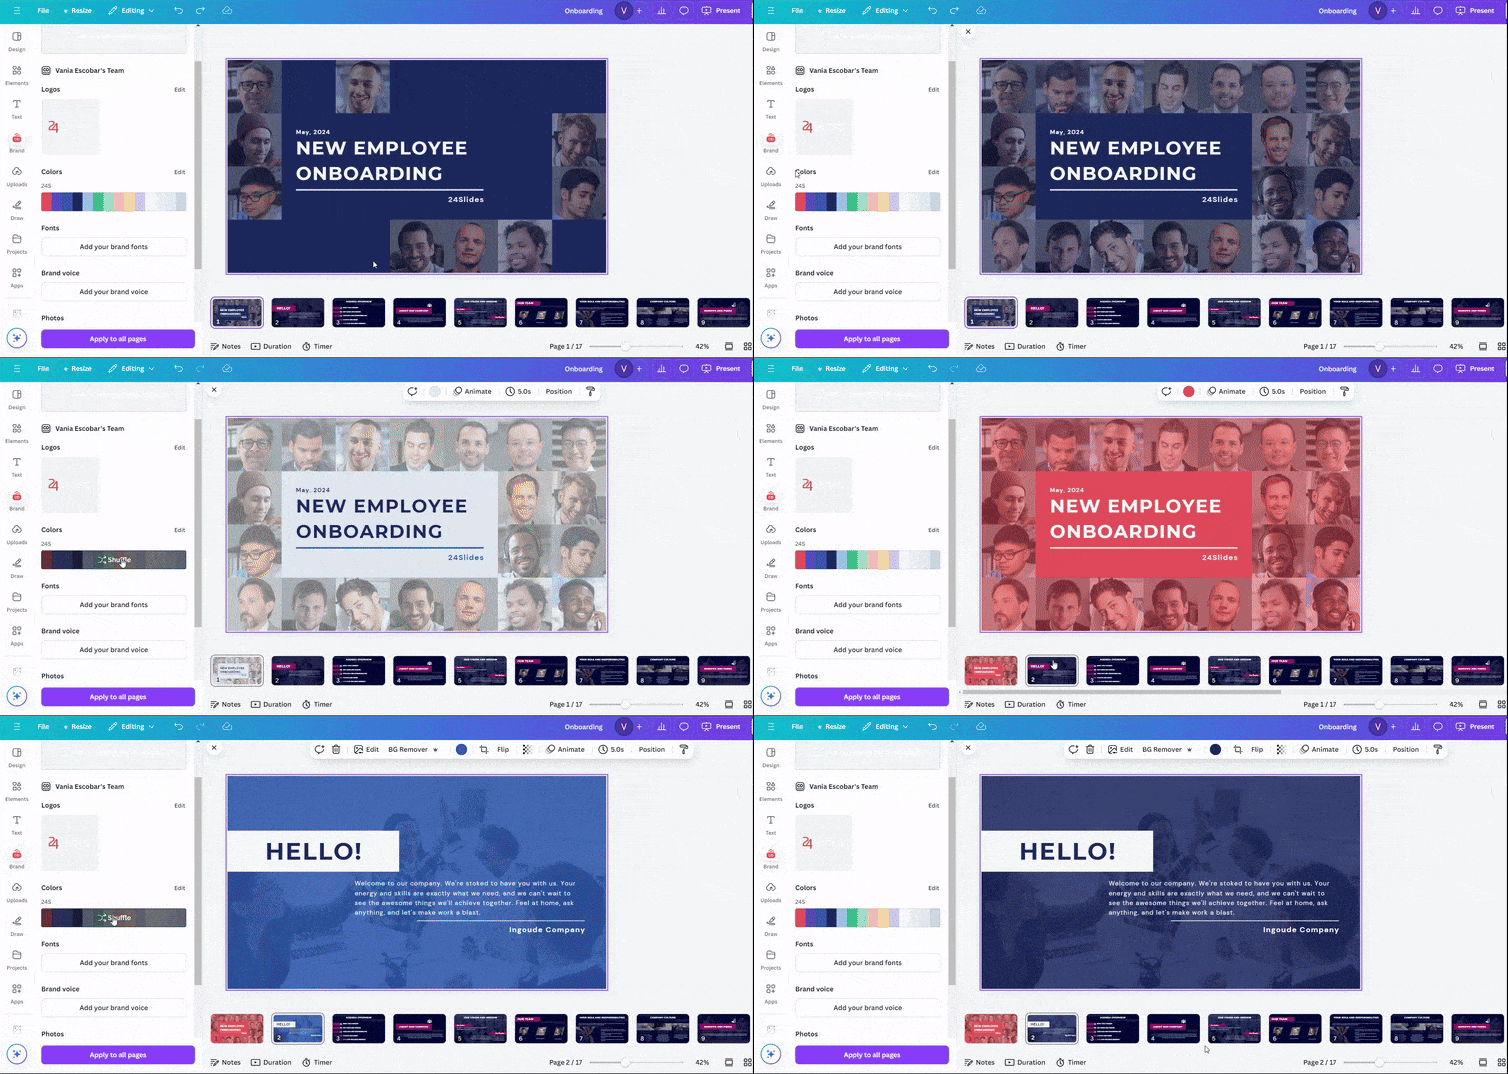
- Go to the "Brand" icon in Canva’s toolbar.
- Hover your mouse over your color palette (if you haven’t added it yet, now’s the time to do it).
- Press "Shuffle," and you’ll see the changes in seconds. Every time you press "Shuffle," you’ll see a different color mix in your deck.
How to add a brand element to your Canva Presentation?
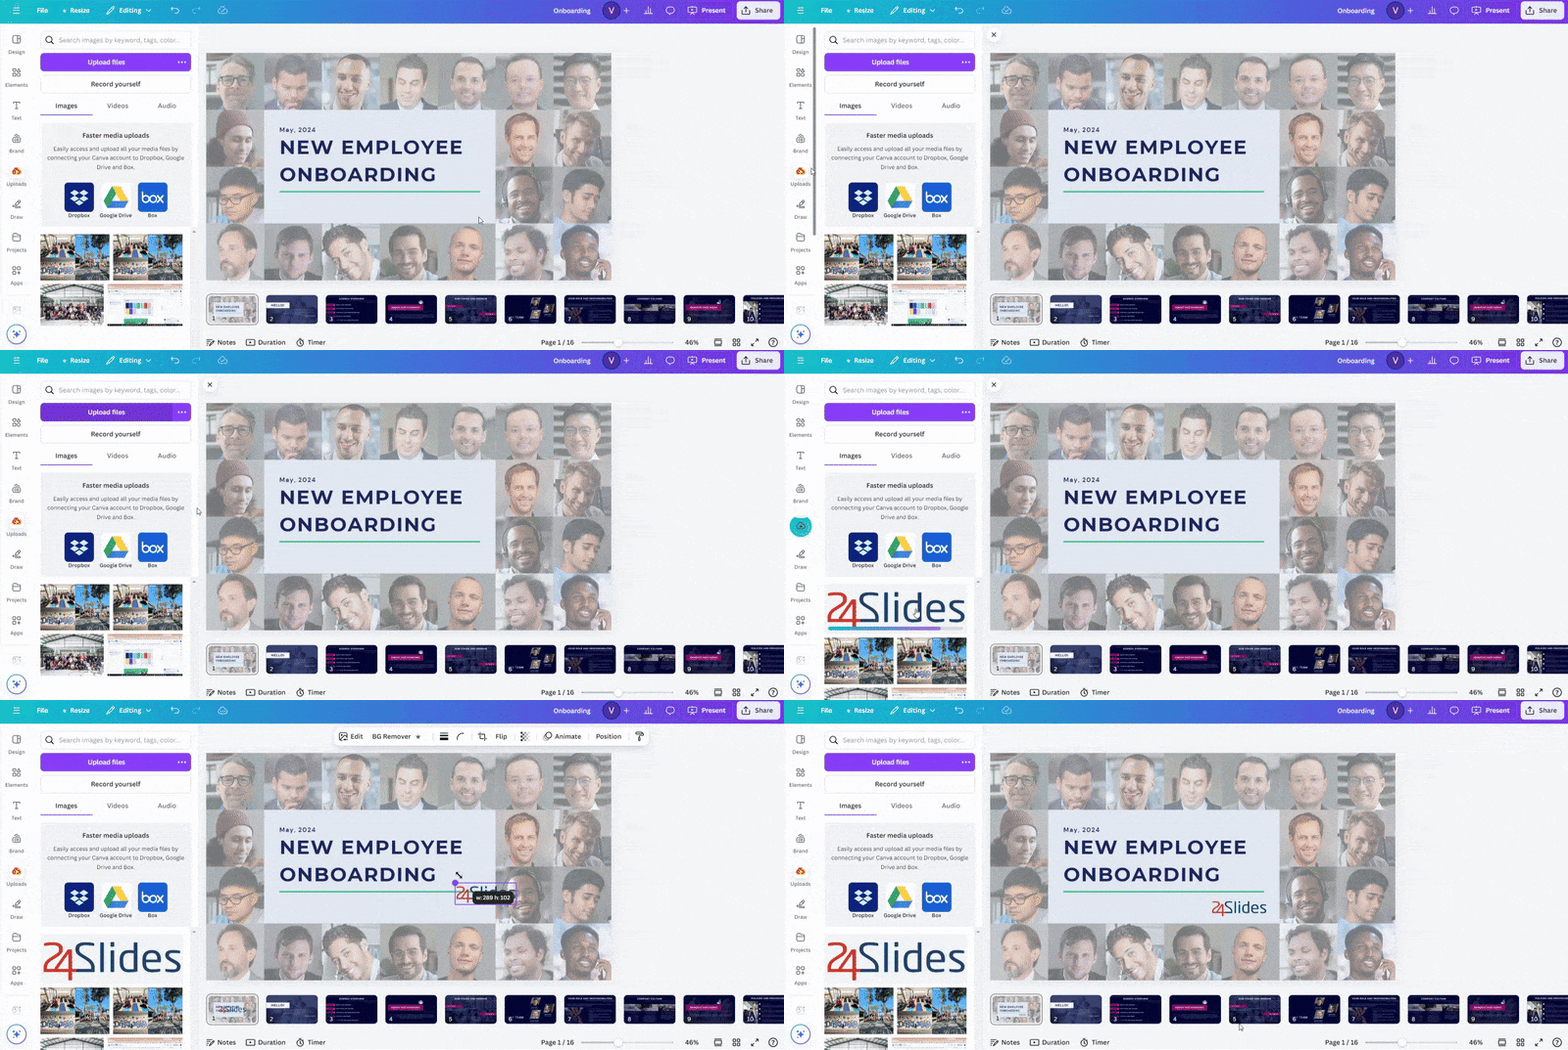
- Look for the "Uploads" button in Canva’s toolbar.
- Select "Upload files" and find the brand element you want to import to Canva. We recommend using a PNG file to ensure a transparent background.
- Wait a few seconds and add the new element to your deck!
👉 Pro tip: We also recommend customizing your Brand Kit in Canva, so you can have faster access to your brand assets.
Step 4: Present to your audience!
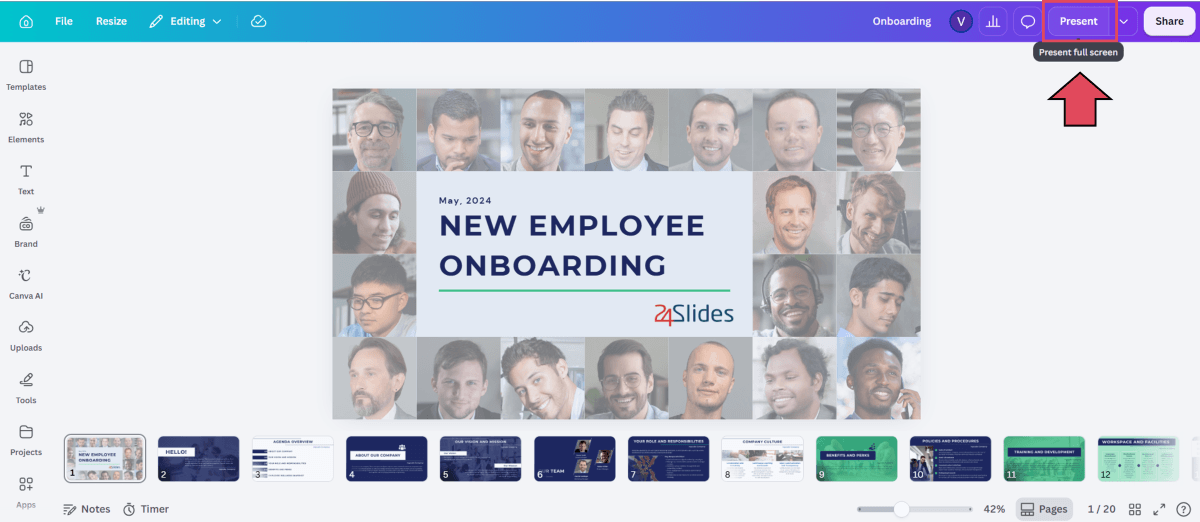
If you want to use Canva to present your slides, just click on the "Present" button in the upper right corner of your screen
And that’s it—you’ve finished creating your first Canva presentation!
But remember, your presentation isn’t just about your slides. Make the whole experience enjoyable for your audience by using these fun icebreakers for your next presentation!
How to Create a Presentation with Canva AI?
Canva has innovated various processes with its new AI-powered technology, including creating presentations from scratch.
The lastest update of Canva AI allows you to create presentation decks in seconds. All you need to do is create a specific "prompt" and provide the tool with all the details via chat.
Let’s see the step-by-step to create a presentation with Canva AI:
- Create a new design or go directly to Canva’s AI Presentation Maker website.
- To use this AI feature, you need to click "Canva AI" of the tool bar and write the prompt for your request. For this example, we want to create an onboarding presentation for a new intern at 24Slides.
- Now, wait until Canva’s AI tool loads your presentation deck.
- Check the chat and follow the conversation.
- Canva AI will create a editable presentation and you can ask for changes via chat. You can ask it to add charts, diagrams, or new slides, as well as update data, adjust layouts, or change background colors—all in real time.
And voila! Now you have a Canva presentation made in seconds!
You can also customize it with your brand colors by following these steps.
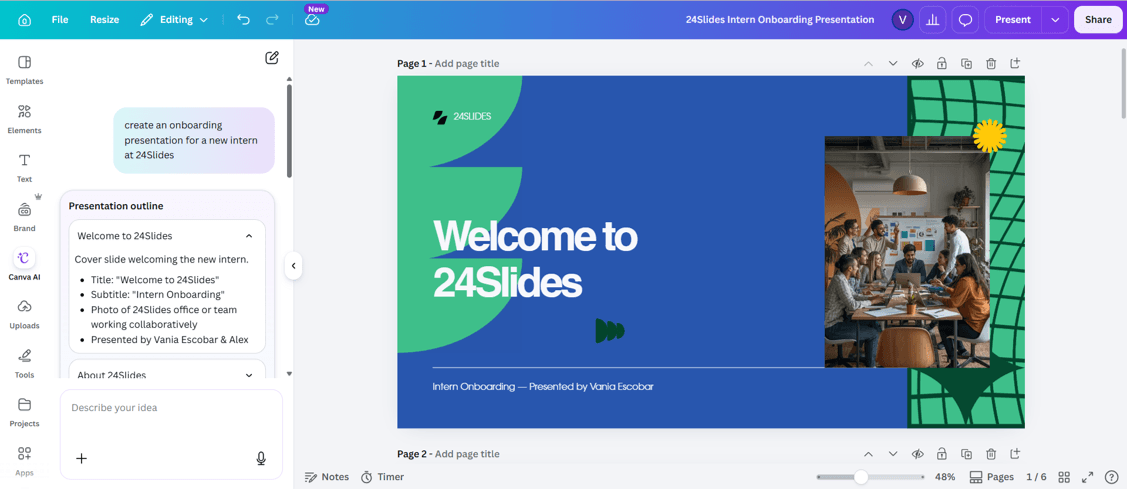
Curious about the final design using Canva AI? Here you have it:
As you can see Canva AI has created the layouts and content from scratch, but there are improvements you need to do manually (in this case, the font size is too small).
At 24Slides, we believe that while AI can help you create a strong first draft, the human touch remains irreplaceable.
Frequently Asked Questions (FAQ) about Canva for Presentatios
Whether you’re creating your first Canva presentation or moving between Canva and PowerPoint, these answers cover some of the most common presentation-related features.
1. How to import a PowerPoint Presentation into Canva?
To import a PowerPoint presentation into Canva just need to:
- Go to the Canva homepage.
- Click the “Create” button in the upper-left corner.
- A list of design formats will appear. Scroll to the bottom and select “Upload.”
- Choose your PowerPoint file and wait for Canva to process it.
- Once uploaded, you can open and edit the presentation directly in Canva.
Keep in mind that some fonts, animations, layouts, or complex design elements may not transfer exactly as they appeared in the original PowerPoint file.
2. Can you convert a Canva Presentation into PowerPoint?
Yes, it’s possible to convert a Canva presentation to PowerPoint. You only need to:
- Select the “Share” button.
- Click “Download.”
- Choose the “PPTX (Microsoft PowerPoint document)” option, and that’s it!
3. How to embed a Video in a Canva Presentation?
If you want to embed a video from your computer in Canva, just:
- Go to the “Uploads” button.
- Then go to “Upload files.”
- Once the video has uploaded, drag it onto your slide and adjust its size and position.
You can also use Canva’s built-in video library:
- Go to “Elements” and describe what you need on the search bar.
- Select the Videos category to find relevant stock footage.
- After adding a video, you can trim it, adjust its playback, or apply effects.
4. How to record a presentation in Canva?
Canva allows you to record your presentation with your voice and camera, making it useful for online training, tutorials, virtual classes, or asynchronous presentations.
- Go to the arrow next to “Present”.
- Click on “Present and record.”
- Then click on “Go to recording studio.”
- Decide whether to add a front video to your presentation and select the microphone source.
- When you finish presenting, you can download the recording to your computer or copy the public link to share it later.
5. How to loop a Canva Presentation?
To loop a presentation in Canva, just:
- Assign a time for each slide (on the clock icon, next to “Animate”).
- Go to the arrow next to “Present”.
- Select “Autoplay” and you’ll create a loop that displays your slides continuously.
This option is useful for digital displays, events, trade shows, or presentations that need to be played without manual navigation.
Running out of time to finish your Presentation? Discover why 24Slides is your ideal Presentation Design Partner
Clear message. Strong design. Fast delivery at scale.
For more than 10 years, 24Slides has helped global brands turn complex ideas into clear, compelling, and high-impact presentations.
We don’t just design slides. We become an extension of your team, combining dedicated talent, structured workflows, and scalable delivery to make presentation design a reliable business capability.
What makes 24Slides different?
- A team that knows your brand: Your dedicated designers, Design Manager, and Project Manager learn your visual identity, preferences, and non-negotiables. The result: greater consistency, less time spent briefing, and fewer revisions with every project.
- More than design execution: We combine expert designers with project management, quality control, customer success, and a proven workflow. You gain the design capacity you need without building or managing an additional in-house team.
- Fast delivery without compromising quality: Receive standard projects within 24 hours or choose a 10-hour priority turnaround. Our speed comes from dedicated capacity and experienced teams, not rushed, anonymous production.
- Built to scale with your business: Whether you start with one team or expand across the organization, 24Slides adapts to your evolving needs. Scale your presentation design capacity without rebuilding workflows or changing partners.
- High-quality design with verified social impact: As a Certified B Corporation, we combine professional design with a responsible employment model and meaningful community impact. With us, you don’t have to choose between quality, speed, scale, and purpose.
Work smarter. Present better. Scale faster.
By partnering with 24Slides, you’ll experience presentation design that grows with your business.
Want to learn more? Explore these related articles: